Advanced media centers and small business require larger amounts of storage to save and share huge media files and data sets. With today’s larger drive capacities, 4-bay NAS units like the QNAP TurboNAS TS-453A can handle most SMB backup and storage needs. Moving up to a four-bay NAS with additional RAID options vs a two-bay NAS offer added data protection and increased performance. QNAP takes the TS-251 2-bay NAS we reviewed earlier and expands on its capabilities to offer up a very powerful four-bay advanced NAS solution.
The QNAP TS-453A is a complete package to support the Internet of Things (IoT) ecosystem. With it’s Open-Source Linux platform it is able to support IoT solutions and Smart Devices. For developers, the TS-453A can run IoT apps directly on the TS-453A using Linux. Expanding to a Private Cloud to offer secure storage solutions and applications. Additional features include critical business related features such as Volume/LUN Snapshots that can restore files/folders in case of corruption or file-loss ensure uptime in case of failures. Ample processing power supports 4K (H.264) real-time transcoding for video playback for media center needs.
- Supports the Linux OS with direct output via HDMI
- Dual HDMI output for switching between duplicated and extended desktop options
- AES-NI hardware-accelerated encryption for efficient cryptographic performance up to 412 MB/s
- Supports 4K hardware decoding and transcodes 4K H.264 videos on-the-fly or offline
- Quickly find files using a real-time, natural search with Qsirch 2.1
- NAS and iSCSI-SAN unified storage solution for virtualization
- Supports VMware, Citrix, Microsoft Hyper-V and advanced virtualization features
- A hybrid approach to virtualization in one NAS: Virtualization Station & Container Station
- Build a personal karaoke system with high-quality audio output with the new OceanKTV app
QNAP TS-453A 4 Bay NAS Specifications
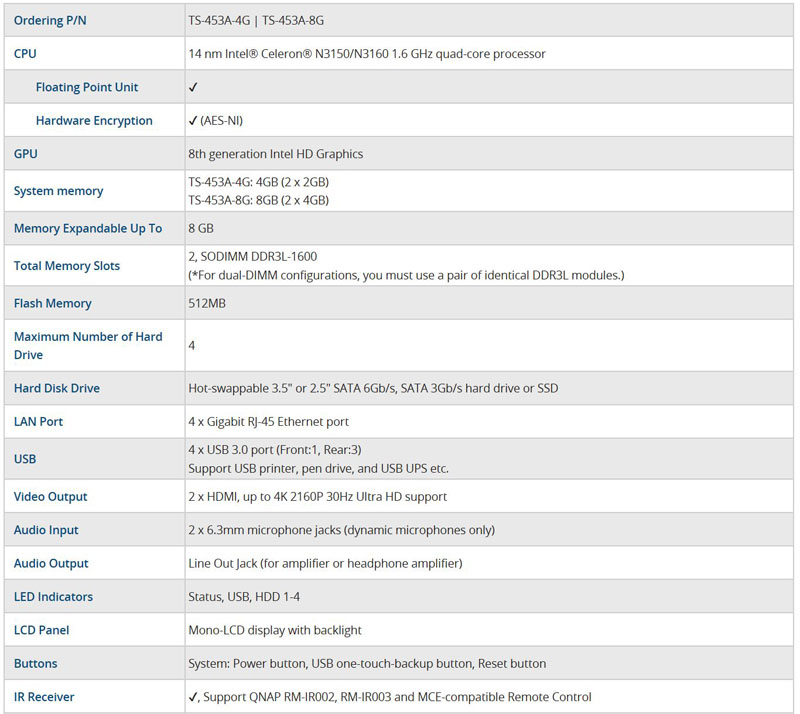
- CPU: 14 nm Intel Celeron N3150/N3160 1.6 GHz quad-core processor.
- RAM: 4GB or 8GB DDR3 options
- Number of Drives: 4
- Drive Interface: SATA 3
- Dimensions: (Height x Width x Depth): 177 mm x 180 mm x 235 mm
- Weight: 3.65 kg empty
- Power Consumption: 32.35 W (Access), 18.86 W (HDD Hibernation)
- Power Supply: External AC 100-240V Universal, 50/60Hz single phase
For complete system specifications of the TS-453A head over to QNAP to find more detail.
Should you find you are outgrowing your storage needs, QNAP offers expansion boxes such as the UX-800P that allow you to increase your storage capacity with an added 8 drives. Using an UX-500P expands your NAS an additional five drives.
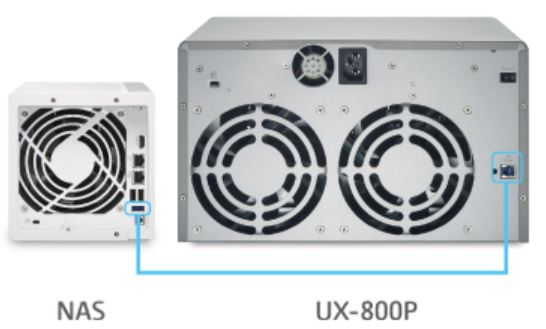
This unit connects to the TS-453A and automatically detects this expansion and adds the drives to your existing storage pool. The ability to easily expand a NAS unit is great once these NAS systems are deployed in an office since there is minimal disruption to ongoing operations.
QNAP TS-453A 4 Bay NAS Overview
Our TS-453A came in a large retail box that is well packed with foam inserts to protect the unit.
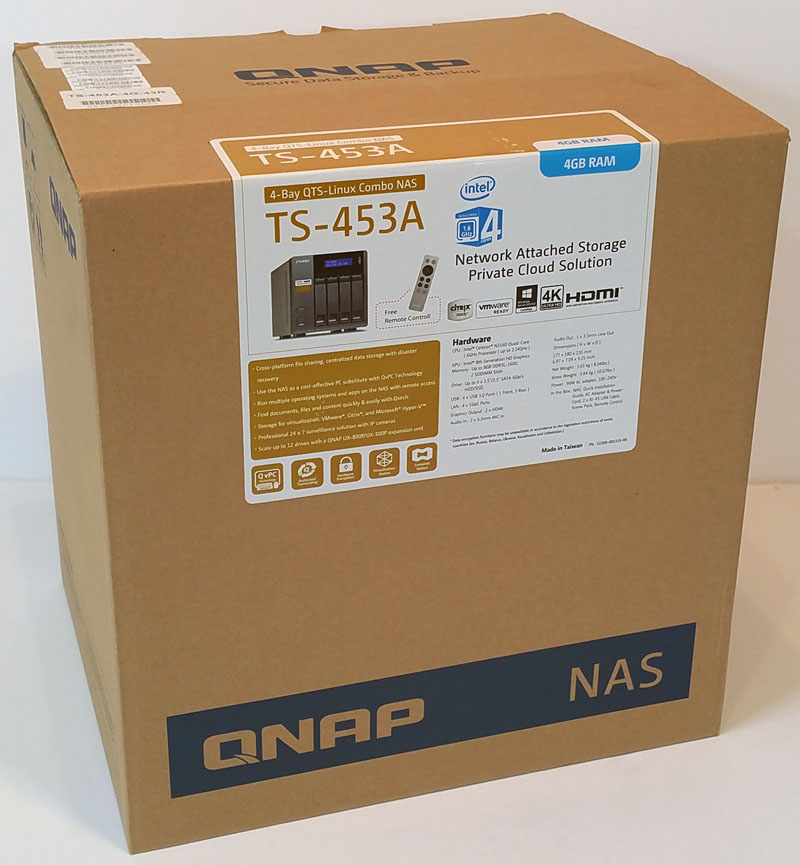
The retail box is simple, while the main box label gives a brief overview of what the contents include and specifications. Compared to the TS-251 2 Bay NAS, this packaging is somewhat lacking on product description and capabilities. Then again, most users buying this class of device will be doing research outside of the physical box, such as reading this review.
Inside the retail box, we find the accessory kit with everyone one would need to get started.
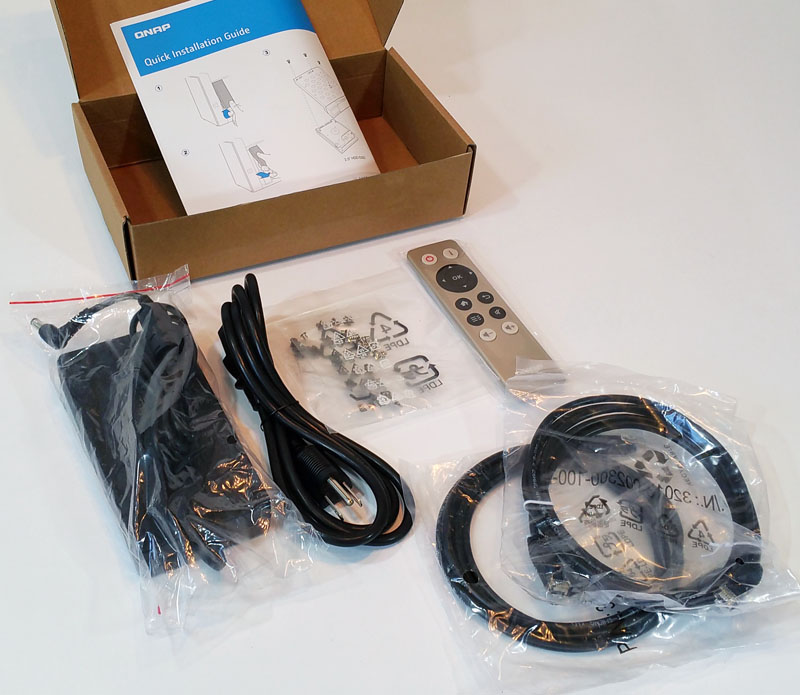
Accessories included with the TS-453A include:
- TS-453A enclosure
- QNAP Quick Installation Guide
- AC Power Adapter
- AC Power Cord
- Infrared (IR) Remote Control
- Bag of assorted hard drive mounting screws
- 2x Ethernet Cables

Included with the TS-453A is QNAP’s IR Remote Control which was not supplied with the TS-251. For those using the unit as a media center, this is a great feature. For those wondering why one may use a feature like this, we have seen similar NAS units run digital signage, saving a few hundred dollars on buying a dedicated signage PC. In environments such as doctor’s offices, this solution works well.
QNAP TS-453A 4 Bay NAS Installation
After removing the TS-453A from its packing material, we can now take a look at the NAS.
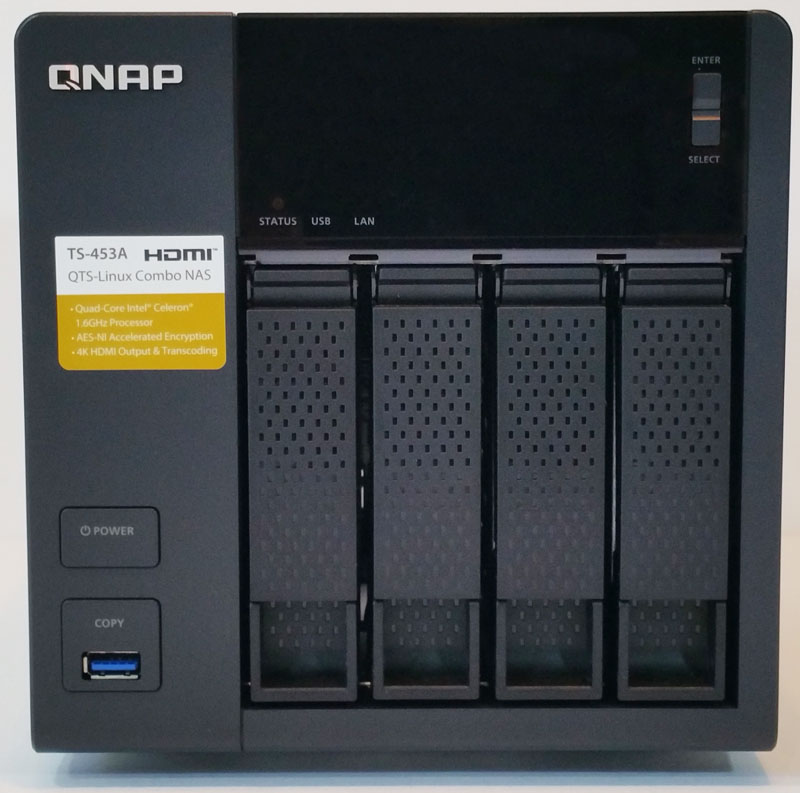
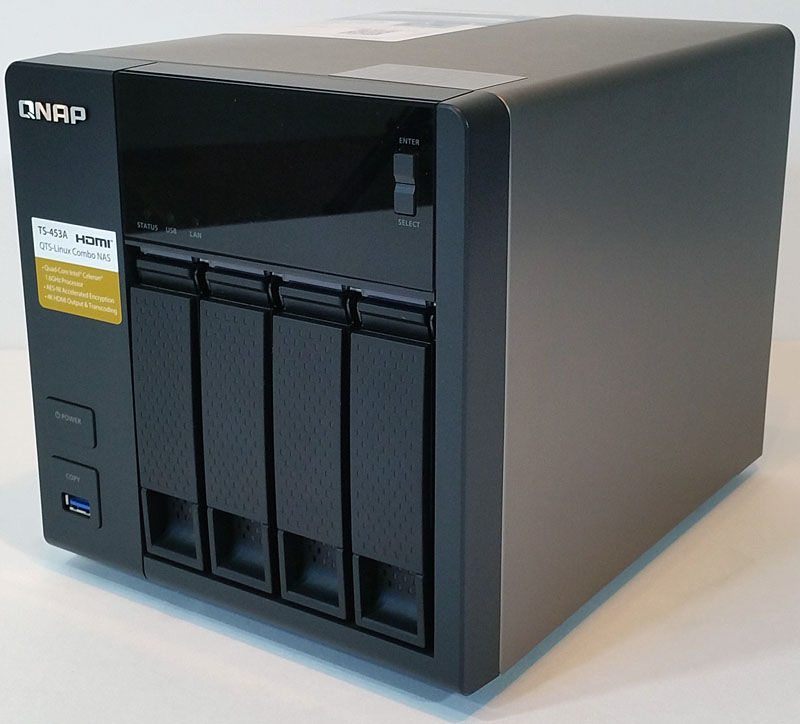
The enclosure of the TS-453A is made from a steel outer case with a dark gray plastic front. Each of the four drive bays is latched at the bottom, and small holes provide air flow to help keep the drives cool. The drive bays are not lockable which is something we would like to see. Off to the left are the power button and the USB 3.0 port.
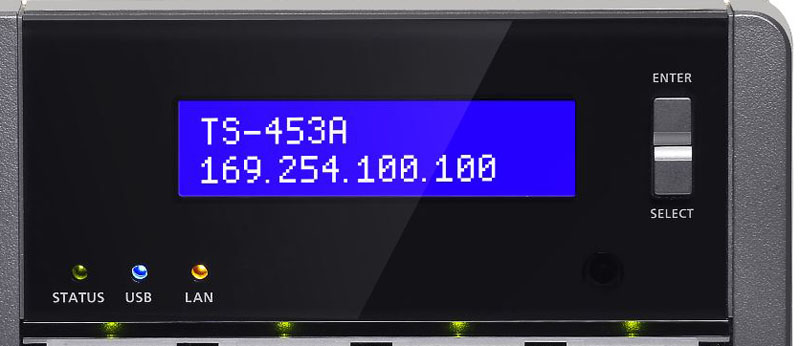
A premium feature of the TS-453A is a front mounted LCD status display which will display messages that you can scroll through. This is extra handy when you need simple information like the IP address of the machine. Other status LED’s are also shown for each drive, USB and LAN.
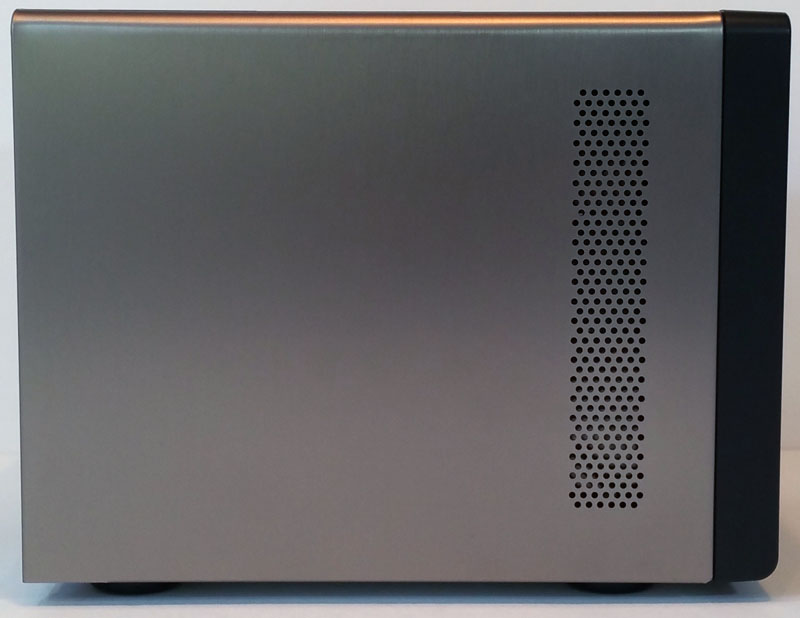
The left side of the TS-456A has perforations for air flow, while the right side does not have these perforations.
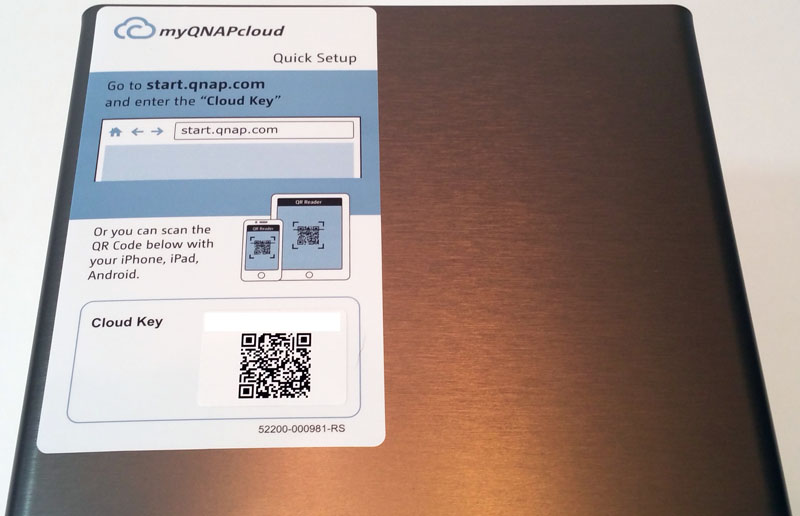
The top of the NAS has a large sticker which has your myQNAPcloud key if you wish to use this feature. We have seen this myQNAPcloud sticker on each of our QNAP reviewed units so far and would like to see these in some other location, perhaps the bottom of the unit or on a plastic card that you can slide in or out. It detracts from the overall looks of the NAS and is something that cannot be easily removed.
The back of the NAS has 3x USB 3.0 ports, 4x RJ-45 1GbE LAN Port and power connector. Also, there is a security port to lock the unit down at a location.
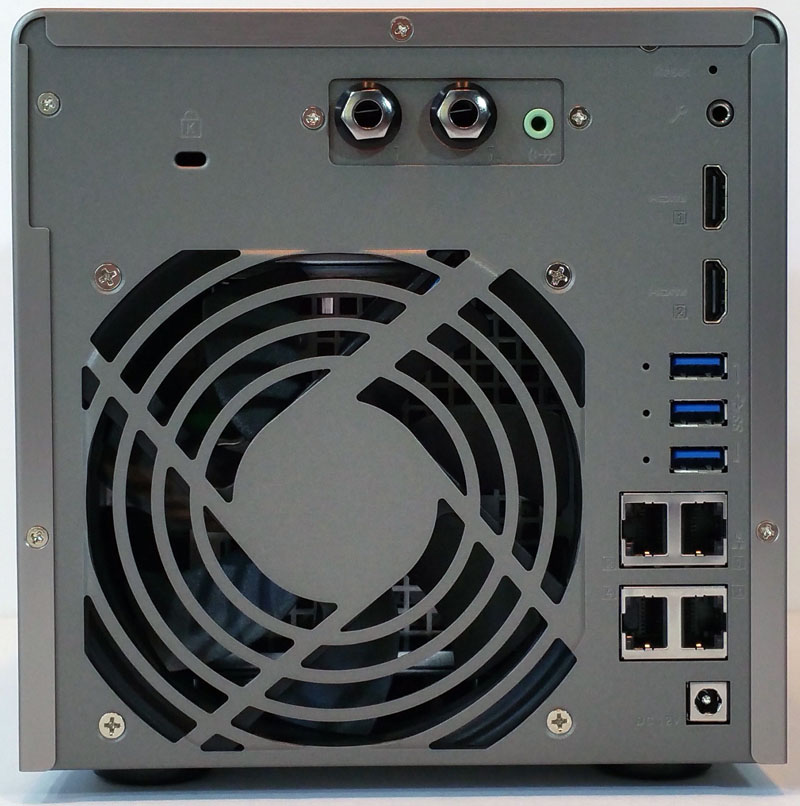
The two RJ-45 1GbE LAN Ports also provide Link Aggregation / Failover support. We also find 2x HDMI ports which provide up to 4K 2160P 30Hz Ultra HD support, line out jack for amplifier or headphone amplifier, 2x 6.3mm microphone jacks (dynamic microphones only).
Each of the four hot-swap drives are installed by sliding them into each bay slot. To remove a drive, lift the latch at the bottom and pull out.
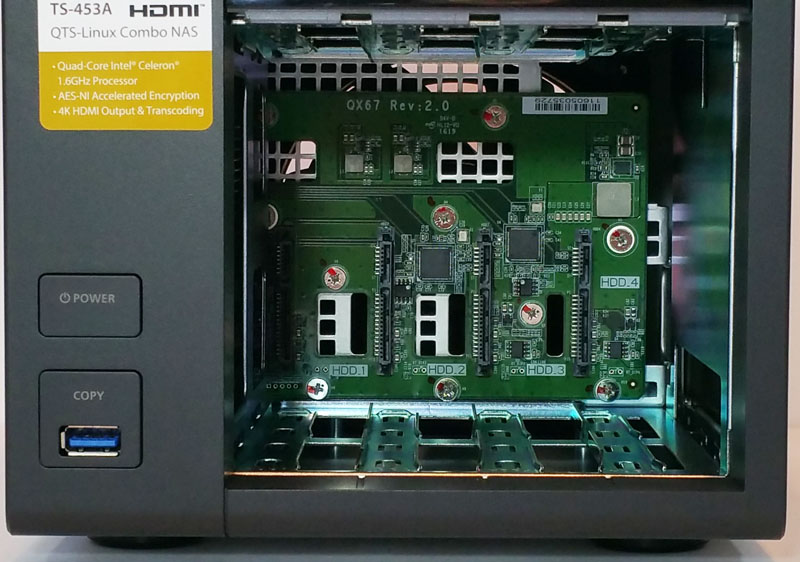
With all drives removed we get a look at the backplane. Construction inside the TS-453A consists of a metal cage and large PCB to connect the drives. Printed on the PCB, we find HDD numbers that note which drive number the slot is for.
Let’s move on to installing the hard drives.
Our sample unit arrived with drives installed. The hard drives directly set on the tray and screws insert on the bottom side.
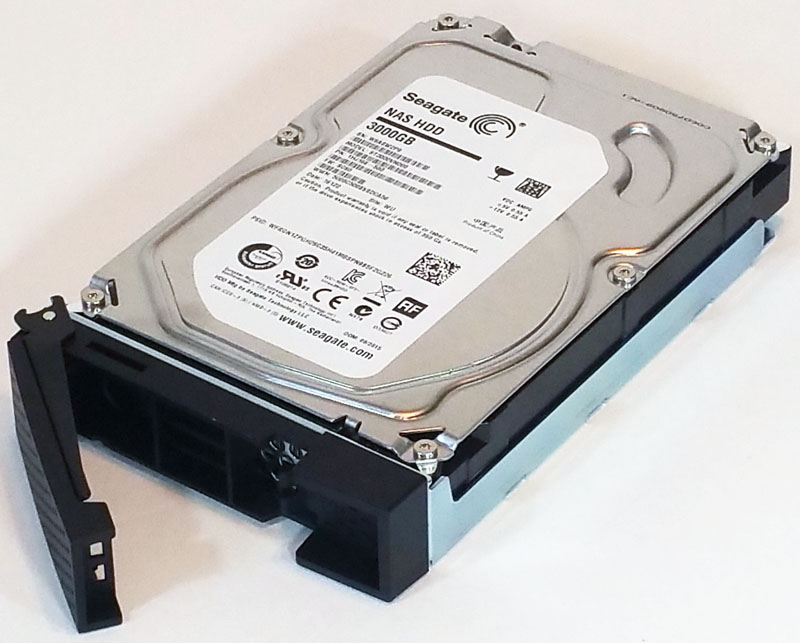
Here we see a hard drive mounted to the tray and ready to be inserted into the TS-453A.
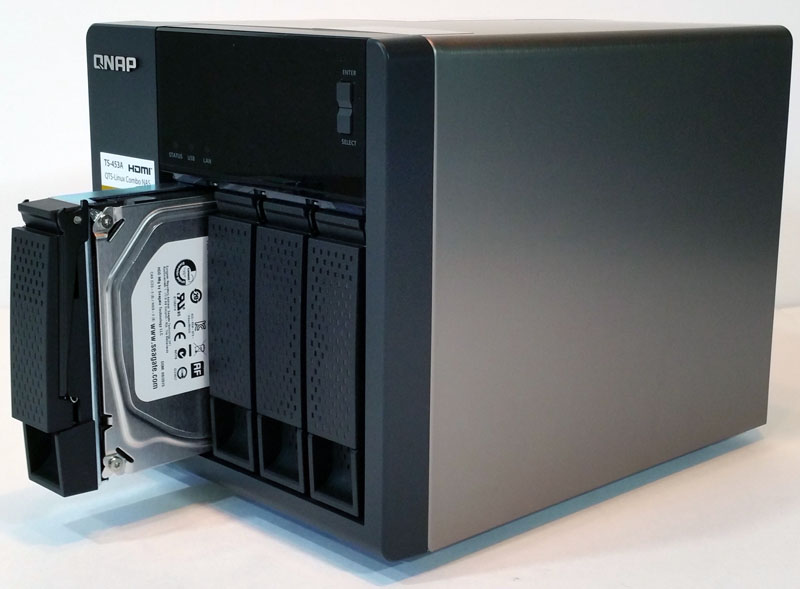
Hard Drives insert into each drive slot and lock into place. Drives insert relatively smooth, but it is possible to have them just slightly off center at the top or bottom which makes it feel slightly jammed.
QNAP TS-453A 4 Bay NAS Management
Getting our TS-453A up and running is the same as the TS-251 we reviewed earlier, we will walk through the steps here also.
After turning on the NAS and connecting it to your network type in “start.qnap.com” in your browser to bring up the management interface.
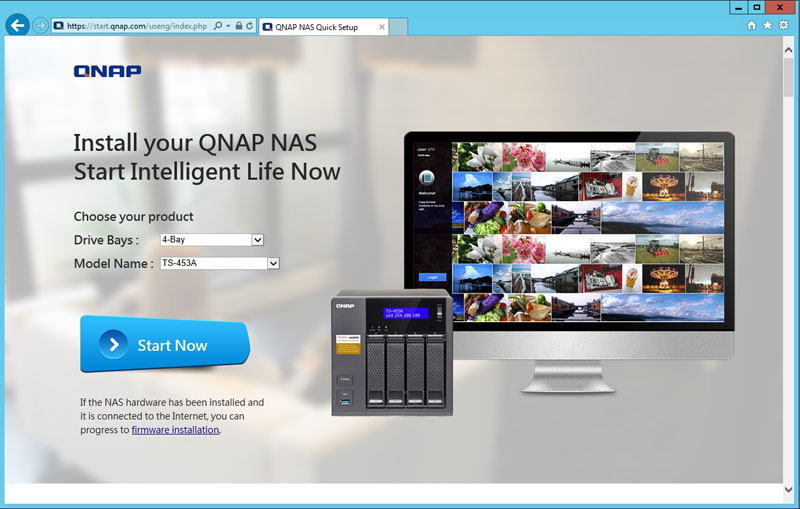
After this page comes up, we can now begin setting up our NAS. Make sure the correct QNAP model and number of drives shows up in the product section. If everything looks good, press Start Now.
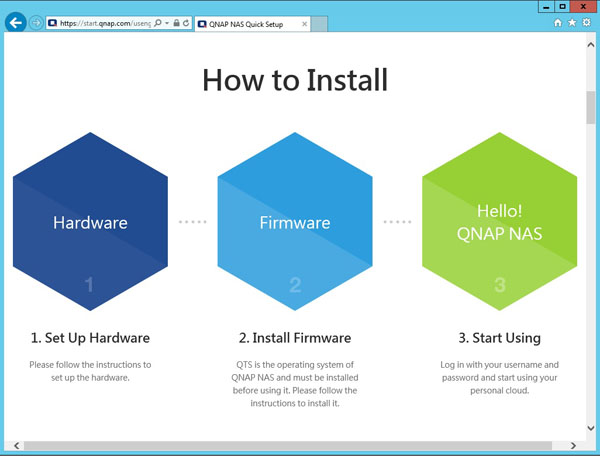
The next page is rather long and shows all the details about operating the TS-453A. Hopefully, you have already installed disks in the unit at this point.
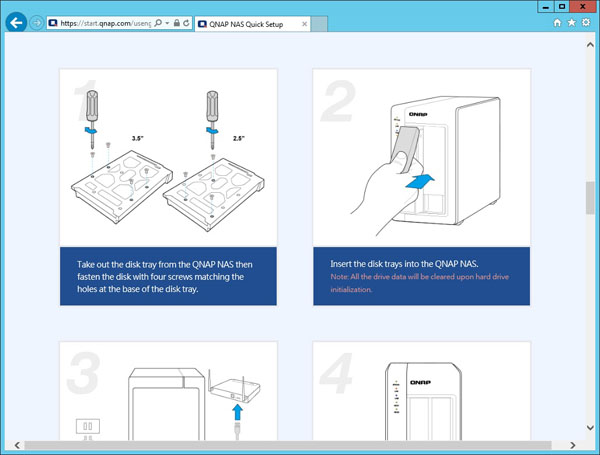
The first step shows detailed instructions on how to install your hard drives. We have already completed step number one, so we will move on to step two “Installing Firmware”.
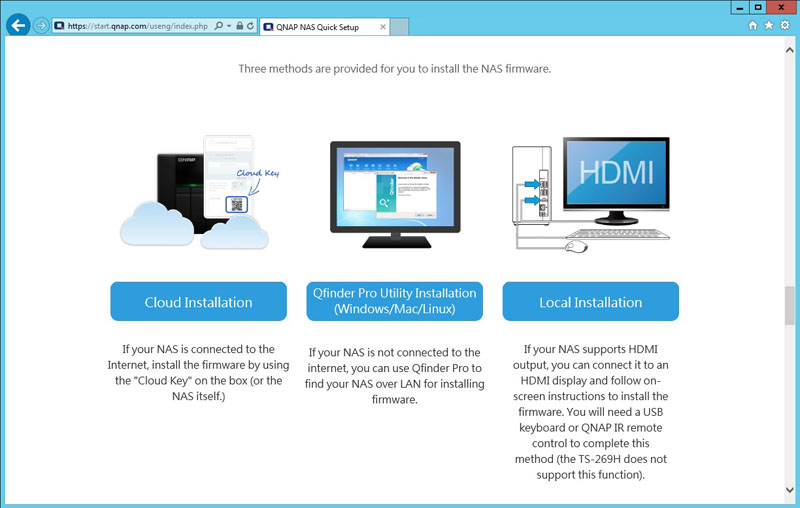
Here we have several options for Installing Firmware depending on how you want to use the TS-453A. We went with the middle option to set everything up on our workstation.
With this step, we need to download and install Qfinder Pro, so we continue with that.
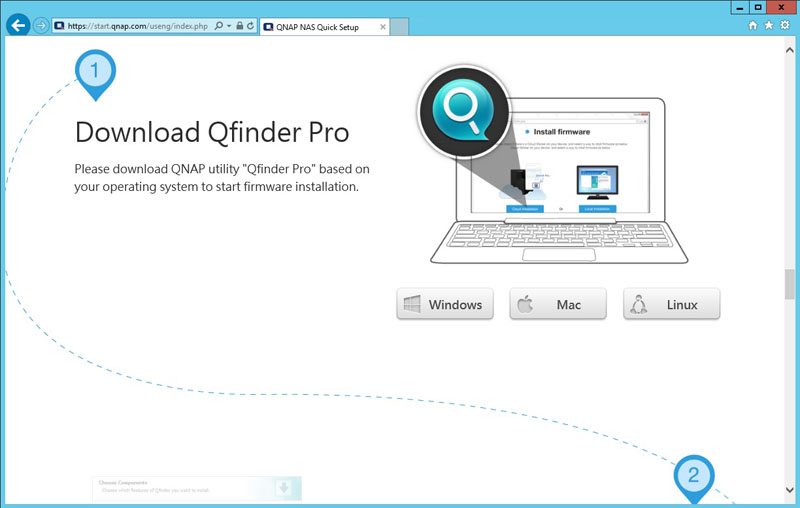
For our workstation needs, we selected Windows and proceeded to the next step.
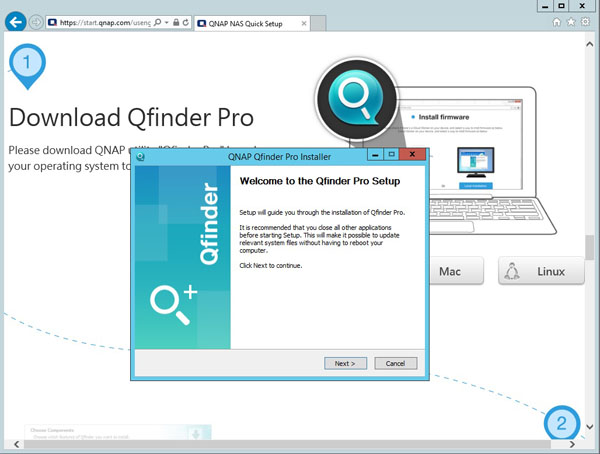
Now the QNAP Qfinder Pro Setup installer begins, let’s select Next and continue.
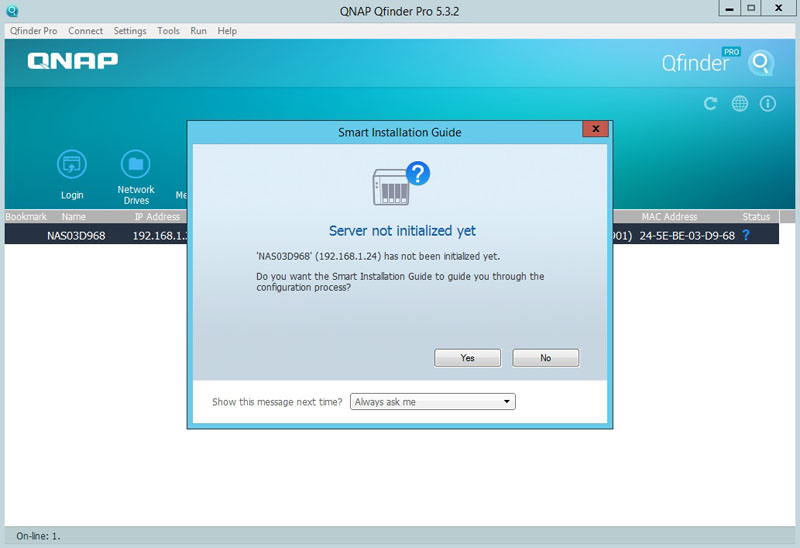
After Qfinder Pro was installed the next step is to initialize our NAS by selecting Yes.
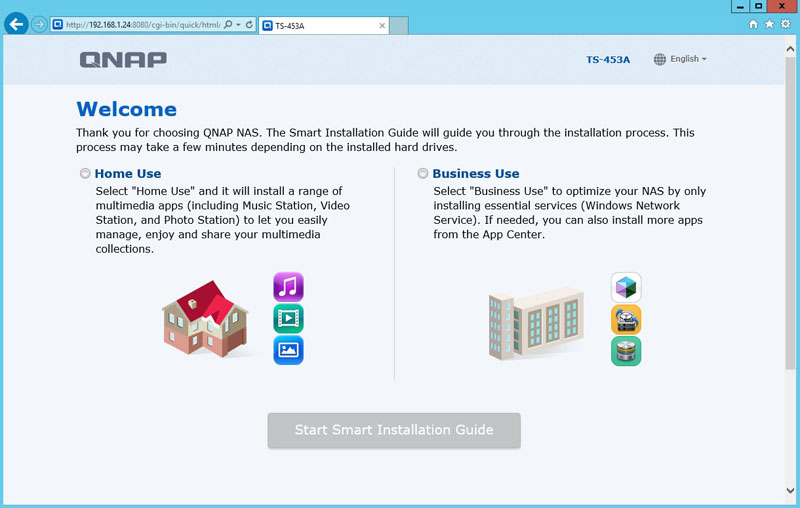
For our use, we selected Home Use in this window and then selected Start Smart Installation.
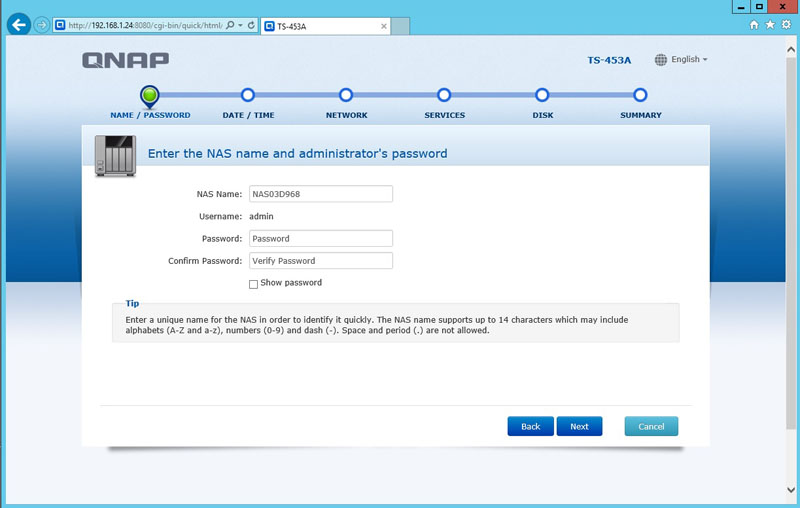
Here we enter the password we will use for the admin account and continue.
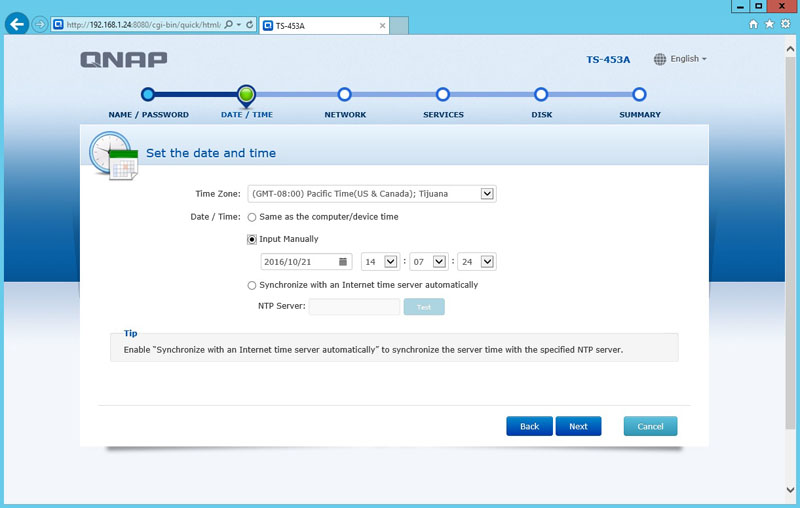
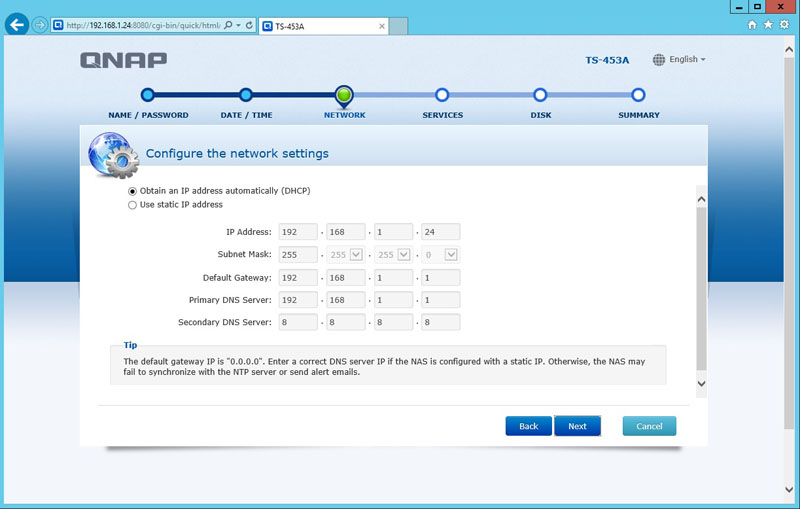
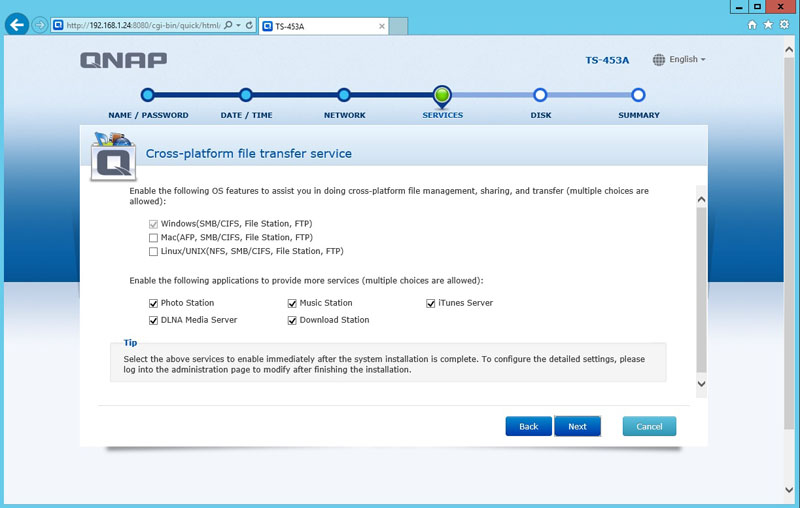
Here we selected Windows and folders we want to have automatically created.
The next step is setting up the drive configuration.
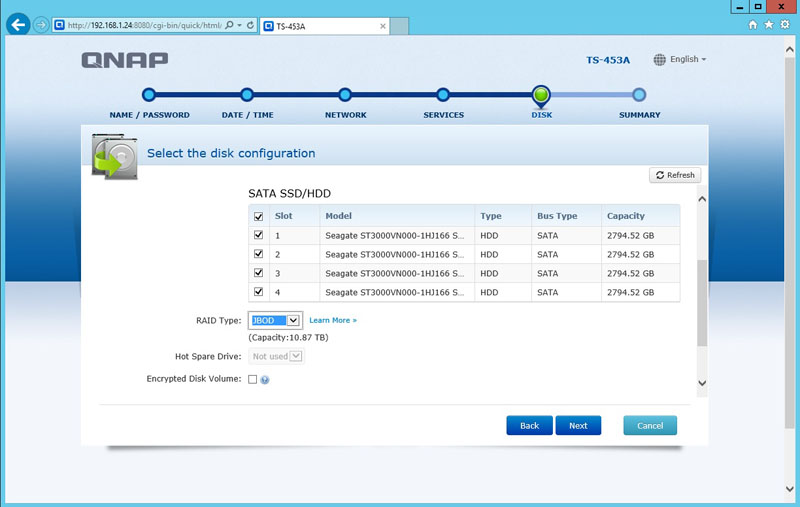
Here we can set up how we want to configure the hard drives, JBOD, RAID 0, RAID 1, RAID 6 and RAID 10. Other options to consider are Disk Volume Encryption and Hot Spares.
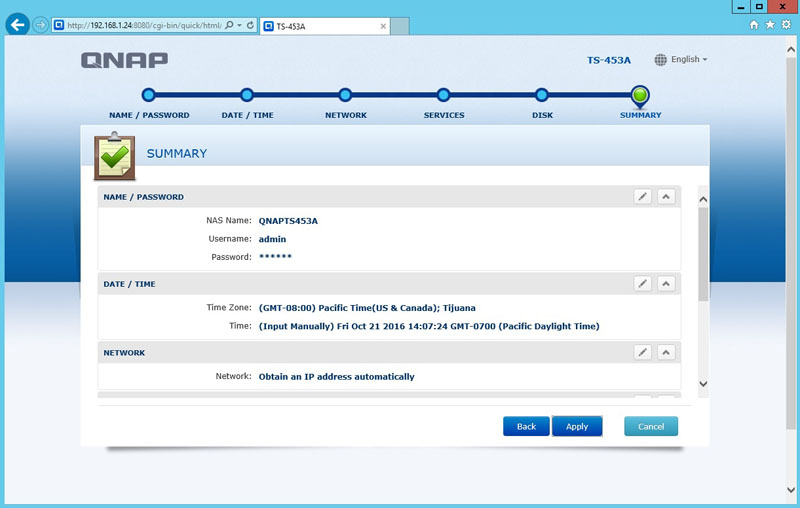
And we can confirm our settings before moving on and then selecting Apply to get it started.
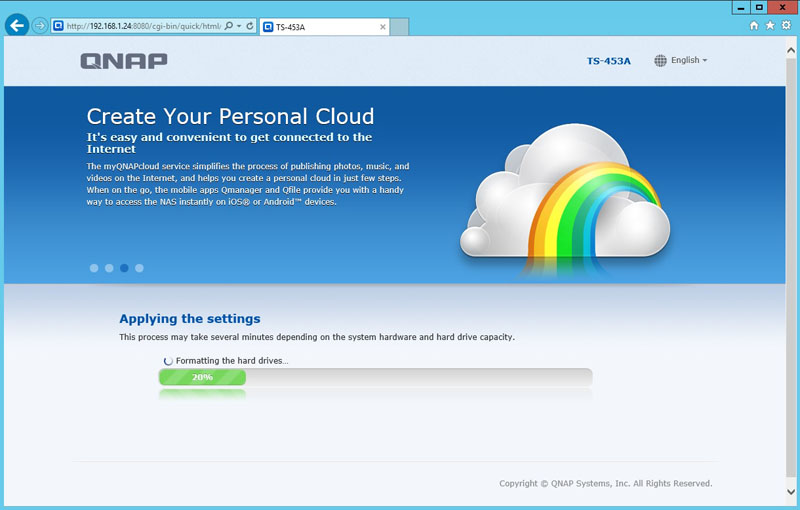
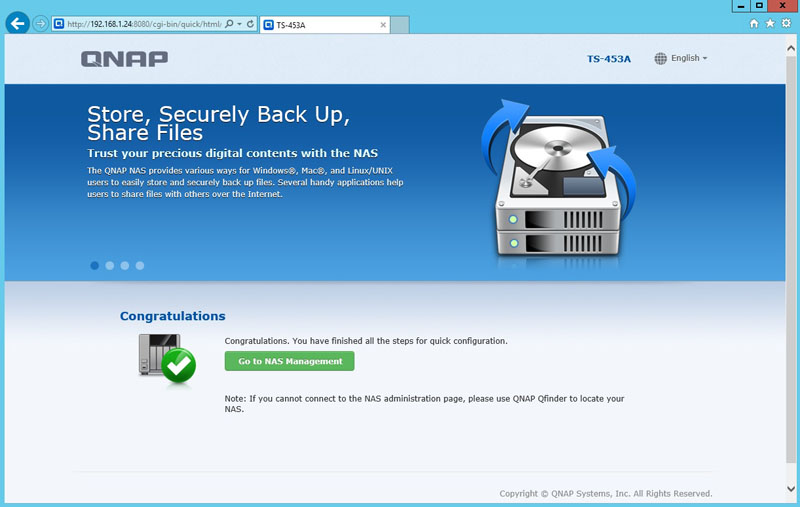
A few minutes later after the NAS has initialized, we are presented with this screen, and it states setup was successful. Now we can move on to the QTS NAS Management screen.

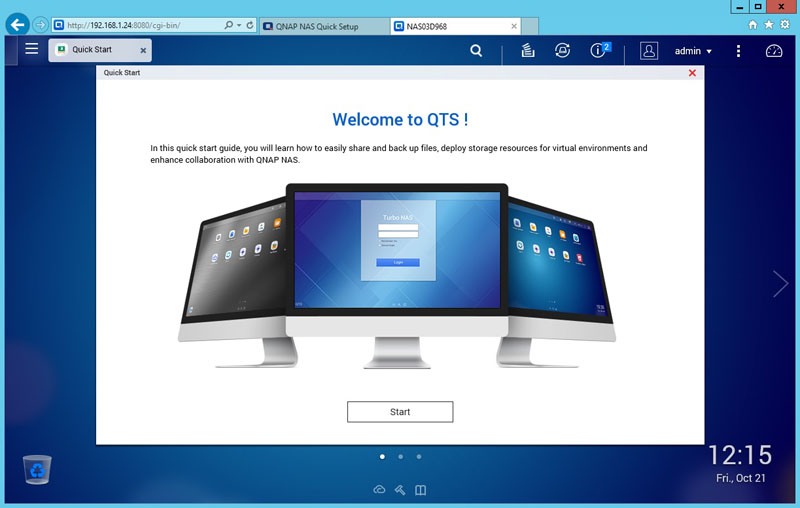
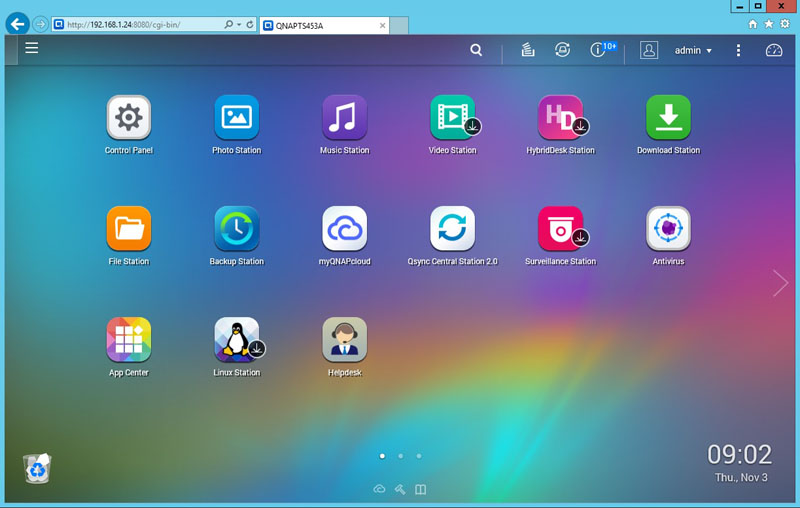
After logging into the QTS management screen, we can see the TS-453A management desktop. This is very similar to what we see even on QNAP’s higher-end data center NAS units.
At the bottom of this screen we three small dots and then an arrow on the right-hand side of the window. We have two more screens that we can use to make desktop shortcuts on, very much like how you would use your smartphone.
Now we have configured our TS-453A, let’s move on to performance testing.
QNAP TS-453A 4 Bay NAS Performance
Our QNAP TS-453A can be setup to run in six different configurations, JBOD, Raid 0, 1, 5, 6, 10. For our testing, we will configure the TS-453A in JBOD, Raid 0, 1, 5, 6, 10 configurations and run our tests. When switching Raid types around for our tests, we waited until the Raid creation process had finished before running each test. The Raid creation process can take some time to complete. You can use the NAS while this process is going on, for best performance we waited until it was complete.
The performance benchmarks we will use are Intel NAS Performance Toolkit and ATTO Disk Benchmark. These tests are not the full test suite we run on larger rack-mount systems, then again, these are not systems designed to deliver millions of IOPS in a data center. Instead, these systems are meant to provide file sharing, backup, media streaming and other features.
Our network consists of a Quanta LB4M 10GB Uplink Switch that connects our TS-251 to our workstation. This is not a consumer switch; however, it was a very popular 1GbE/10GbE switch for large cloud providers. For hard drives, we will be using four Seagate 3TB NAS Hard Drives that came pre-installed in our NAS.
Intel NAS Performance Toolkit
The Intel NAS Performance Toolkit (Intel NASPT) is a file system exerciser and analysis tool designed to enable performance comparisons between network-attached storage (NAS) devices.
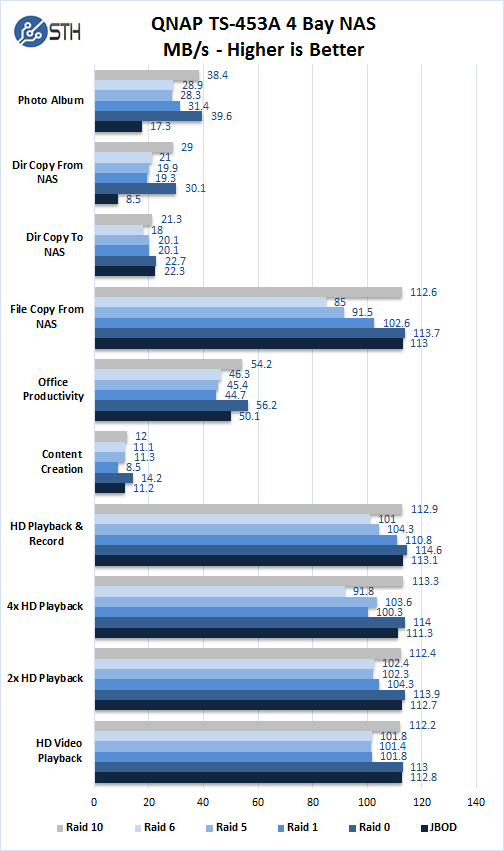
In each of the six different RAID configurations, we see strong performance in our benchmarks. RAID 0 holds the performance crown in our tests with RAID 10 coming right behind. When using RAID 0, you would lose data protection if a drive fails the whole Raid goes down. We generally do not recommend utilizing RAID 0. While RAID 10 offers good performance, you’re wasting half of your storage capacity. With four drive systems, RAID 5 offers the best compromise in performance and capacity; we think this RAID would be the most common used. If one drive fails your RAID is still operational, replace the failed drive with a new one, and you continue normal operation with no down time.
We should also note that our RAID 1 tests only used two drives, so it is running at reduced capacity.
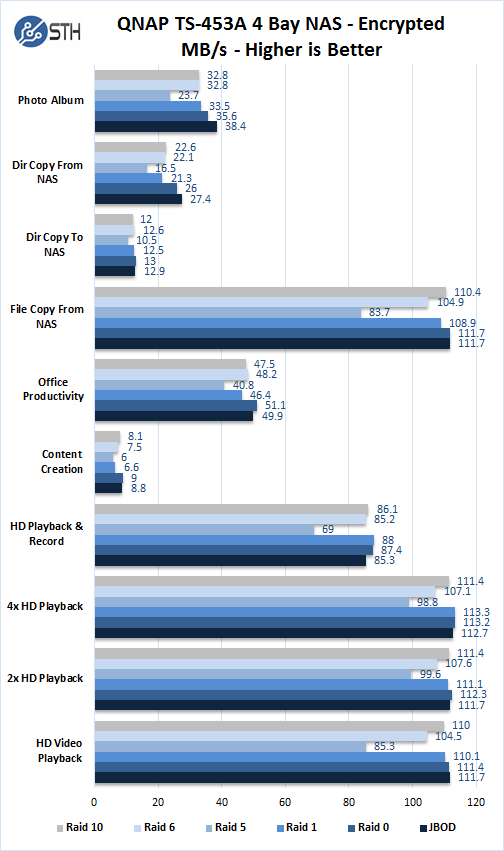
Here we see encrypted folder benchmarks which hold up fairly well in our tests. All though video related tasks appear to be strong; we do not feel there is much need to encrypt videos. Like the earlier test, RAID 5 has consistent performance across all workload types.
ATTO Disk Benchmark
ATTO Disk Benchmark measures performance in hard drives and SSD’s, RAID arrays as well as the host connection to attached storage.
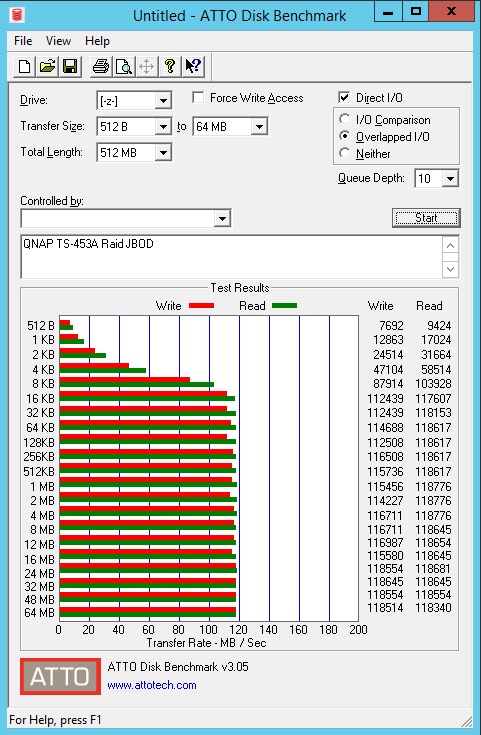
QNAP TS-453A JBOD results show good Write performance with 118+ MB/sec.
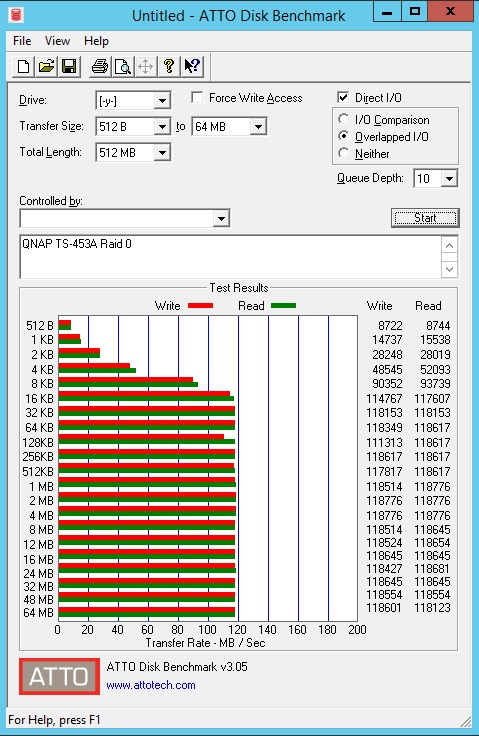
QNAP TS-453A RAID 0 results capping at 118+ MB/sec across both Writes and Read sustained transfer rates. We will see this trend for the next series of RAID configurations.
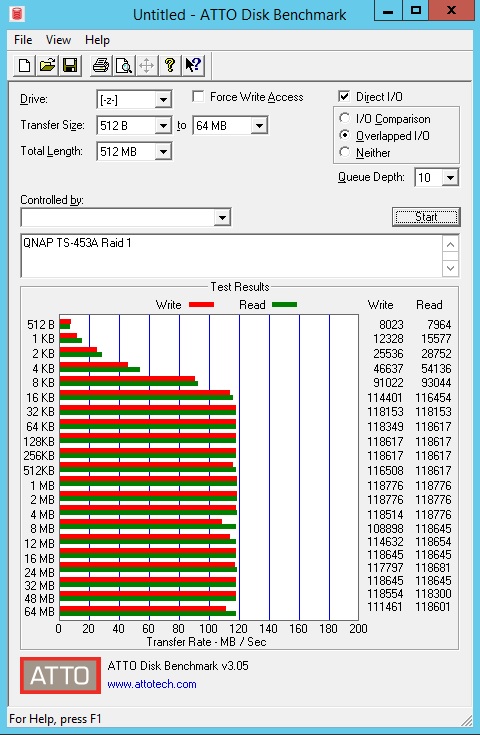
QNAP TS-453A RAID 1 results.
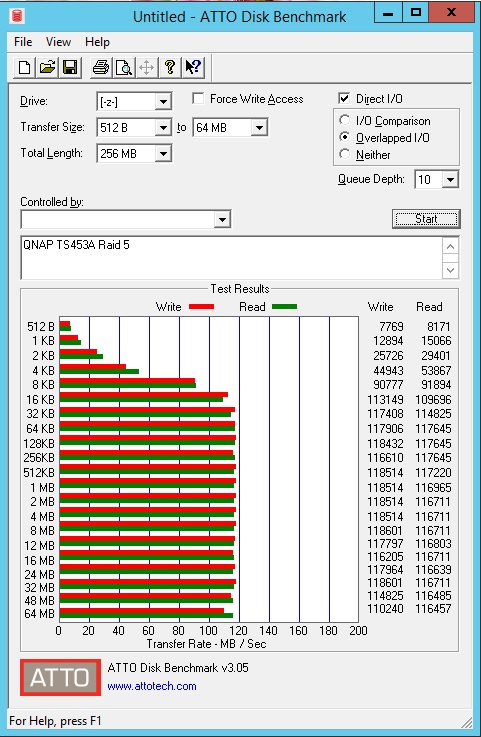
QNAP TS-453A RAID 5 results.
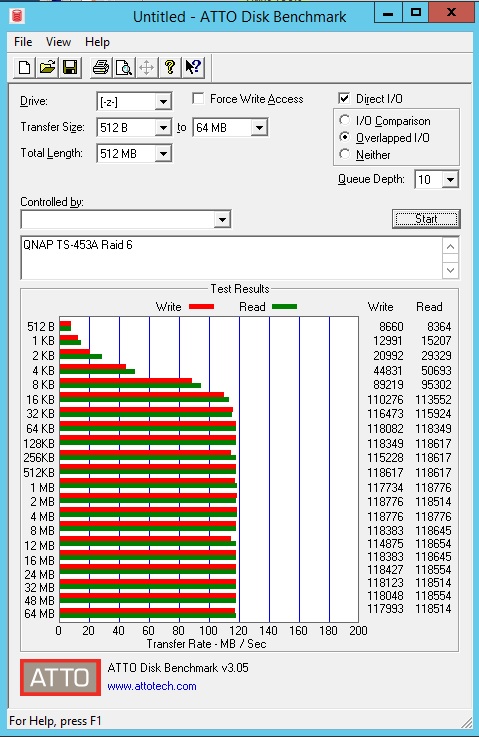
QNAP TS-453A RAID 6 results.
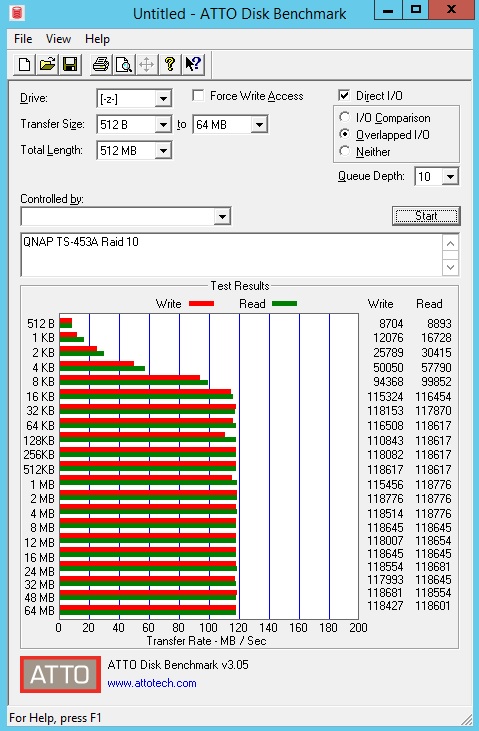
QNAP TS-453A RAID 10 results.
The last series of RAID tests, 0, 1, 5, 6 and 10 show similar performance in sustained transfer rates. These RAID types can reach 118+ MB/sec transfer rates in both Write and Reads.
Linux Station
The QNAP TS-453A is also able to run Ubuntu with a simple installation. We decided to install Ubuntu and see how the Intel Celeron N3150/N3160 1.6 GHz quad-core processor performed in Linux-Bench.
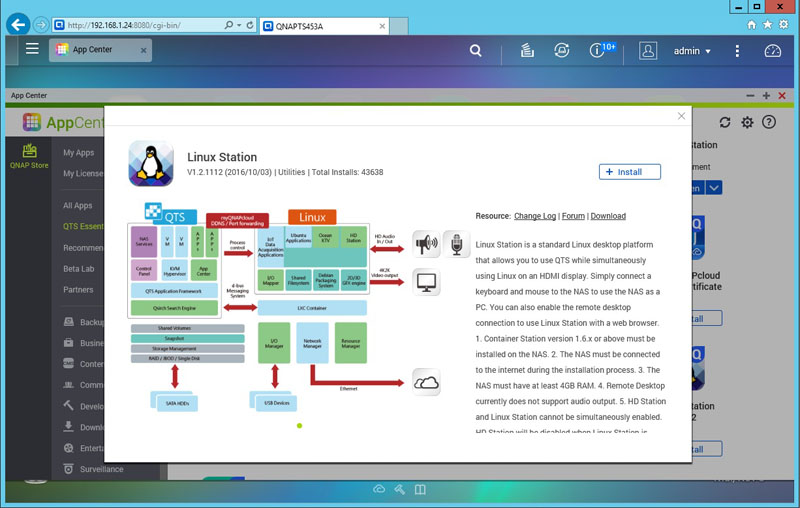
LinuxStation offers an easy way to install Ubuntu on your TS-453A. Clicking the Install Button gets you started.
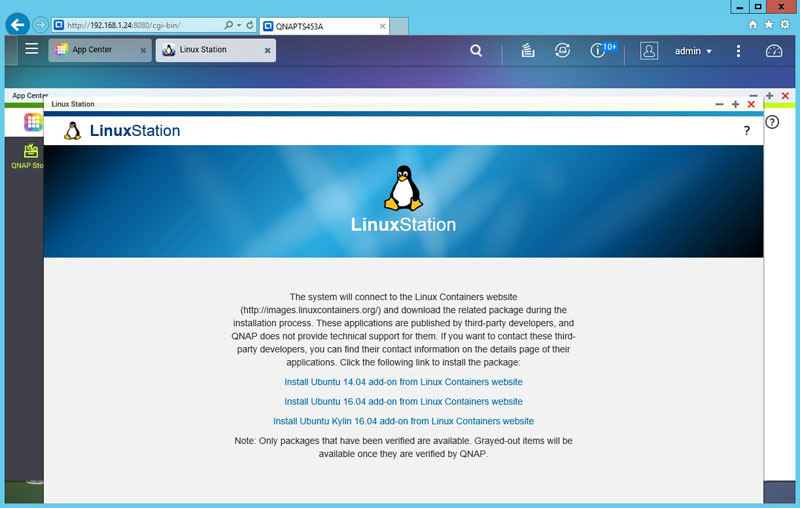
After launching LinuxStation we have the choice of what flavor of Ubuntu to install. Click on the version of Ubuntu you want, it will start installing.
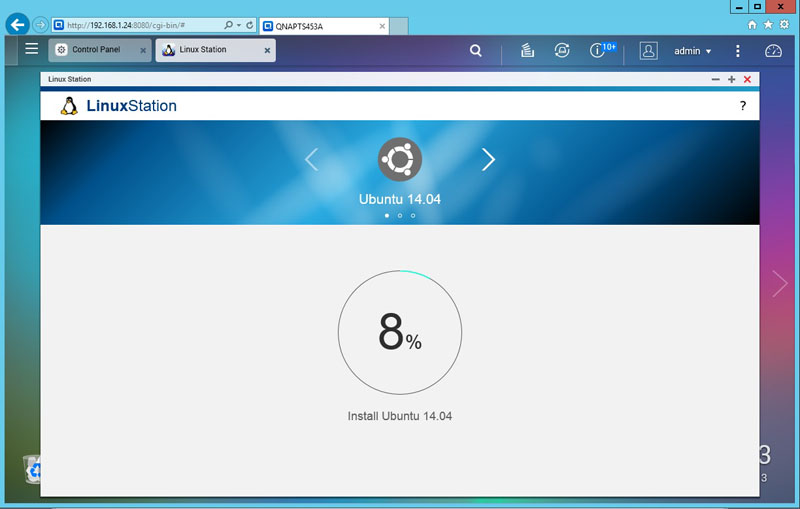
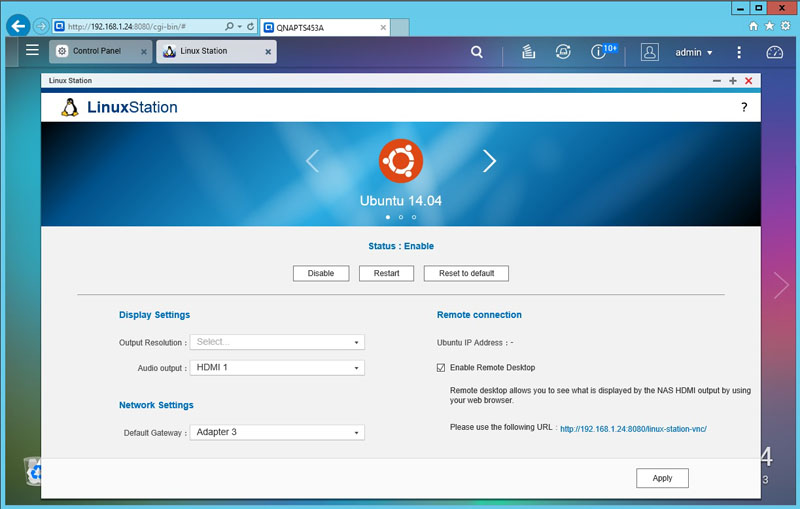
When the install has completed, you will see this screen. At the bottom right, you find a link to run your Ubuntu installation. Click on that link and Ubuntu will start. This is an awesome feature for the novice linux admin.
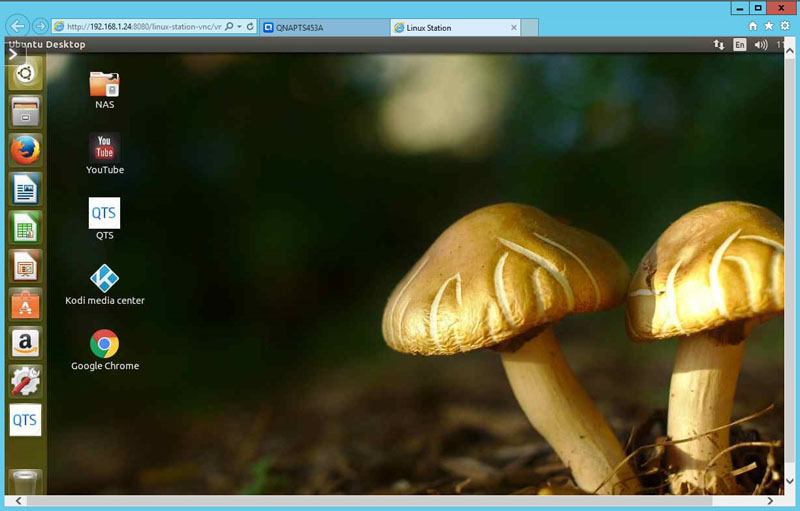
After Ubuntu starts, you will need to enter your login information which is the same as you use for your Admin account. When Ubuntu starts, you have the full desktop GUI experience available to use. Using the provided QTS program, you can administer the TS-453A without having to go back to the main screen. You can also remote desktop into the Ubuntu installation.
Linux-Bench Test
We ran the TS-453A through our standard Linux-Bench suite using Ubuntu as our Linux distribution. Linux-Bench is our standard Linux benchmarking suite. It is highly scripted and very simple to run. It is available to anyone to compare them with their systems and reviews from other sites. See Linux-Bench. We wanted to see if the QNAP Ubuntu installation could run the suite out-of-the-box.
Running Linux-Bench was just like any other system we benchmark.
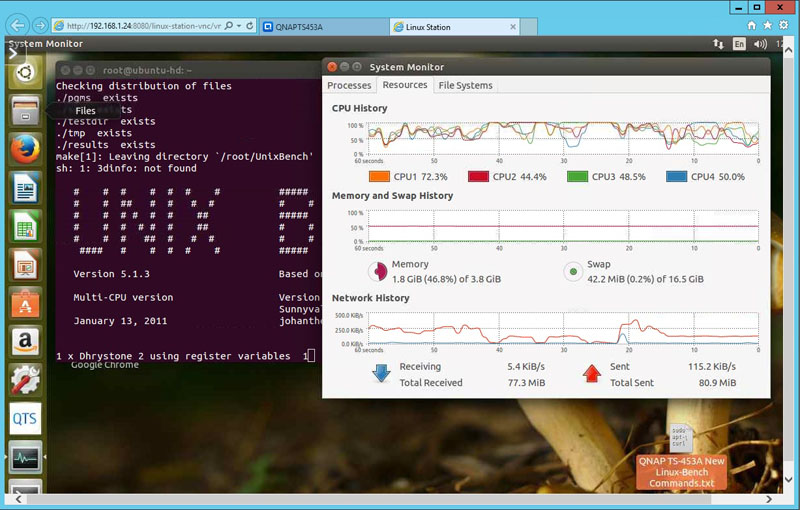
We opened up a Terminal and entered these commands:
sudo su –
wget https://raw.githubusercontent.com/STH-Dev/linux-bench/master/linux-bench.sh
chmod +x linux-bench.sh
./linux-bench.sh
At the end of the run we had a solid set of results.
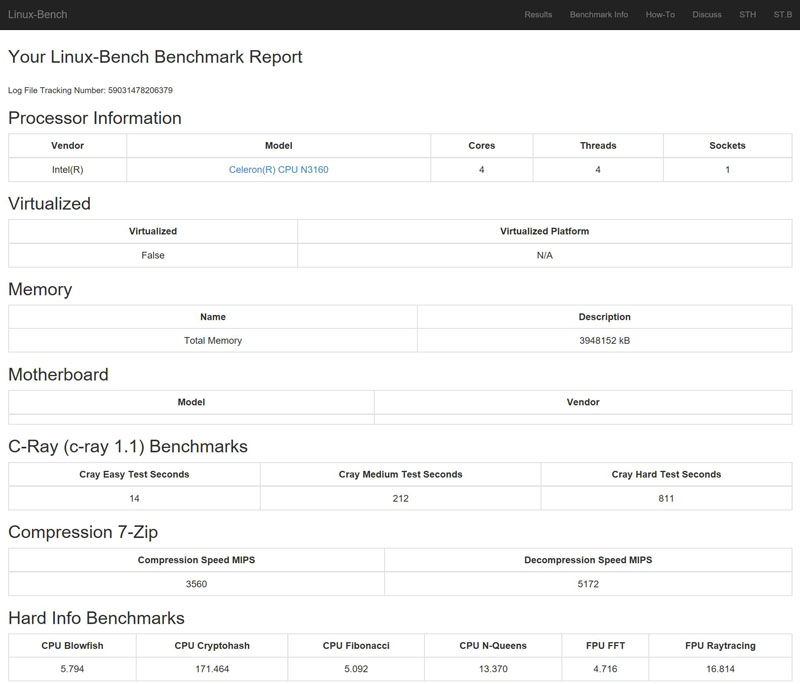
Here you can find the full Linux-Bench test results for the TS-453A. You can see that all of the different benchmark components ran out of the box which is what we would expect from a Ubuntu 14.04 LTS installation so we were happy to see how well LinuxStation worked. In terms of overall CPU performance, you can see that the Intel Celeron N3160 performed very well given it was also running the NAS.
Power Consumption
For our power testing needs, we use a Yokogawa WT310 power meter which can feed its data through a USB cable to another machine where we can capture the test results.
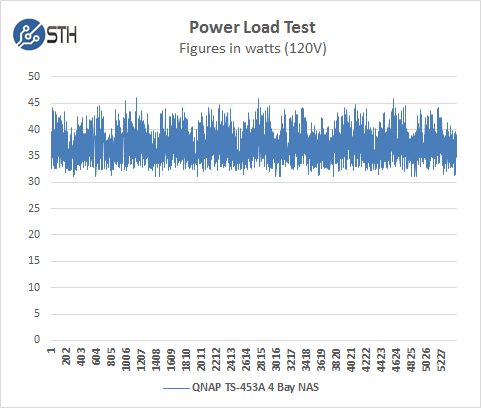
The TS-453A idles at around 31 watts and under max load during our tests we saw a peak of 46.04 watts. This is certainly a far cry fromt he average 1U server. As an in-office NAS unit, this is a solid showing.
QTS 4.2 Features
We updated our TS-453A to the latest version of QTS which is 4.2.2. QTS is the operating system used by QNAP on all NAS units we have tested which makes moving from one QNAP NAS to another very simple with unified operating systems.
We will walk through the major screens that QTS 4.2 has to offer.
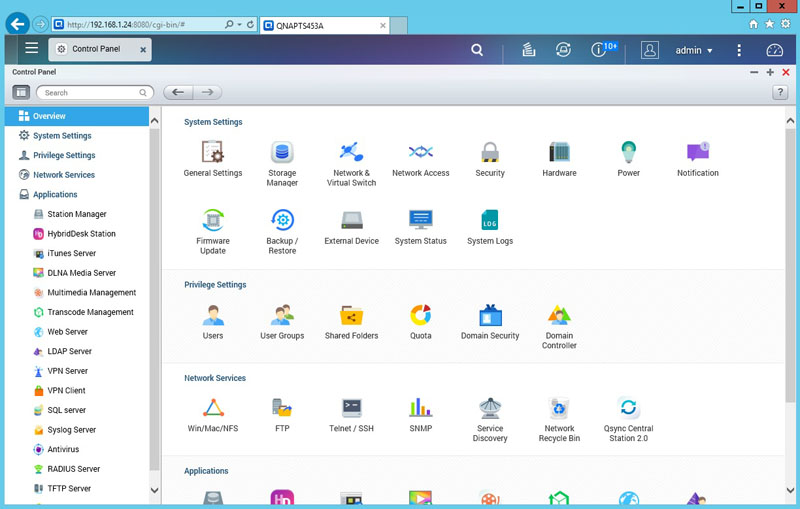
The QTS Control Panel is the central location of the functions of the TS-453A.
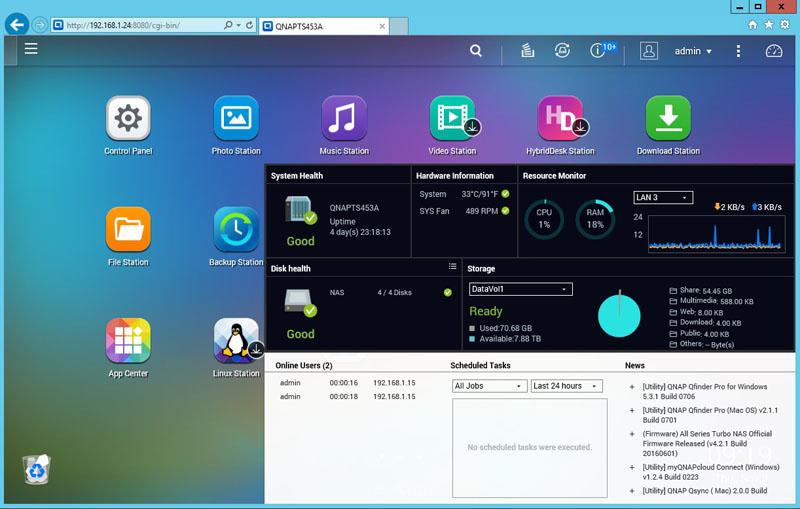
At the top menu bar on the far right side is the System Monitor where you can keep an eye on what the system is doing.
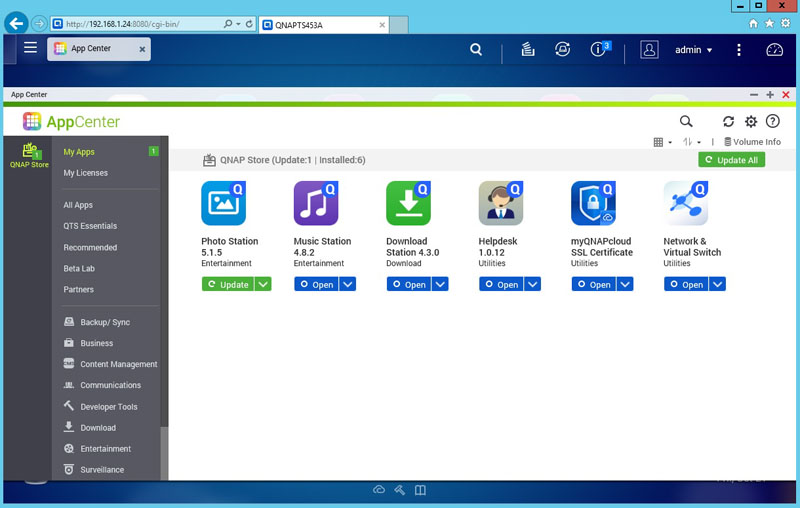
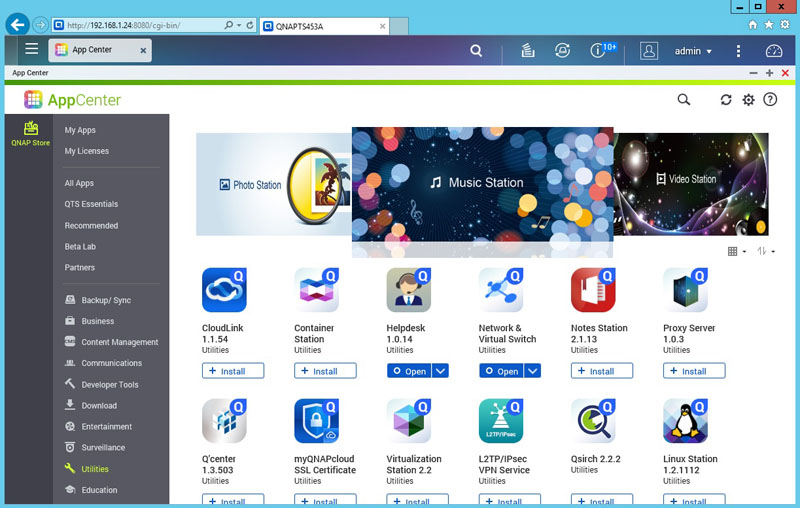
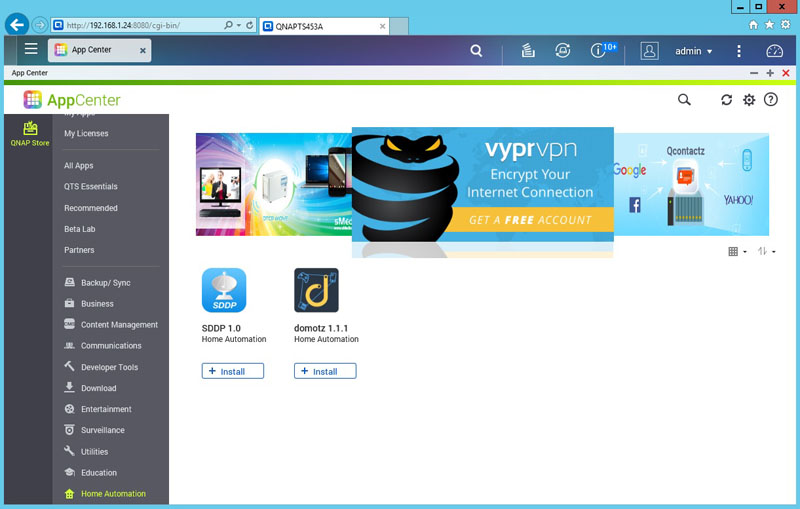
The AppCenter is where you can find a broad range of applications you can install on your NAS. AppCenter My Apps. These are applications you currently have installed.
Let us walk down each category to see what apps we can install.
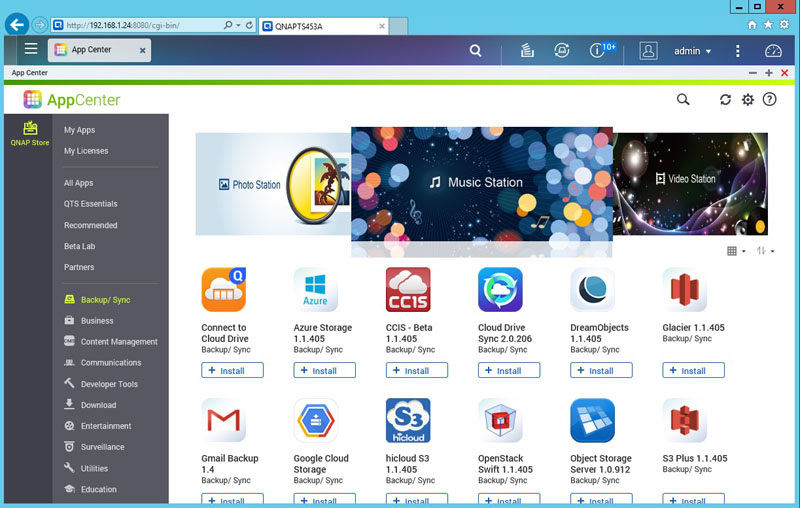
In the AppCenter Backup/Sync category you can see some advanced features such as OpenStack Swift storage, S3 Plus as well as the Object Storage Server. QNAP is brancing out beyond traditional file servers and is embracing the obect storage trend.
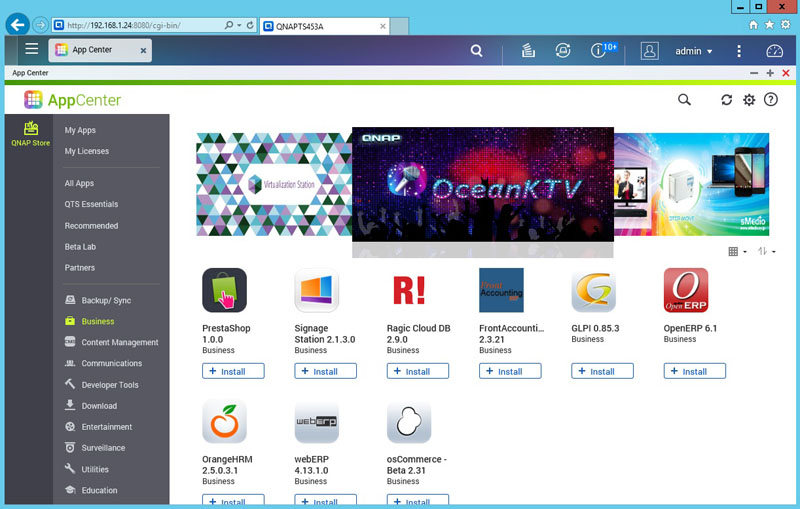
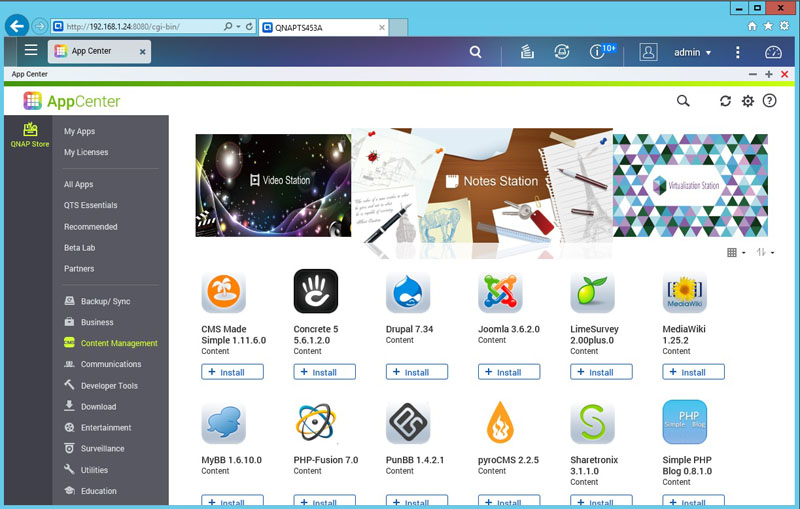

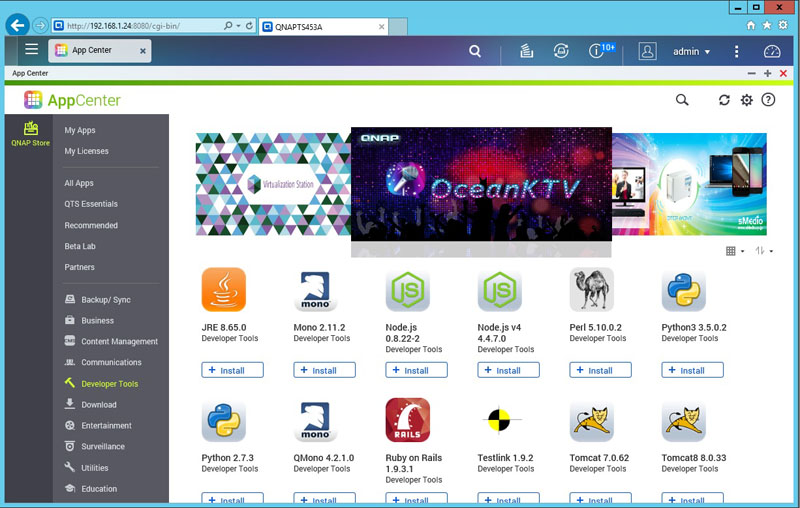
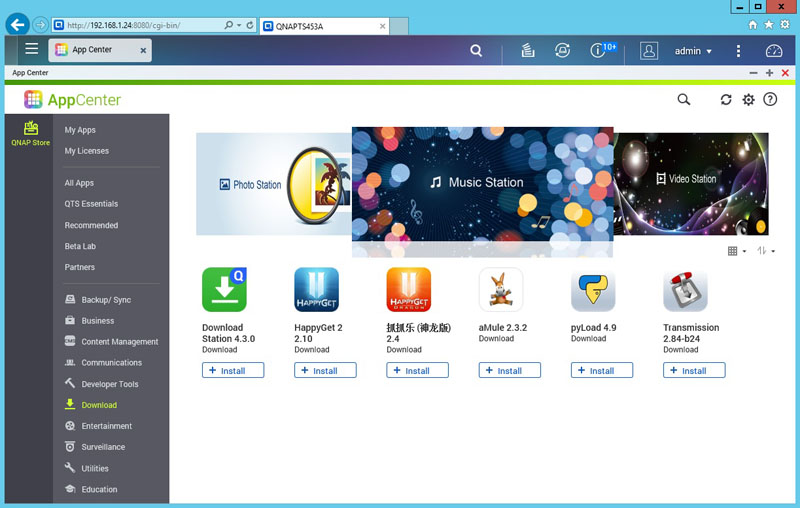
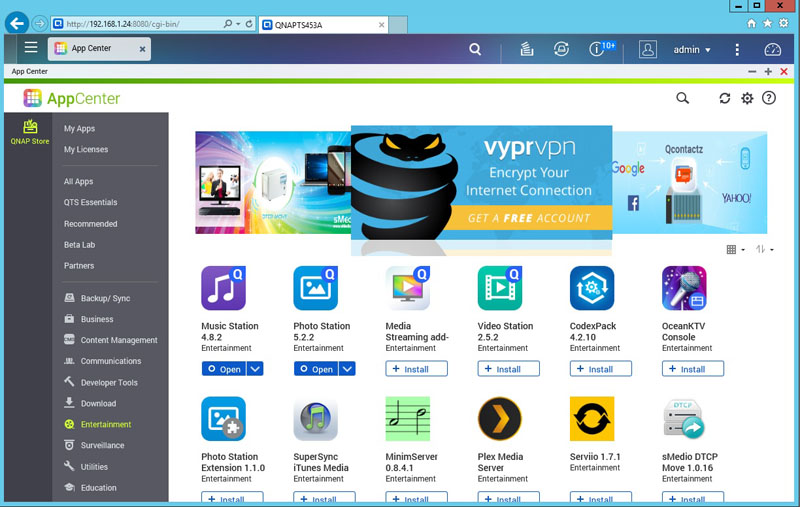
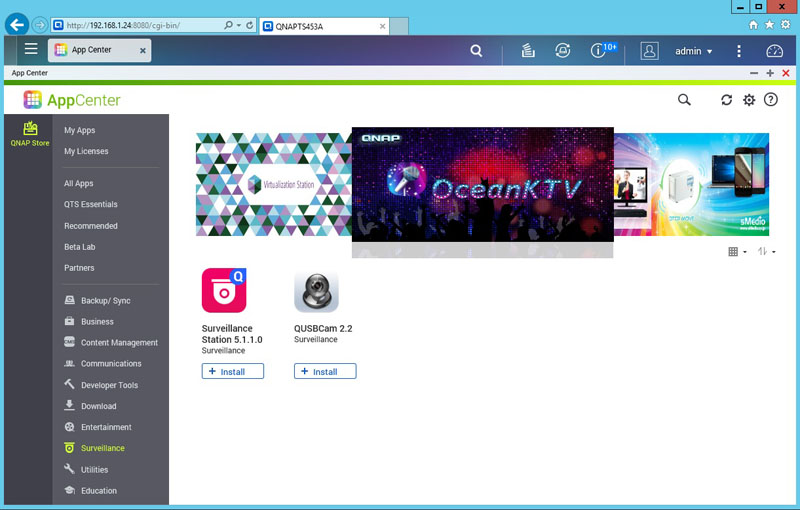
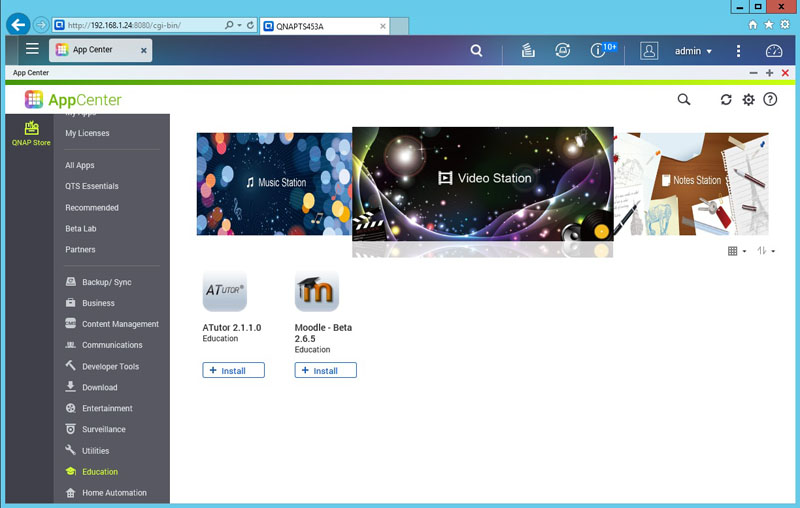
We were slightly surprised to see the home automation category so sparsely filled out. We expect that this will become a much bigger area in the near future.
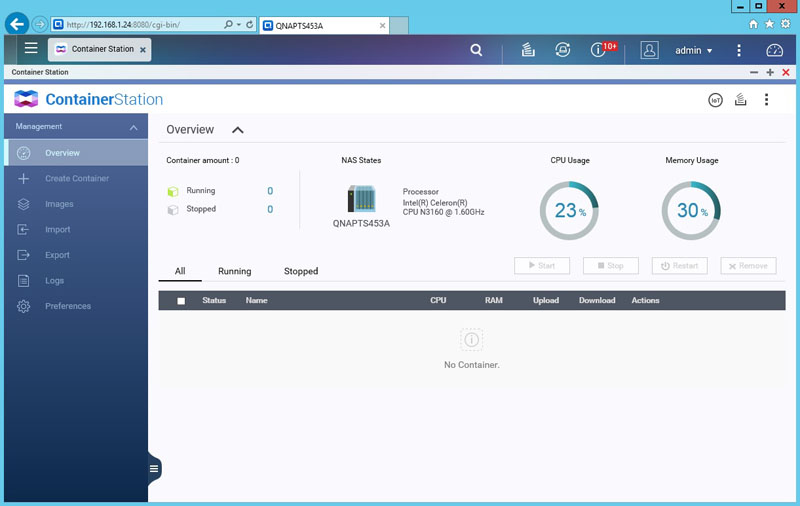
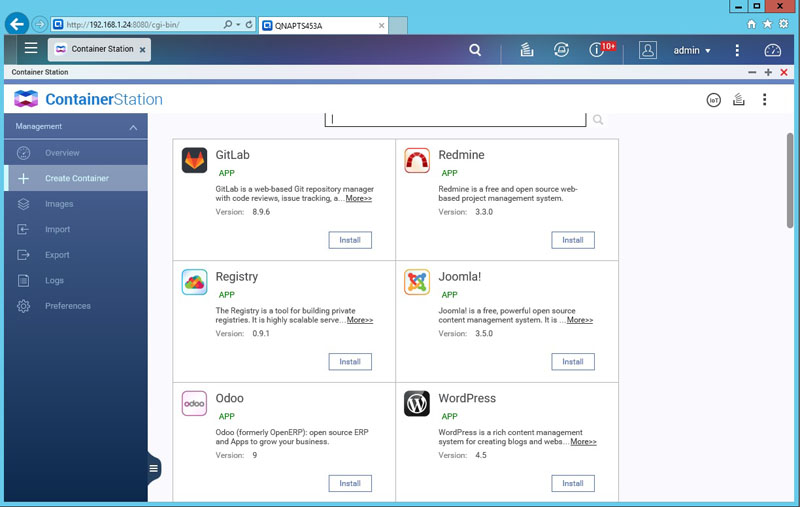
QNAP ContainerStation offers you the ability to run containerized guest operating systems on the NAS. Support for importing virtual platforms such as VirtualBox and VMware Workstation. Other selections include Ubuntu, Debian, Fedora, LibreOffice, MongoDB, Nginx, Node.js, Redis, MySQL, WordPress, Deluge, Minecraft, Wine, Jenkins, GitLab, Redmine, Joomla and more options are available.
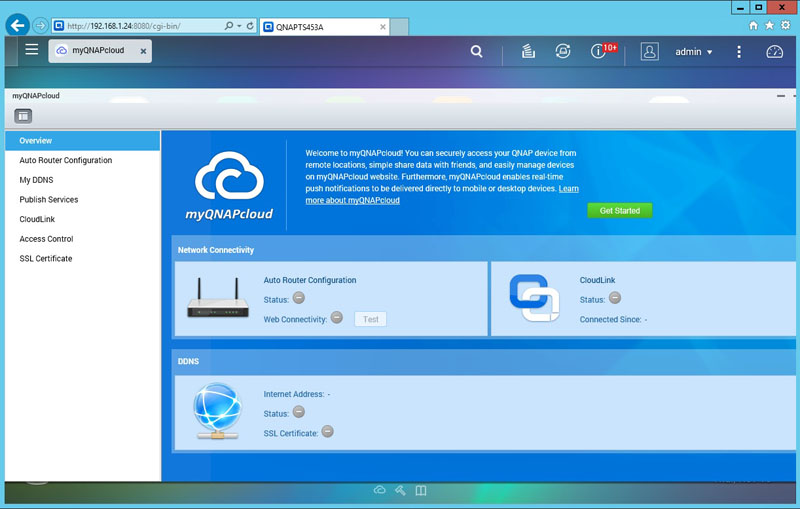
QNAP myQNAPcloud creates your personal cloud so you can access files/data any place you have internet connectivity.
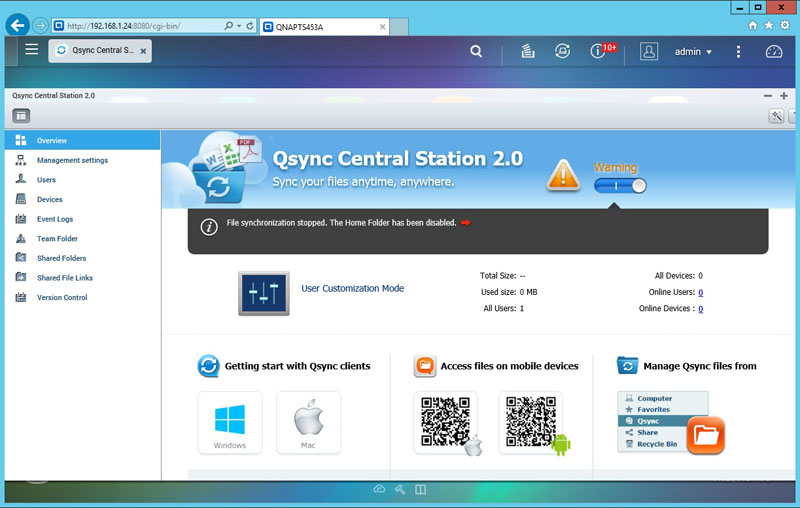
Qsync Central offers File synchronization across multiple devices and clouds.
QNAP QCenter
QNAP QCenter supports VMware ESXi, VMware Fusion 7, VMware Workstation 11 and Microsoft Windows Server 2012 R with Hyper-V. If you have a small set of onsite servers, this can be useful. We have even seen these units giving network share and backup duties at low-cost colocation facilities.
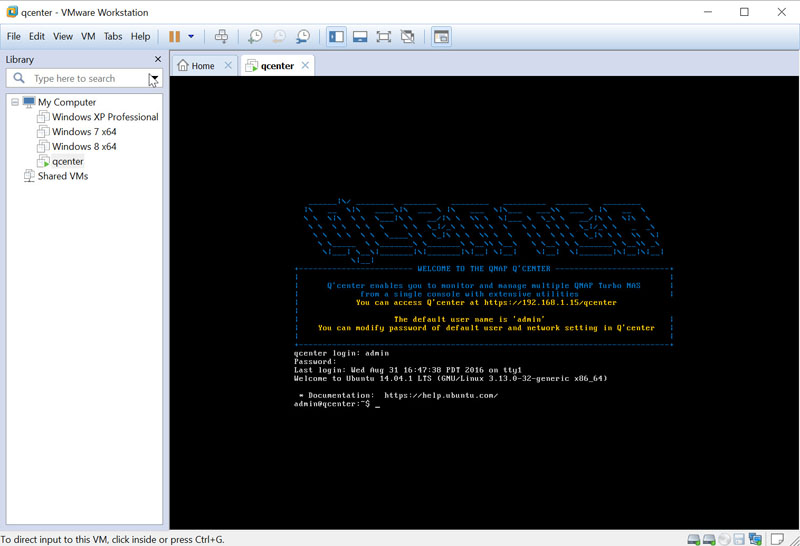
We downloaded QCenter for VMware Workstation Pro 12 into a folder and turned it on. The message says to use https://192.160.1.15/qcenter for our system which we did and received the Welcome Screen.
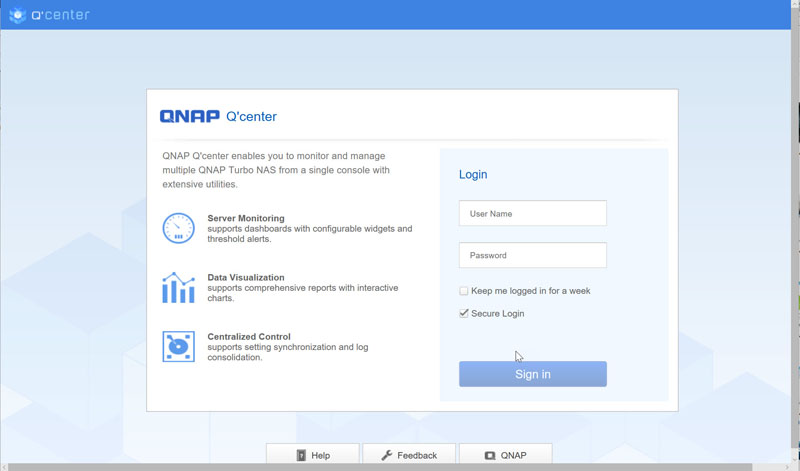
The QCenter welcome screen is displayed, enter your username and password to begin using QCenter.
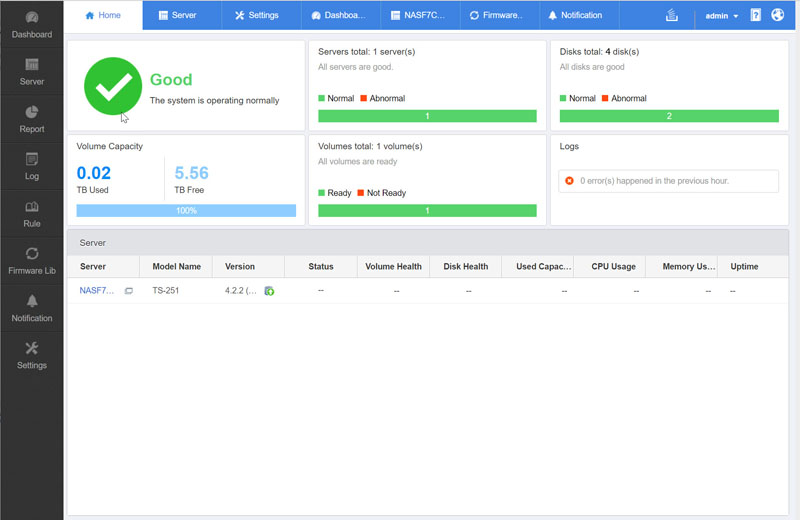
More advanced users or small business will find that QCenter is an excellent way to manage your storage network that uses several QNAP products.
In addition to all the features we have just shown, there are also apps you can download for your cell phone to control and check your QNAP TS-453A NAS. We use a Samsung Galaxy Note 4 so we entered the Google Play Store and searched for QNAP and found a list of apps that we can use.

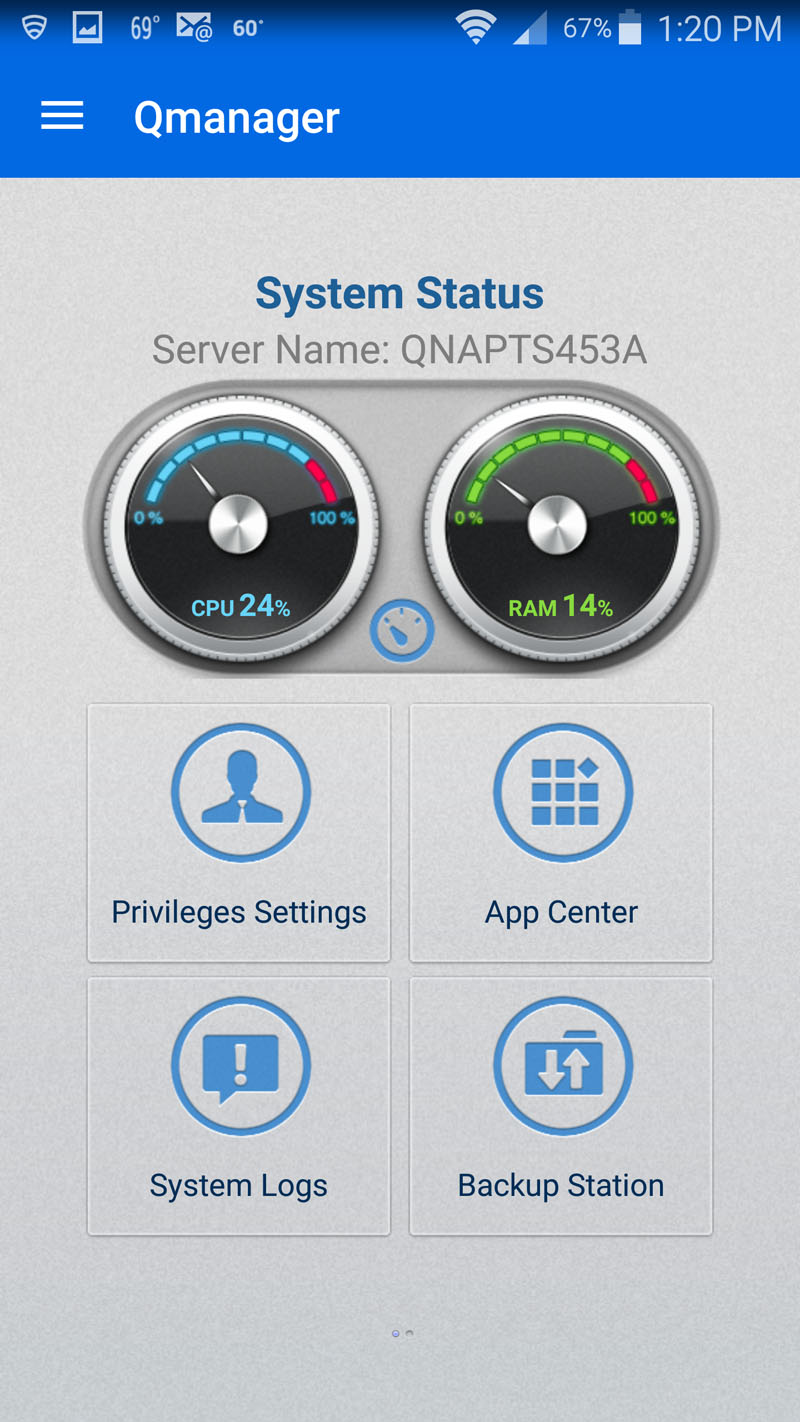
There are additional apps that can be found in the Google Play Store to use with your TS-453A. Download and use the ones like or feel useful in your day-to-day operation.
QNAP also offers the Qfinder Pro desktop utility which helps to setup, login, change settings and configure your TS-453A, this also includes other QNAP NAS’s you might have on your network.
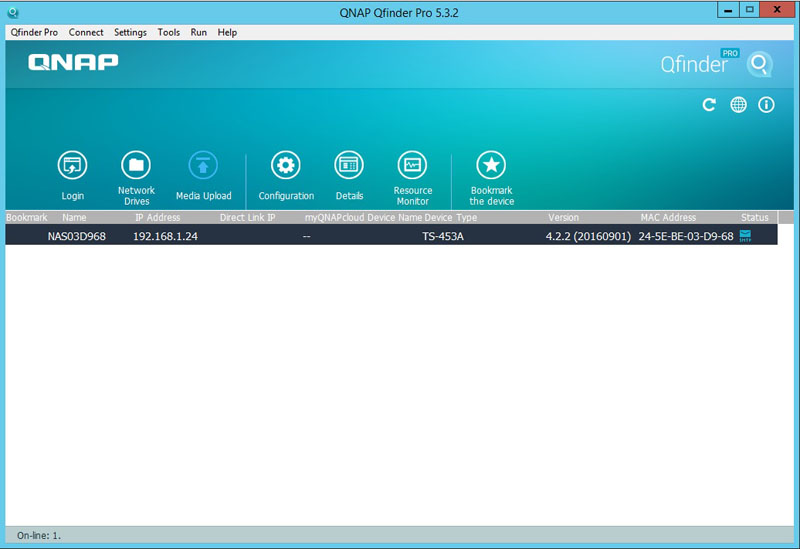
This utility searches for QNAP TurboNAS’s and aids you in connecting them to your network.
Conclusion
After using the TS-251 for our last QNAP review, we found the TS-453A to be very similar in operation, and we felt right at home. What the TS-453A does right is the expanded storage with four drives, this gives significantly more capacity than the two bay units. It also allows us to use RAID 5 or RAID 6. While we likely would use RAID 10 in this unit, or potentially RAID 5, RAID 6 will start to make sense when it is combined with an expansion chassis.
The processor of choice being an Intel Celeron N3150/N3160 1.6 GHz quad-core is more than capable of handling the needs of this NAS and coupled wit the Intel AES-NI hardware-accelerated encryption engine allowed the NAS to perform well under encryption loads. With Karaoke functions with built-in microphone jacks, dual HDMI outputs, VM Center, Quad LAN and being able to run Ubuntu with a few simple clicks, the TS-453A has enough features to explore for a long time. We felt like Tim “the toolman” Taylor with more power using the TS-453A. We will note that we recommend the 8GB version for heavy virtualization users on the QNAP TS-453A.
With all this power in a small form factor, we did feel that we wanted 10GbE network options to push this unit harder, but that is not available for this model. For 10GbE we would need to start looking at enterprise NAS, such as the TVS-EC1080+. In 2016 we saw a major push to bring 10GbE into the mainstream and in 2017 we will start to expect 10GbE from NAS units as most server platforms will have multiple 10GbE built-in.



Thank you for the blog post. Thomas and I happen to be saving
to buy a new e book on this theme and your blog
post has made us all to save our own money. Your thinking really responded to all our queries.
In fact, in excess of what we had thought of just before we found your amazing blog.
My partner and i no longer nurture doubts and a troubled mind because you
have completely attended to our own needs here. Thanks
” to control and check your QNAP TS-453A NAS. We use a Samsung Galaxy Note 4 so we entered the Google Play Store and searched for Synology”…
Wait… What? QNAP is Synology ???