Welcome back to our series on the Xen Cloud Platform (XCP). This is the fourth in a series of articles of how to use the Xen Cloud Platform (XCP). For those of you following along you already have your XCP host up and running and have started managing your setup with Citrix XenCenter. For those of you that are new to this series I encourage to go back and review where we have been.
- Getting Started with Xen Cloud Platform (XCP)
- Installing Xen Cloud Platform (XCP) from USB
- Managing Xen Cloud Platform (XCP) with Citrix XenCenter Part 1
Today we are going to continue where we left off and Create our first Virtual Machine, Create a Pool, and Migrate VMs between XCP hosts!
As a quick refresher of where we left off. Previously we installed and configured Citrix XenCenter to manage our XCP setup and we added shared NFS storage to our XCP node for ISO & Virtual Machine storage.
Create a Virtual Machine with XenCenter
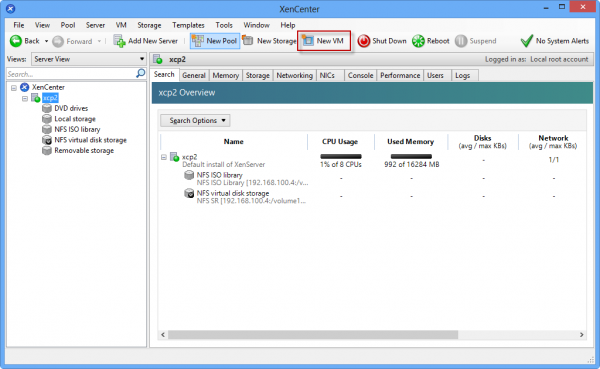
Now to get us started we need to create a virtual machine. Simply highlight your XCP host and click on the “New VM” button on the XenCenter toolbar to start the wizard.
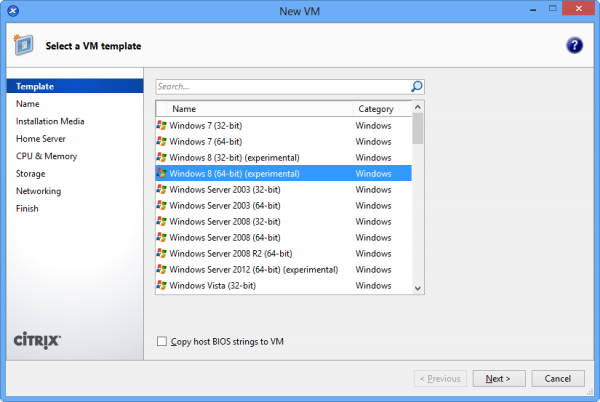
The first screen that you will see is the “Template” screen. This is where you can choose the type of Operating System (OS) that want to install. There are all of the standard Microsoft Windows options as well as plenty of Linux options including specific templates for CentOS, Debian Squeeze, Oracle Enterprise Linux, Red Hat, SUSE & Ubuntu. There are also templates for Citrix XenApp, Xen API SDK, Solaris & Other media.
One thing you may notice on this screen is the checkbox at bottom: Copy host BIOS strings to VM. 99% of the time you will leave this option unchecked. This is only to be used when you are using BIOS Locked Installation Media (e.g. an OEM installation CD that was packaged with a specific computer).
In this example I am going to create a Windows 8 64-bit virtual machine.
The next screen is pretty simple; just name your new VM anything you like. I will be naming mine “Windows 8 (64-bit)”. The follow screen is where we choose our installation media. The first option is “Install from ISO Library or DVD Drive”. In the previous article we created our ISO Library. If this was done correctly all of your ISOs should be available in the drop down menu. Simply choose your Windows 8 ISO and click next.
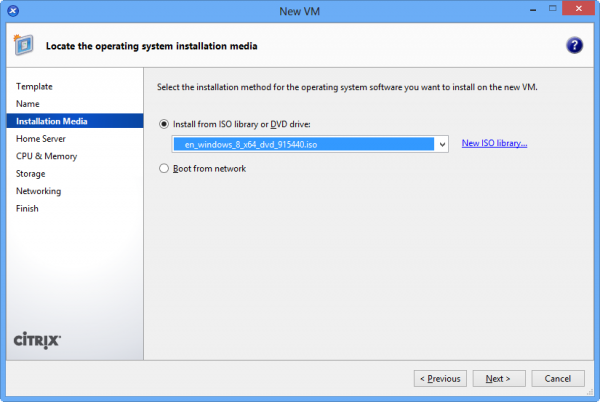
If your ISO files are not in the drop down menu. Make sure that the ISO files are in the root directory you specified when you created your ISO Library. If your files are in subdirectories they will not appear in this list.
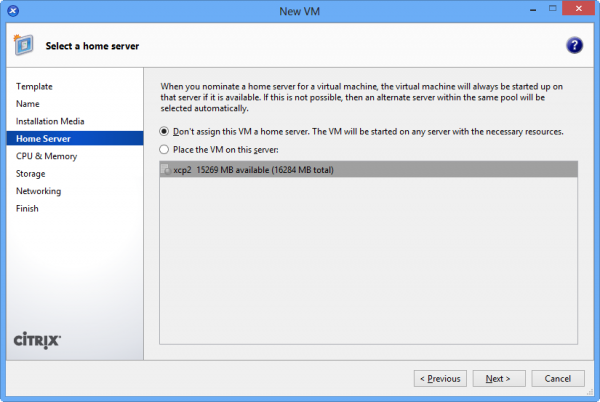
On the next screen you are given the option to choose a home server for your VM. This can be useful when you have a VM that needs to run on a specific machine; however, for our purposes this is not necessary so I choose the “Don’t assign this VM a home server.” Option. This will allow the VM to be started on any server with the required resources. Additionally, this will act as a poor man’s load balancer on startup.
Next screen again is pretty self-explanatory. Just choose the resources you want to dedicate to this VM. I am choosing 1 vCPUs & 2048MB of memory.
The following screen is the “Storage” screen. You can choose the location and size of the Virtual Hard Disk (VHD) you will give the VM. Since we previously created shared Virtual Machine storage this location should be the default. If you want to change the size or location, click on the Properties button on the right and a new window will open. I have opted to increase my VHD size to 60GB.
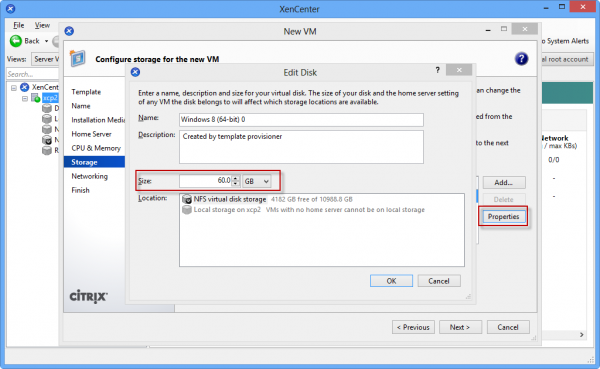
The next screen will allow you to choose your networking options. Currently, I have two NICs in my hosts and have not created networks with VLANs or any NIC Bonding. I will be covering advanced networking at a later time. For now just choose “Network 0” this is the management network and segment that you are using to connect Citrix XenCenter to the XCP host.
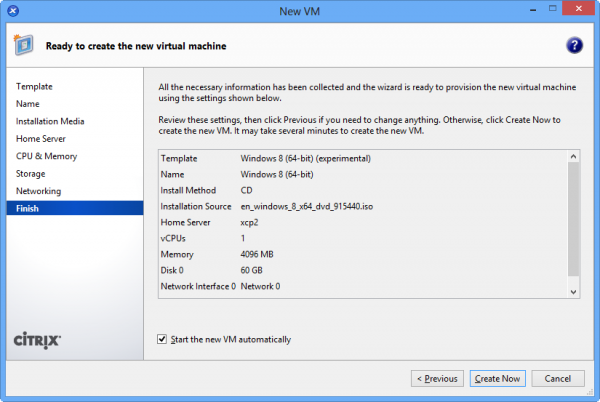
Finally, review and start your new VM.
Now there are plenty of guides out there to cover the Windows 8 Installation so I will skip that. Don’t forget to install XenServer Tools!
Creating a XCP Pool with XenCenter
So now that you have the basics down its time to add another XCP Host and create a Pool. Now I have a confession….I cheated and already had a second host ready to go. But as soon as you add your second hosts you are ready to create your pool.
There is no need to recreate shared storage for each host(s). When we create the pool the storage will allocated to the pool and not to each machine. In fact you cannot add server to a pool that has shared storage (Except for the Master).
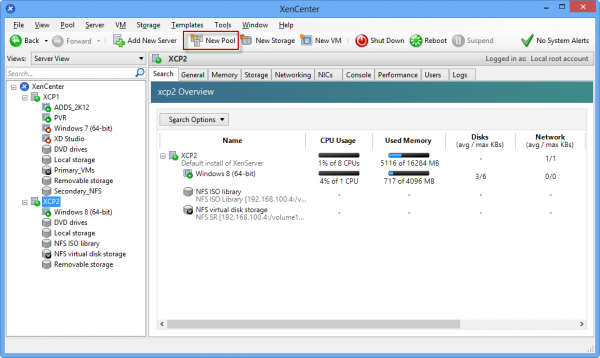
Now that you have your second host added your screen will look similar to mine (I have created some additional VMs already). All we need to do is click on the “New Pool” button across the top.
This will bring the up the Create New Pool screen. Just name your pool and select the members.

Then after you click Create Pool, you will be presented with your new console.
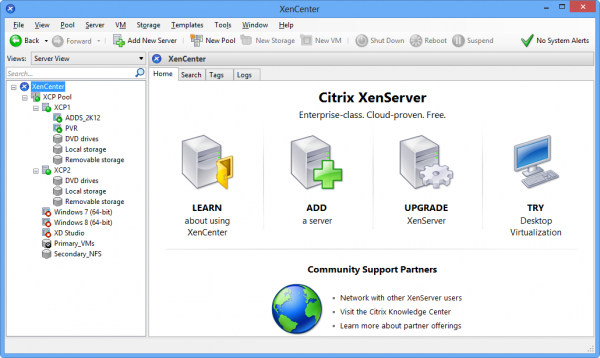
As you can see you now have shared storage between both XCP Hosts! This will allow us to migrate VMs from one XCP Host to another.
Migrating VMs Between Hosts with XenCenter
So you have your XCP Pool set up and now you need to move some VMs to another machine. Or its time for some maintenance on one of your hosts, but you don’t want to shut down all your VMs? Just do a quick migration.
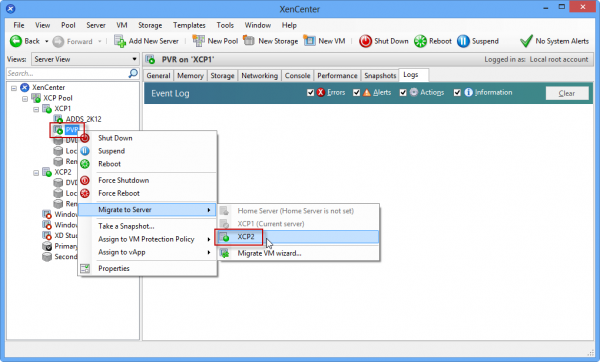
With XCP this couldn’t be easier. Right click on the VM you want to migrate, go down to Migrate to Server and choose the XCP host you want to move it to.
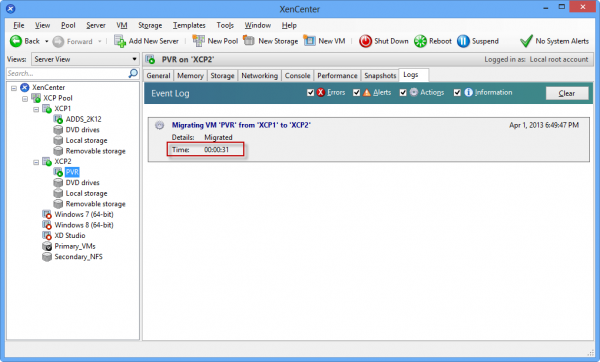
This process is fairly quick. As you can see in the screenshot below, on my system it took 31 Seconds to complete and I experienced zero downtime.
Conclusion
Hopefully this article has helped you get started with XenCenter and you can start using your new XCP setup. Stay tuned for the next installment! I will be showing you how to quickly move your VMs from Hyper-V into XCP without having to export/import or using XenConvert.



Just so I understand, did you create a second host on the same hardware just to illustrate the process of migrating VM’s between hosts? If not, can you elaborate on why one might need multiple hosts on one physician server? Can multiple hosts on different machines be in the same pool?
Thanks for the write-up. Great read and very helpful.
Will there be another article or is this the last one? I have been following this series and think it’s a really good idea!
Hi Stephen,
I’ve been following this series with great interest. I’m patiently waiting for the next installment. I’m especially looking forward to how you plan to do virtual desktops.
Thanks.