With a diminutive size, the Lenovo ThinkStation P330 Tiny may not seem like a fast or flexible machine. Indeed, the unit we purchased had an Intel Core i7 with an NVIDIA Quadro and still fit in a small package. This ThinkStation P330 Tiny works with Windows and Linux. It is customizable with dual NVMe storage, up to 64GB of RAM, and even an NVIDIA CUDA capable Quadro GPU. At the same time, it is small enough to be hidden from view making the P330 Tiny surprisingly flexible. That is what we will explore in this review.
Project TinyMiniMicro Lenovo ThinkStation P330 Tiny Video
As part of this project, we are releasing videos with some additional looks at the systems and some more candid thoughts. Here is the video for this:
This article will have a bit more since there are some facts and concepts easier to convey using text rather than video. You can also see the full video series using this YouTube playlist. Our suggestion is to open the video and play it in the background to listen.
Project TinyMiniMicro Background
In Project TinyMiniMicro we are purchasing a large number of these devices from different sources. While a standard STH review is of a new product, these TMM nodes occasionally have specs that differ from what one would expect. In all of these pieces, we are going to talk about what makes the nodes unique. We are now well over 20 different nodes to increase diversity. We are testing these on a more circular economy/ extended lifecycle basis to see how they can be deployed after their initial use as corporate desktops.
For our $585, we received a node with an Intel Core i7-8700T CPU, an 8GB SODIMM for RAM, and a 256GB NVMe SSD. Our unit came with the NVIDIA Quadro P620 which is a lower-end PCIe GPU, but massive in the 1L PC space. We even got an embedded Windows 10 Pro license which would have cost us around $140 alone. Ours shipped with the default Lenovo added bloatware but a fresh Windows 10 Pro install fixes this.
We would likely add a second/ bigger M.2 NVMe SSD, a 2.5GbE or 5GbE USB NIC, 2x 32GB SODIMMs, and 802.11ax WiFi to round out the configuration.
This is a bit more than we paid for both the M920x Tiny and the P320 Tiny. As you will see, in many ways, this is a competitor. What we will not cover, but we wanted to mention is that as a ThinkStation, Lenovo has a number of ISV applications that it has validated support for. Many of those applications are costly, where the cost of this machine is negligible, however, if you do have an application where you need support this may be an option.
We are going to go into the hardware overview, then into the key specs. We are then going to talk a bit about performance and power consumption before getting to our lessons learned from these units and our final words. Our Apple Mac Mini M1 discussion will happen on the last page in our key lessons learned section.
Lenovo ThinkStation P330 Tiny Hardware Overview
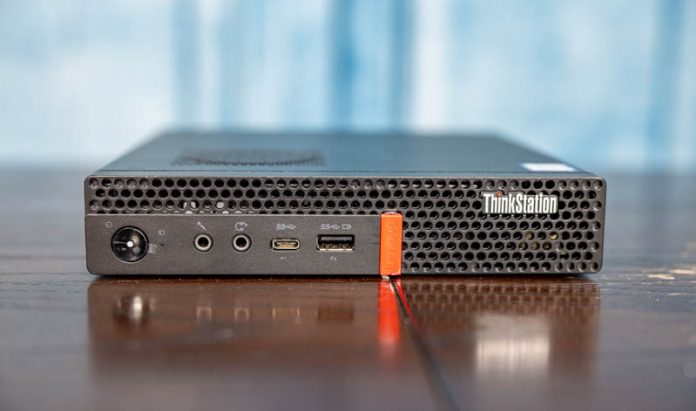
The chassis itself is a fairly standard design for the older ThinkCentre Tiny series. It measures 179 x 183 x 37mm (7.0 x 7.2 x 1.5in) which means it is around 1L like the other systems in this series. This is also slightly taller than the M920x Tiny we reviewed in this generation to provide a bit more room for cooling. One can see here that the fan grate is raised on the top cover here.
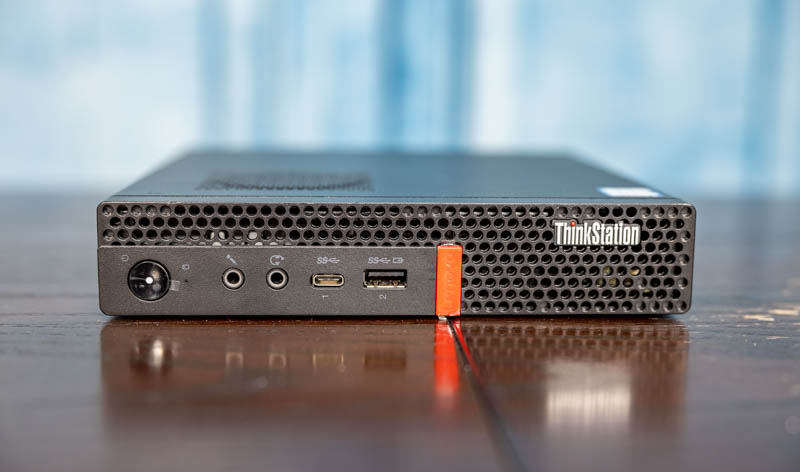
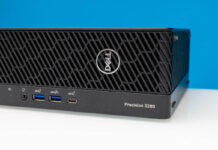
In the front of the chassis, we get headset and microphone jacks as well as two USB 3.1 Gen1 ports. One of these USB ports is a Type-A port while the other is a Type-C port. We generally prefer systems that have at least one Type-C port given how prevalent that is today. The ThinkStation P320 Tiny has two Type-A ports, so this is a welcome update. We have also seen some systems offer three USB front panel ports on other ~1L workstations, but here we have the more common design with two.
On the rear of the unit, a DisplayPort and a HDMI port standard. In our unit, the dual optional slot that we found on other units such as the M920q Tiny was instead replaced by four Mini DisplayPort outputs that are driven by the NVIDIA Quadro P620 (2GB) GPU. Lenovo also has options to replace this panel with either a NVIDIA Quadro P1000 (4GB) or an Intel i350-T4 adapter. We specifically purchased this unit to see the PCIe riser.
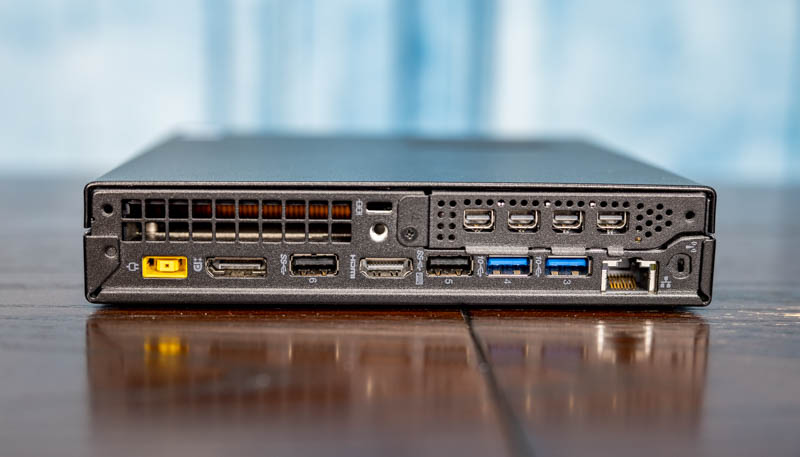
We also have four USB 3 Type-A ports. Some systems of this era used USB 2 ports, so this is a nice upgrade. Two of the ports are USB 3.1 Gen1 ports while the other two are Gen2 ports, just like the M920q and M920x. That means one can use fast 10Gbps devices such as the Crucial 1TB X8 USB SSD and get faster-than-SATA storage speeds. For networking, we can see the 1GbE port. Since this model supports vPro, this is going to be an Intel i219 NIC. In our unit, the WiFi antenna header is not populated since ours did not come configured with WiFi.
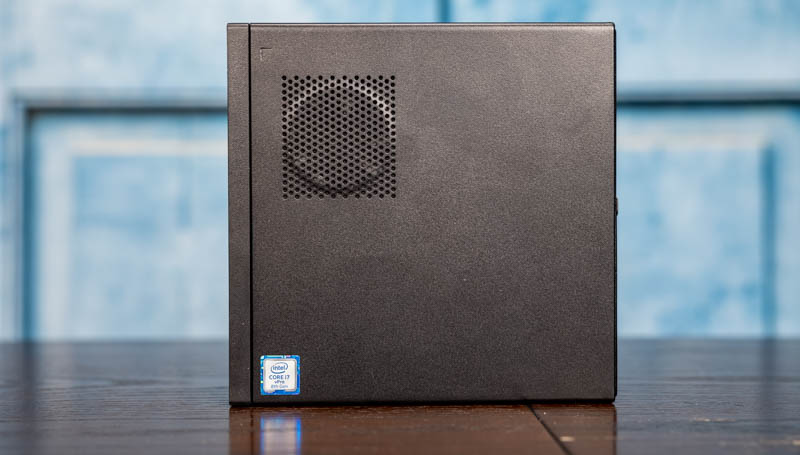
Something that we did want to quickly note is that due to the CPU and GPU combination, the system has a top vent to improve airflow. As a result of this small change, one needs to be more careful of airflow compared to other Project TMM nodes with standard front to back airflow when stacking them.
Opening the system is done via a single screw. Lenovo’s design, unlike HP’s for example, does not retain the screw on the chassis. As a result, one has to keep track of it when working in the unit. The fit and finish for the P320 Tiny are good. For some reason, our lid on this unit had a stronger sticking point that would need to be overcome before the lid would release. This may have just been our particular unit.

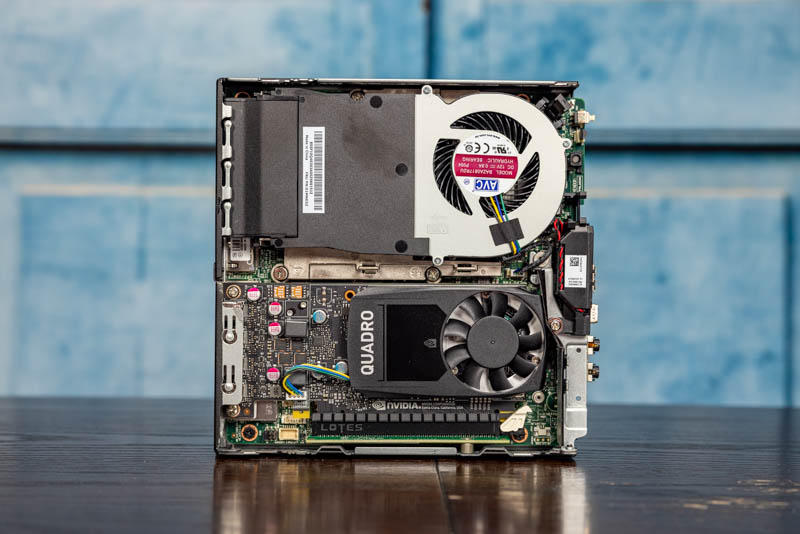
Inside the system, we see the CPU on top, this time with a twist. Unlike in the M920x Tiny or the P330 Tiny, we do not see a heat pipe between the GPU and the main cooling assembly above. Instead, we have what is more of a standard NVIDIA Quadro P620 2GB card. You can compare what we have here to our NVIDIA Quadro P620 Low Profile, Low Power Graphics Card Review. The major difference is that we have a custom rear I/O bracket.
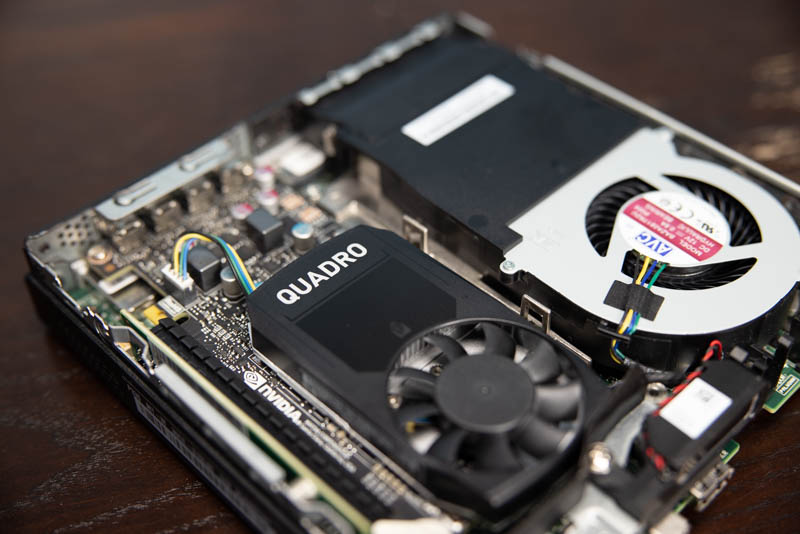
While our unit has the NVIDIA Quadro P620 2GB GDDR5 in the system, that is an option. The GPU is connected via a PCIe riser. This slot can also be configured and ordered with an Intel i350-T4 NIC, a higher-end Quadro P1000 4GB GPU, or there can be nothing here/ storage. For those who are looking for a low-profile expansion slot TMM node, check if you are getting the riser with your unit as they can be hard to find elsewhere.
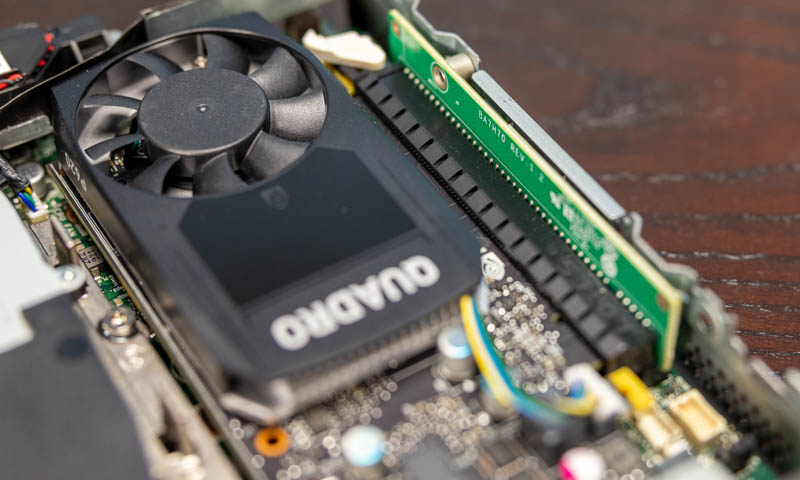
Underneath the GPU we have the WiFi card slot. Our unit does not have WiFi installed, but if they were configured, these came with 802.11ac WiFi + Bluetooth combo cards from Intel. We have been upgrading a lot of our units to WiFi 6 using the Intel AX200. It is much easier to upgrade if there are already antenna wires present.
Lenovo’s design we really like. Once the top cover is off, one can remove the bottom cover by simply sliding the cover off. Underneath, we find the memory and NVMe storage expansion.
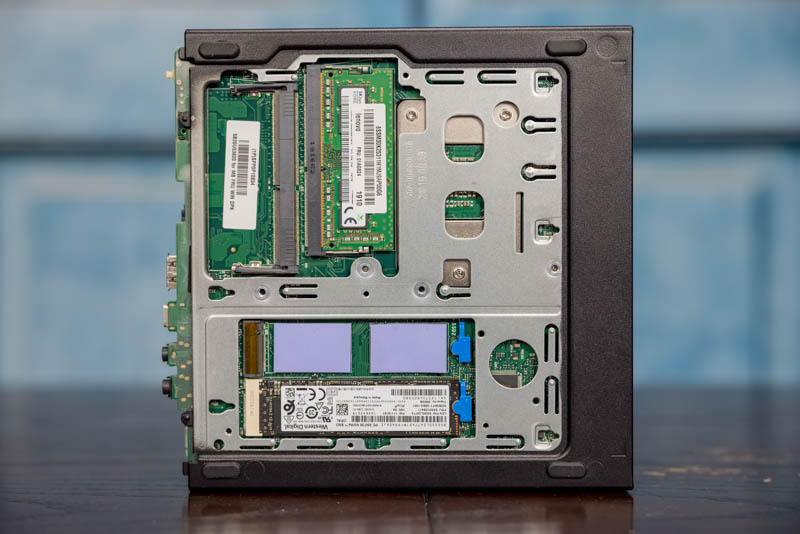
Our unit came with a single 8GB DDR4-2666 SODIMM. We generally prefer getting 16GB units, but this is what came in the system. The plus side is that we can remove this DIMM and use two 32GB SODIMMs. Lenovo has supported configurations for up to 2x 32GB for 64GB. We have tested other units that do not officially support 64GB and found they work, but it is nice to see a unit with 64GB in the specs.
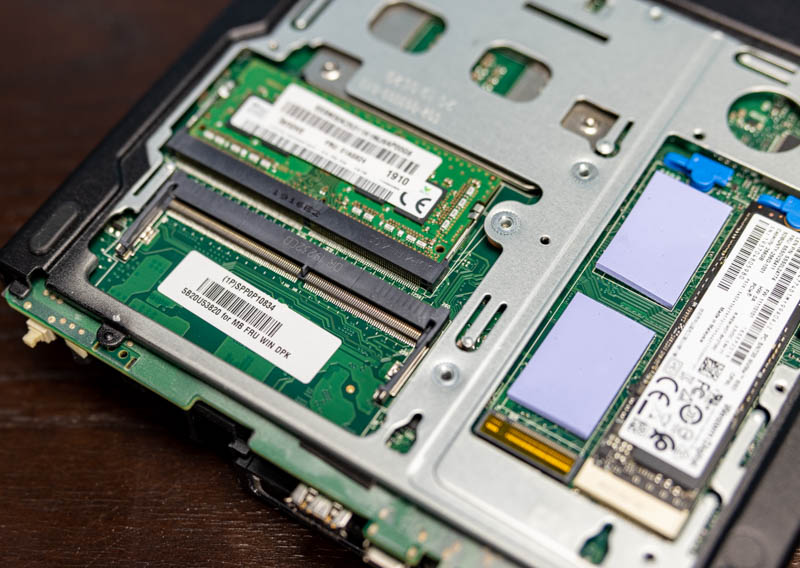
For NVMe storage, there are dual M.2 drive slots. Also, the M.2 retention mechanism is a blue tool-less design as we saw in the M920x Tiny. After servicing a few dozen of these nodes, having everything tool-less is a major design win for us. Our unit came with a WD 256GB NVMe SSD which is an Opal unit. While it is good for a boot drive, it is neither large nor fast so it is something we would upgrade. Then again, as a Proxmox VE, Windows, or other boot/ root device, it is great. Beware though, this is M.2 2280 (80mm) capable but not M.2 22110 (110mm.) This is standard on TMM class nodes, but it is something we have received questions on.
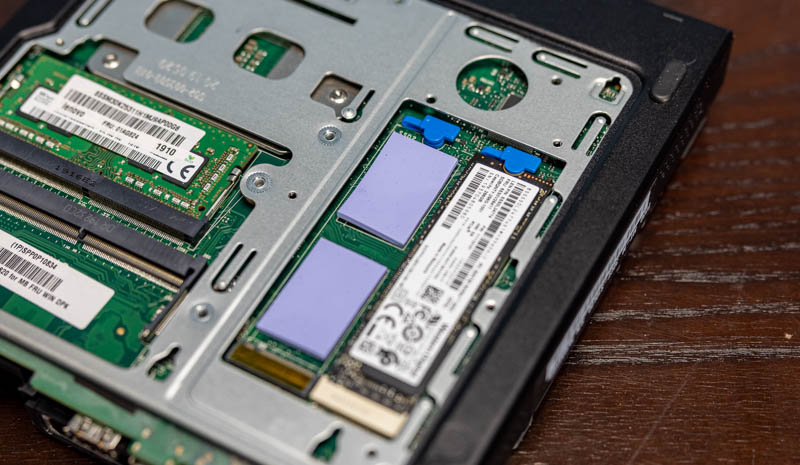
This is one of Lenovo’s highest Tiny systems, and it shows. There are a ton of configuration options and it is quite easy to service the unit without tools. If you have one unit that you need to service, the tool-less design may not be a big deal. When you have many units, it can be particularly important. Lenovo is leading the market in the 1L node serviceability.
Next, we are going to look at the key specs we have been able to pull from a number of different sources to get you some idea of what to expect in terms of configuration diversity. We are then going to get to performance and power consumption.

Thanks for the review.
I was very interested into buying one of these as a Plex server given the capability of the entry level Quadro for the 2-3 family members on my server, but as it would sit in my living room, it sounds like the noise would be an issue…
Any recommendation for a similarly spec’ed system, but quiet? (doesn’t necessarily have to be that small)
Maybe better to assemble one myself?
STH wrotte: “ M.2 retention mechanism is a blue tool-less design as we saw in the M920x Tiny. After servicing a few dozen of these nodes, having everything tool-less is a major design win for us. ”
I have bad experience with these m.2 tool-less blue nightmarish mechanism on several P320 proxmox nodes…after three years in use, there was need to remove nvme and these blue knobs was so tight, that imposible remove them with bare hands and i have nails on long side..so i everytime there is need to use tools to do that.
Thanks for the review and video, really informative. If one was willing to sacrifice the GPU, could the PCI slot be used for a 10-gig Ethernet adapter?
Good review of the system. Any chance providing a pointer to a website where these are sold for the mentioned price?
Amazing! Had been looking at buying some NUC 9s to set up a lab, but one of these popped up on Ebay with the i7-8700t CPU relatively cheap (at least for the UK) and just popped in a Dual 10 Gb card and VMware seems very happy with it all! Am now keeping an eye out for any bargains and should have a 3 host lab with 10Gb connectivity for less than the cost of one loaded NUC9!
2 fringe downers vs the NUC are no support for 110mm drives and no 2nd slot for something like an Nvidia T4 or similar – That said, if I had the money for T4s and licensing lying around I’d also have bought the NUC 9 or something like one of the embedded Xeon Supermicro boxes.
STH wins again :D
I have had one of these for four and a half years now. I have periodically upgraded it as parts got cheaper. It started as an i7-8700T with 16GB of RAM, 250GB M.2 drive and a P630 2GB video card. It now has an i9-9900T with 32GB of RAM, both the 250GB and a 1TB M.2 disk as well as a T1000 8GB video card. I picked up the DVD cage as well as the special cable for a song and then removed and upgraded the drive to one capable of UHD Bluray. Capable of easily playing a UHD Bluray disk and being quiet while doing it makes this the perfect portable theater rig. Paired with an LG PF1500 LED projector, an FXAudio 802C Pro amp, and a pair of Zilch modded RS Optimus Pro 7 speakers I consider this the ultimate setup. For desktop use I can’t see where you could go wrong again. It boots in about 10 seconds, is stunningly fast and very compact, has ports galore, and is capable of running multiple monitors. Of course there is the down side and that is the WiFi card and interface. It is CNVio, the winmodem of WiFi, and essentially removes any option for upgrading the WiFi. I can’t say what I think of this interface for fear of having the post cut. Other than that, pick up one for a song and do a bit of upgrading and you have a decade computer.