In our HP ProDesk 600 G4 Mini guide we will see how this unit stacks up to other units that we have tested in the Project TinyMiniMicro series. This is an 8th generation Intel Core processor platform that offers a lot of modern features in its compact chassis. In our guide, we are going to see the impacts of these innovations and what this system has to offer.
Project TinyMiniMicro HP ProDesk 600 G4 Mini Video
As part of this project, we are releasing videos with some additional looks at the systems and some more candid thoughts. Here is the video for this:
This article will have a bit more since there are some facts and concepts easier to convey using text rather than video. You can also see the full video series using this YouTube playlist. Our suggestion is to open the video and play it in the background to listen.
Project TinyMiniMicro Background
In Project TinyMiniMicro we are purchasing a large number of these devices from different sources. While a standard STH review is of a new product, these TMM nodes occasionally have specs that differ from what one would expect. In all of these pieces, we are going to talk about what makes the nodes unique. We are now well over 20 different nodes to increase diversity. We are testing these on a more circular economy/ extended lifecycle basis to see how they can be deployed after their initial use as corporate desktops.
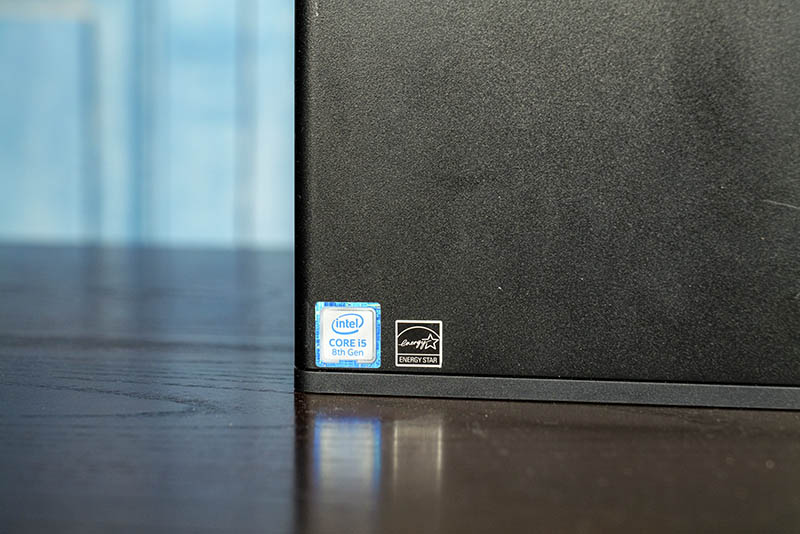
For around $325, we received a node with an Intel Core i5-8500T CPU, one 16GB SODIMM (16GB total) for RAM, and a 256GB NVMe SSD. We even got an embedded Windows 10 Pro license which would have cost us around $140 alone.
Given our recent Dell OptiPlex 3050 Micro Project TinyMiniMicro Guide we think this was a much better offering on a value basis.
We are going to go into the hardware overview, then into the key specs. We are then going to talk a bit about performance and power consumption before getting to our lessons learned from these units and our final words.
HP ProDesk 600 G4 Mini Hardware Overview
The chassis itself is a fairly standard design for the older ThinkCentre Tiny series. It measures 177.04 x 175.01 x 34.29 mm (6.97 x 6.89 x 1.35 in) which means it is around 1L like the other systems in this series.
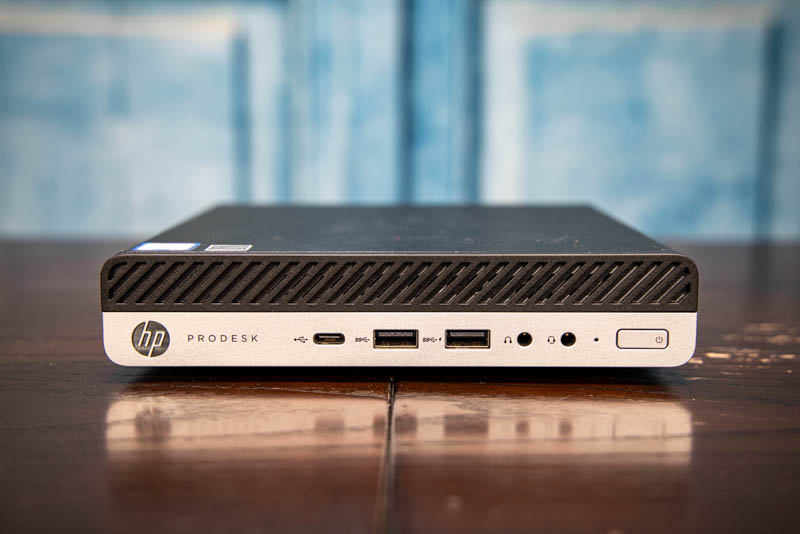
In the front of the chassis, we headset and headphone jacks as well as three USB ports. There is a USB Type-C 3.1 Gen2 port. We also get two USB 3.1 Type-A ports where one is Gen1 and the other is Gen2. This is a massive bandwidth increase over the previous-gen systems with 10Gbps USB. It is also nice to have three front USB ports including the Type-C port. Since there is so little room in the chassis for expansion, most of the expansion will come via USB so having higher-performance USB and more ports is a big deal.
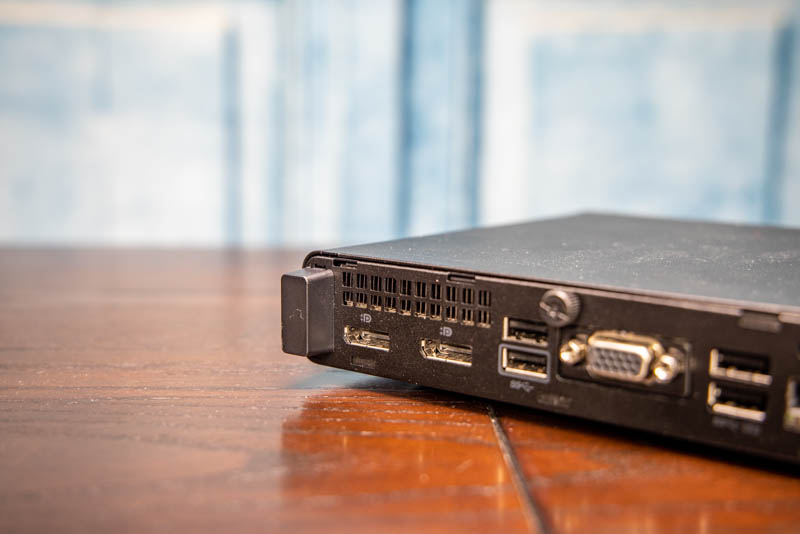
On the rear of the unit, we get two DisplayPort 1.2 outputs as standard. Our unit also has an optional HDMI port. This slot can also be blank, VGA, DP, or HDMI. We get four USB 3.1 Type-A ports on the rear. Two are Gen1 and two are Gen2. HP does not label these well which is something we saw in our HP EliteDesk 800 G4 Mini TinyMiniMicro Guide as well.
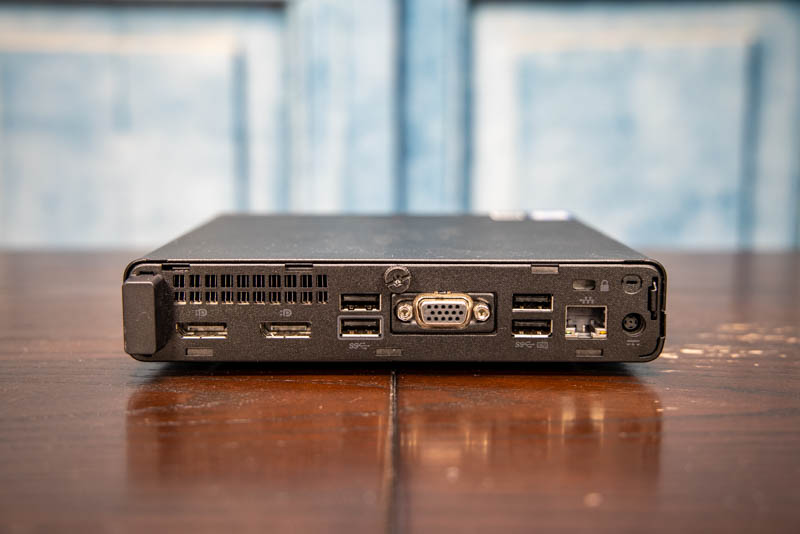
For networking, we get an Intel i219LM which is the PCH integrated NIC. Some of the lower-end units utilize Realtek NICs, but the ProDesk 600 G4 Mini uses a higher-end NIC along with the Intel Q370 chipset.
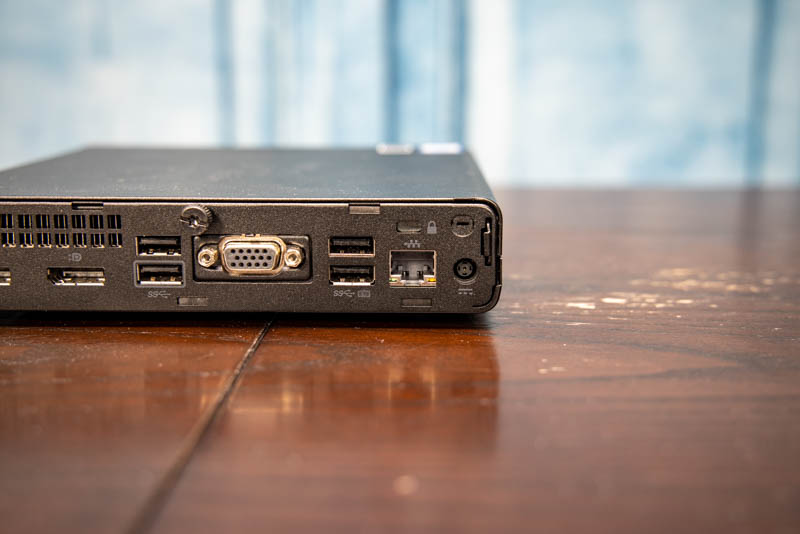
HP also uses a WiFi antenna that is integrated into a small “nub” on the rear of the chassis. For the purposes of Project TinyMiniMicro we see units with this nub also include pre-wiring for a WiFi M.2 NIC, even when we purchased units without WiFi cards. We also like that this keeps the antenna in a fixed space so we can stack them easily. External antennas using SMA connectors found on Dell and Lenovo systems are easier to find larger antennas for, but tend to make it slightly more difficult to stack than this HP solution.
Inside the system, we see the CPU on top and the expansion slots below.
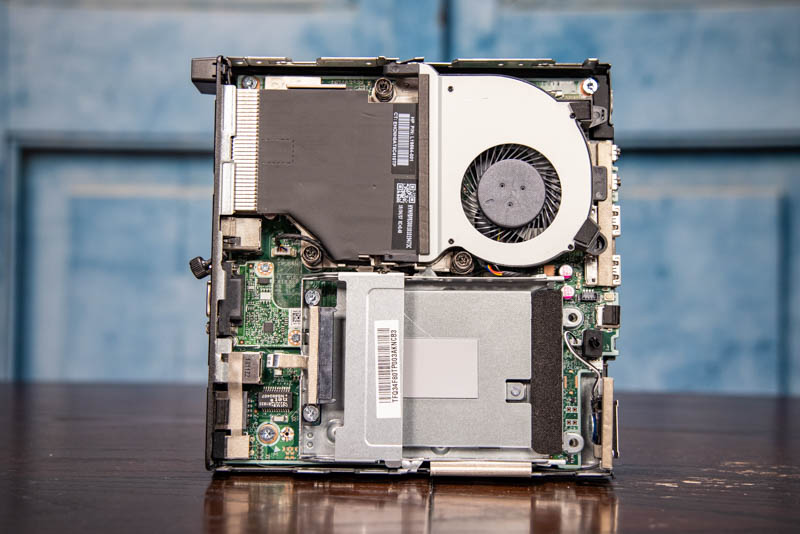
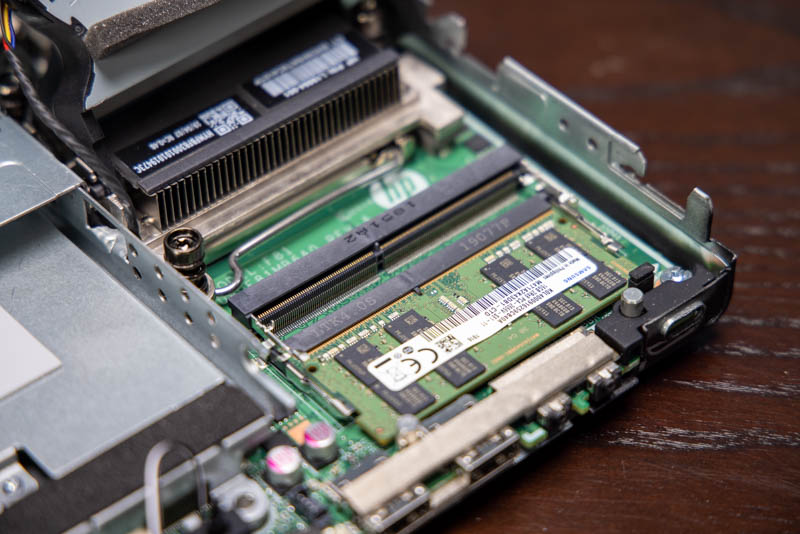
This system uses HP’s typical flip-up fan to expose the SODIMM slots. Here we can see two DDR4 SODIMM slots. Our unit came with a single 16GB DDR4 SODIMM which makes upgrading to 32GB very easy.

There is a 2.5″ drive tray system that sits in the chassis. Unlike some competitive solutions, this is not tool-less. There is still a peg system to secure drives. Our unit did not come with these drive pegs so we need to source them elsewhere or use something like Velcro on a SSD for this carrier. As we are going to see soon, the Velcro option has another benefit.
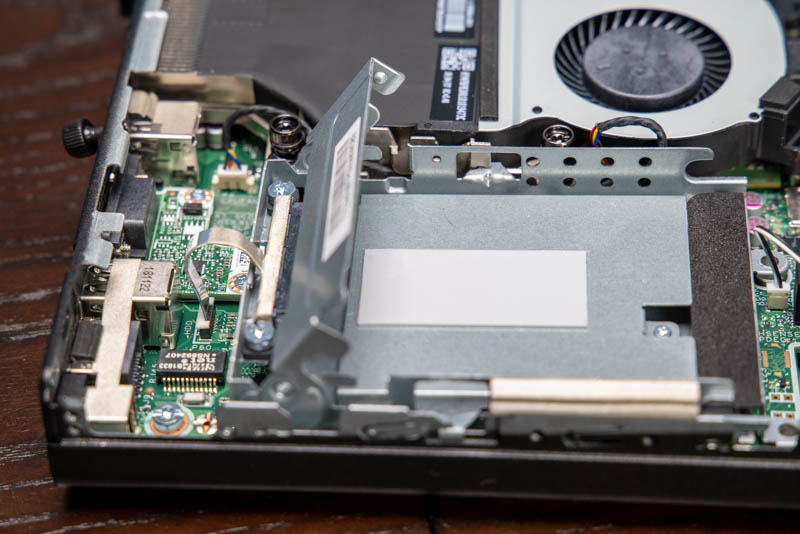
We also wanted to quickly note that this system utilizes a small ribbon cable to deliver power and data connectivity to the SATA drive. In servicing this chassis, one should always be mindful to check that this cable is fully inserted when re-installing the 2.5″ assembly. This occupies less space than a hard 2.5″ connector, but it introduces a check when servicing.
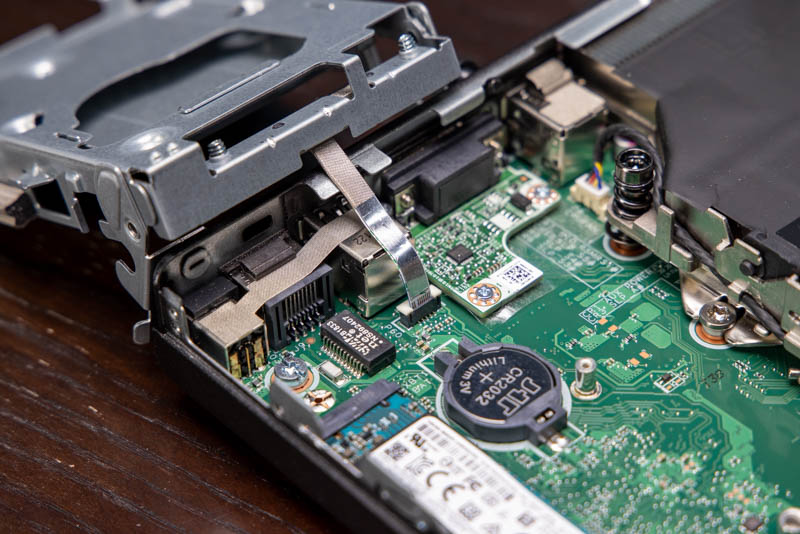
Under the tray, we can see the expansion area. Here we have two M.2 NVMe SSD slots.
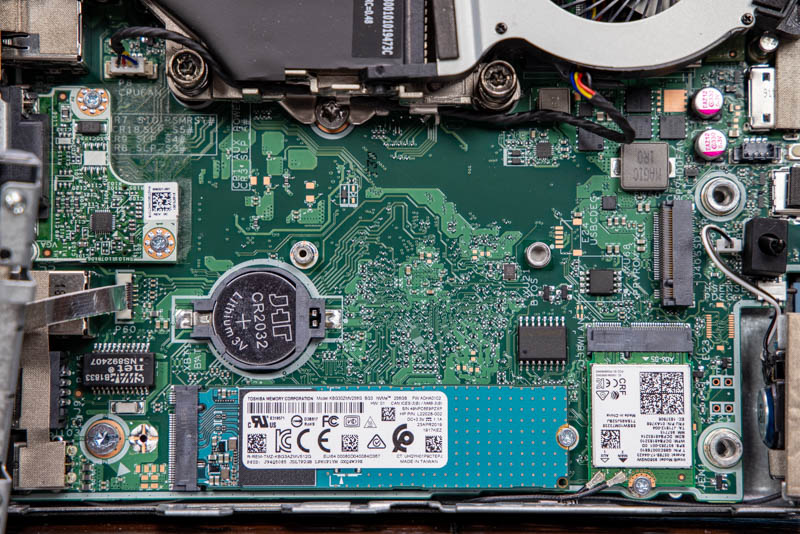
One of ours has a DRAM-less Toshiba BG3 SSD installed. We are going to quickly note that if you have a second M.2 SSD installed, the 2.5″ carrier will interfere with the drive. One option is to remove the metal 2.5″ housing completely.
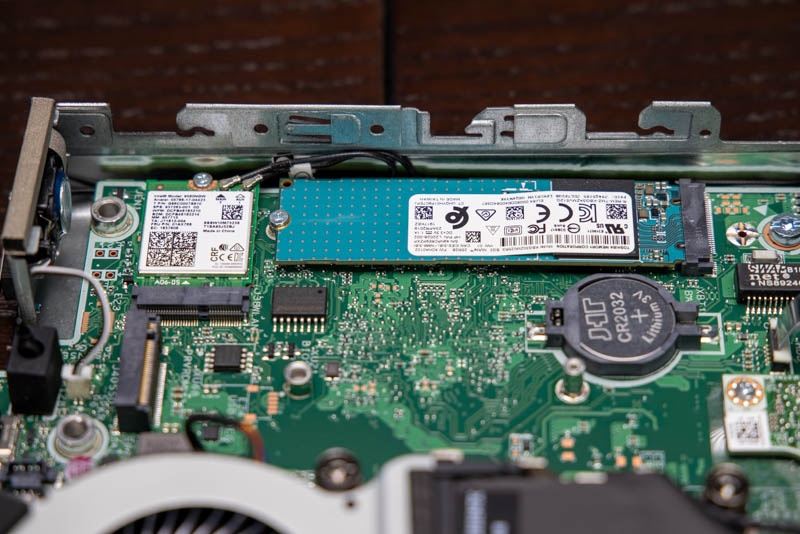
For WiFi, this is an 802.11ac generation machine. The most popular WiFi solutions we are seeing in this chassis are the Intel 1×1 and 2×2 solutions while some had Realtek solutions. Of note, the Intel 9560 802.11ac 2×2 with Bluetooth M.2 combo card had both vPro and non-vPro options listed in the spec sheet. Ours did not have vPro support which we will discuss later.
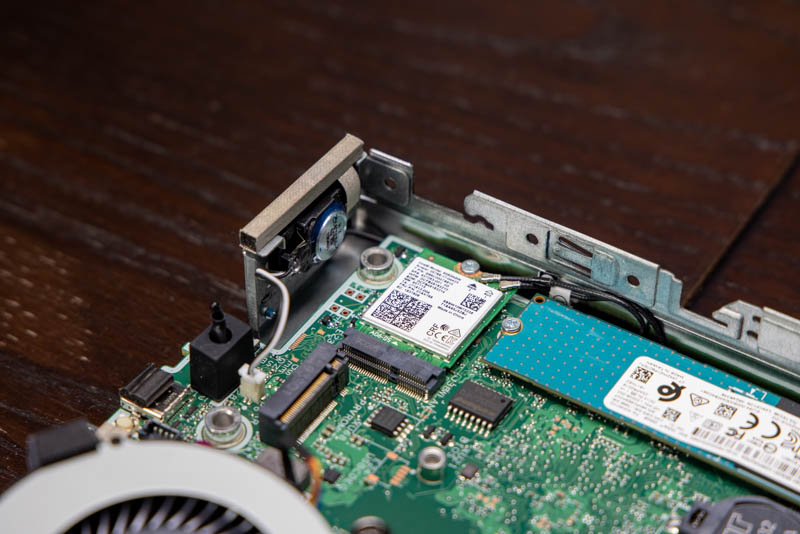
Something we wanted to show on this unit is the PCB for the optional VGA port on the rear. This small PCB is held in by two screws and can be replaced with other options in 1-2 minutes. If you find the perfect solution, but want a HDMI port, third display port, serial port or the like, this is the type of solution that can help customize. We always suggest looking at what you are getting. Many will not need anything in this optional slot, however, if you do want to customize, this is an easy swap.
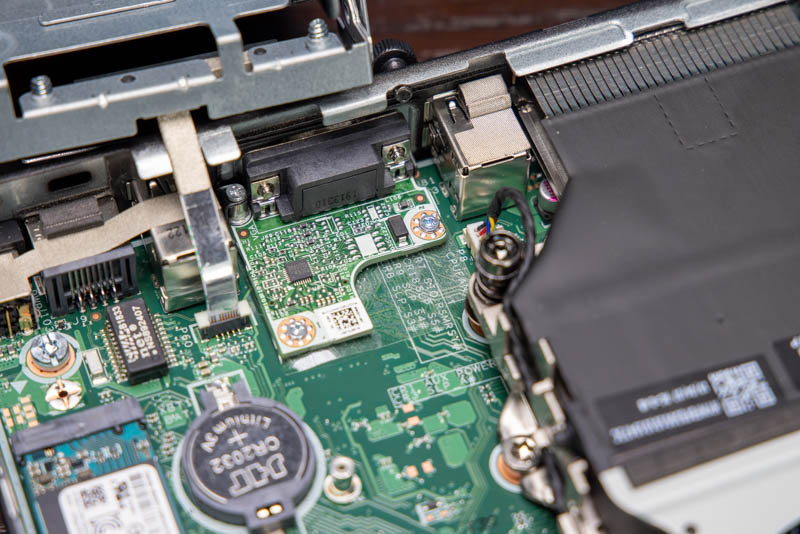
Overall, this system has a great set of features for Project TinyMiniMicro. The 2.5″ carrier feels like it is from a much older system given how Lenovo and Dell innovated on servicing even before the G4 Mini arrived.
Next, we are going to look at the key specs we have been able to pull from a number of different sources to get you some idea of what to expect in terms of configuration diversity. We are then going to get to performance and power consumption.

I’m too lazy to look for the 400 and 600’s, but at least the 700 and 800 lines have a usb-c addon card to replace the dp/serial/hdmi options. You then have one usb-c in the front and one behind.
Hp seems to be the only TMM allowing some flexibility.
On the second page, the second heading says “Dell OptiPlex 3050 Micro Performance and Power Consumption” when this article is about HP ProDesk 600 G4?
Also, would you mind looking into the Acer Veriton N series? They don’t get much coverage and it should be quite comparable to the “big three” machines.
I have bought the ProDesk G4 600 SFF and find it hard keeping it cool under low load. Maybe the smaller variety is better at cool due to reduced internal volume and better airflow, IDK. Just a note.
I’ve got the same machine with the i7 processor and running proxmox on it and would like to make a memory upgrade. Running dmidecode tells me that the bios reports supporting a max of 32G of ram but you seem to have got it to work with 64G, is it possible to get details on how you managed it? Would be great to know if it’s possible before I got out and buy new ram modules. Did you just add 2x32G or was there something like a bios upgrade? Thanks!
Well? What happened here?
Hi. I just removed my SATA drive and tray from an Elitedesk 800 G5 Mini. The manual says to “Lift the connector latch on the system board (1), and then disconnect the hard drive cable using the pull tab on the cable (2).” I can see the connector clearing in your photos. I tried many ways and could not get the latch to release. I did manager to remove the cable anyway. But I doubt I could re-insert it without getting the latch to open. Do you have any idea/description details on how to lift the latch? It is a white plastic thing sitting atop a black connector that is soldered to the MB. Thanks!
David.
As Im a year and a bit late. You likely worked this out, by now.
The white part of the connector is pulled straight upwards. It is not the flipping kind.
Pull up to release. Push in the cable. press down to lock the cable in place.
As an addendum, to this article.
On the Prodesk 600 G3s, at least. Even though they are not listed as having vPro support. With a vPro CPU installed, VPro works exactly as it normally would on a stickered vPro machine.
It is the 400s that do not have all the vPro bits.