Today we are going to do a main site post on how to fix an issue whereby the Ubuntu installer finishes but upon reboot only a blinking cursor and black screen is seen. This has happened to many users on several occasions so we thought we would take a quick look at a somewhat common installation issue and a quick way to fix it. This guide was prompted by a forum post on this subject recently. We figured it was worth doing a quick guide on.
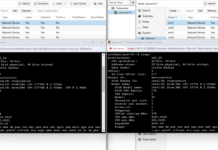
The problem occurs after installing Ubuntu and removing the installation media. At this point, the machine reboots and one sees a blinking screen with only a cursor as can be seen below:

Generally, the reason this occurs is due to the Ubuntu installation placing the GRUB bootloader on a partition that is not being booted to. This can happen for a variety of reasons.
One great example of where this happened recently was when we installed Ubuntu using a Zalman ZM-VE300 in dual mode. We will have a review of the Zalman unit shortly but the device has a mode that allows a hard drive to emulate both an optical drive and have a normal hard drive volume accessible.
In that case, the automatically configured Ubuntu installation managed to install the GRUB bootloader on the USB hard drive. When the installation USB device was removed, the machine no longer had a GRUB instance to find.
Similarly, we recently had a user that had his GRUB installed on a different partition that his server BIOS was not configured to boot from. As a result, the machine did not find the installation until BIOS settings were changed to boot from the correct drive.
Here are a few quick tips for remedying the above blinking cursor after Ubuntu installation issue:
- Remove all unnecessary drives. Ideally you should only have a non-writable Ubuntu installation ISO and a target boot device installed.
- Install Ubuntu from the non-writable media to the target boot drive
- Remove installation media
- Attach any required drives
- Ensure that the original target installation drive is set up as the primary hard drive boot option in BIOS
- Ensure that the original target installation drive is setup as the first boot device option in BIOS. You can move this down the priority list once it is confirmed working.
The above may not be the fanciest guide out there, but it will solve this problem a vast majority of instances where it is seen. Hopefully these steps will help users quickly troubleshoot the blinking cursor after Ubuntu installation issue.
If you do have any other tips/ tricks feel free to comment below or in the forums.


I had this happen a couple of times while installing open stack using crowbar. What solved it for me was changing terminal windows ie alt + f2,f3,etc… So everything installed fine but I needed to change terminals at first log on. It drove me nuts! Hope this helps.
Thank you for this article. I should have guessed the GRUB boot loader was on the USB stick when I realized the system only boots with the USB stick plugged in.
But 1) I didn’t think the system boot information (GRUB could be installed to removable media! Not to mention the install media device…) and 2) If the system would say something similar to not able to find the GRUB or anything it would have saved me hours of work.
I’ve installed Ubuntu countless times (Although more often on VMs which may blanket the issue) and never ever had these issues.
Thanks a ton for pointing out the issue at play!
Why does it automatically put the GRUB bootloader not on the same drive it installs Ubuntu? Seems like a bug to me. Of course I don’t want to install the GRUB bootloader on a USB stick. I’ve been tearing my hair out over this all day.
Thanks a ton man.. I was going nuts for over a week with this issue. Installed/re-installed different ubuntu versions on different hardwares but with same result. And this little trick you shared worked. Thanks once again. cheers! :)
Alt+F1 worked for me.
Thanks! nailed it !
Awesome mam it worked
A more elegant way of fixing this problem is right protecting USB drive with Diskpart