Today we have a high-end workstation, the Dell Precision T7920 on our review docket. When Dell says this is a high-end workstation, they mean it. The Dell Precision T7920 can scale up from a single processor and graphics card to dual CPUs, multiple graphics cards, network options, and storage. What is more, Dell’s engineering means that all of this is housed in an easy-to-service tool-less chassis. In our review, we are going to discuss what makes this system different.
Dell Precision T7920 Workstation Overview
In our Dell Precision T7920 review, we are first going to discuss the hardware looking at the system’s exterior features followed by the internal features. Most users will only see the exterior of these systems, but what is inside is what differentiates the system.
Dell Precision T7920 External Overview
Taking a look at the Dell Precision T7920 Workstation, it is a large tower. Specs put it at 17.05” x 8.58” x 22.29” or 433mm x 218mm x 566mm. Weight is 45.0lb or 20.4kg. It is so big and so powerful, that Dell even offers a 19″ rackmount kit as an option for the workstation. Two handles at the top of the case aid lifting the large heavy case to the desk. At the side, a cover release latch gives access to the T7920 internals.
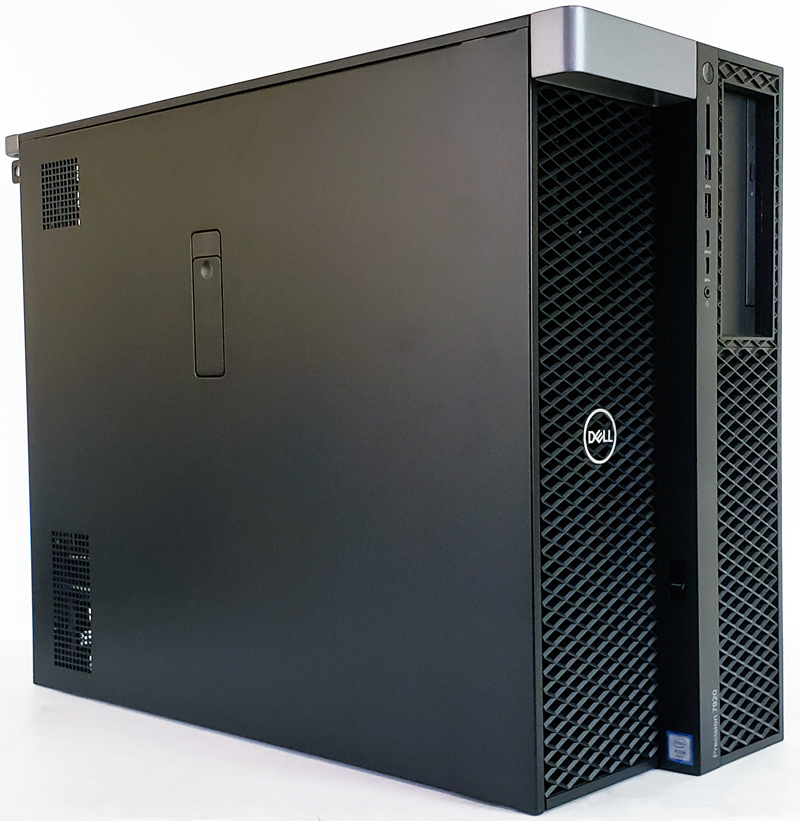
Here we are looking at the front and back of the Dell Precision T7920 workstation.
At the front we find:
- Power Button
- SD Card Slot
- 2x USB 3.1 Gen 1 Type-A ports
- 1x USB 3.1 Gen 1 Type-C port with PowerShare
- 1x USB 3.1 Gen 1 Type-C port
- Universal Audio Jack
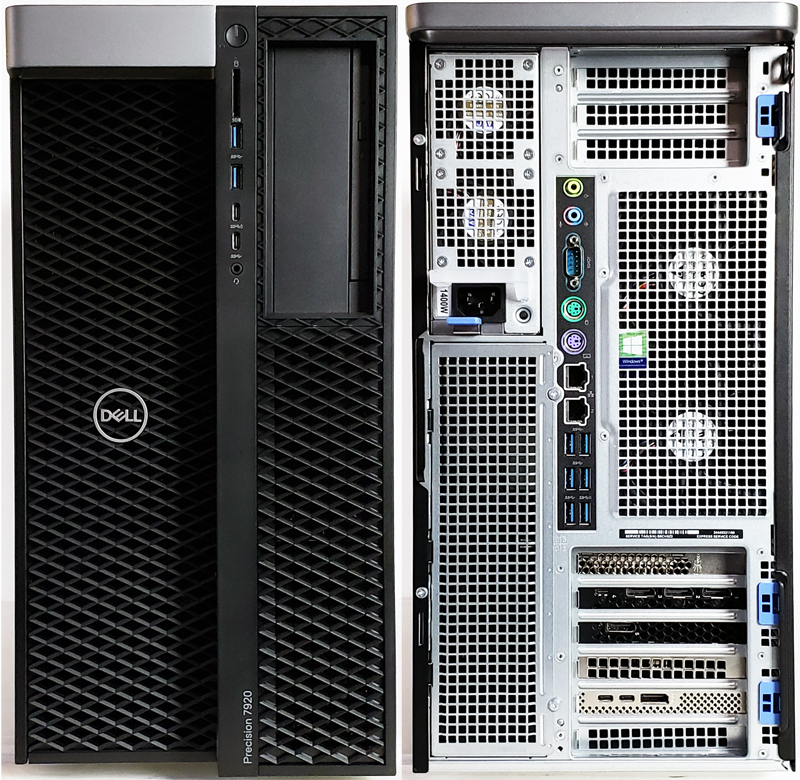
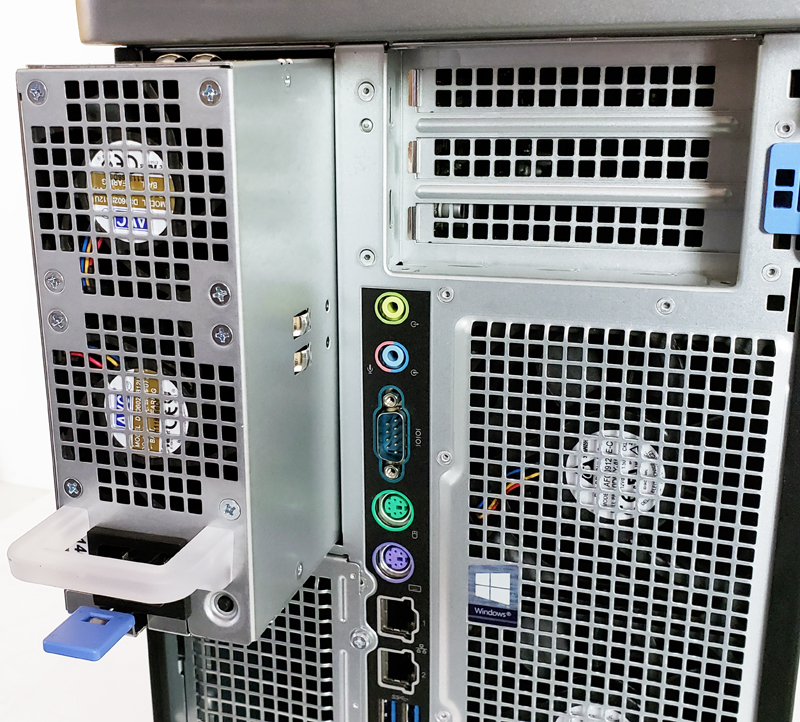
At the back of the Dell Precision T7920 Workstation, we find:
- Audio Line-Out port (via Realtek ALC3234)
- Microphone/Line-In port
- Serial Port
- PS/2 Mouse/Keyboard Port
- 2x 1GbE Network Ports (Intel i210 and i219)
- 5x USB 3.1 Gen 1 Type-A ports
- 1x USB 3.1 Gen 1 Type-A port (with PowerShare)
External qualities aside, this is essentially a desk-side server. The internals are far more interesting.
Dell Precision T7920 Workstation Internal Overview
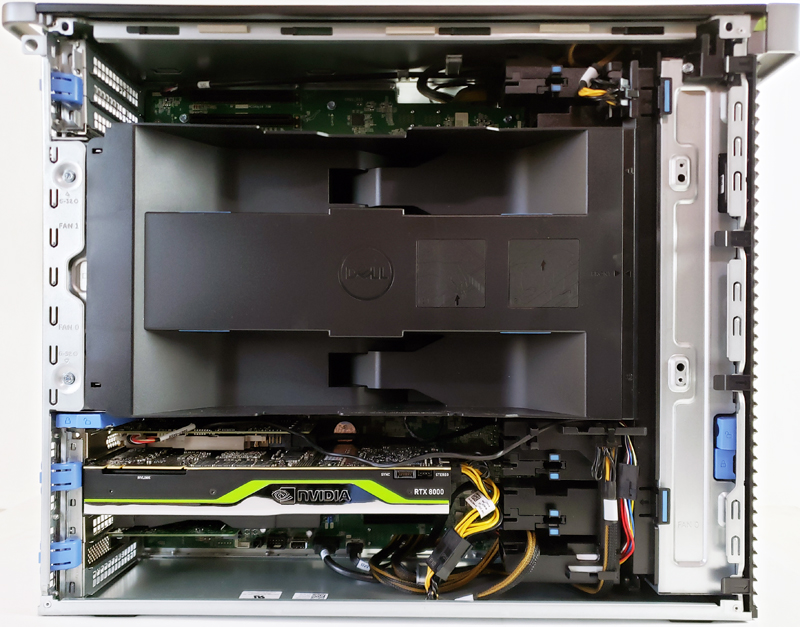
With the side cover off we see the large air shroud that covers the CPU and RAM area, banks of fans at each end and an additional fan in the center provide air-flow through this area. Of note are the blue tabs are seen throughout the inside, these are tool-less locking tabs that allow for easy removal of components such as PCIe devices and fans.
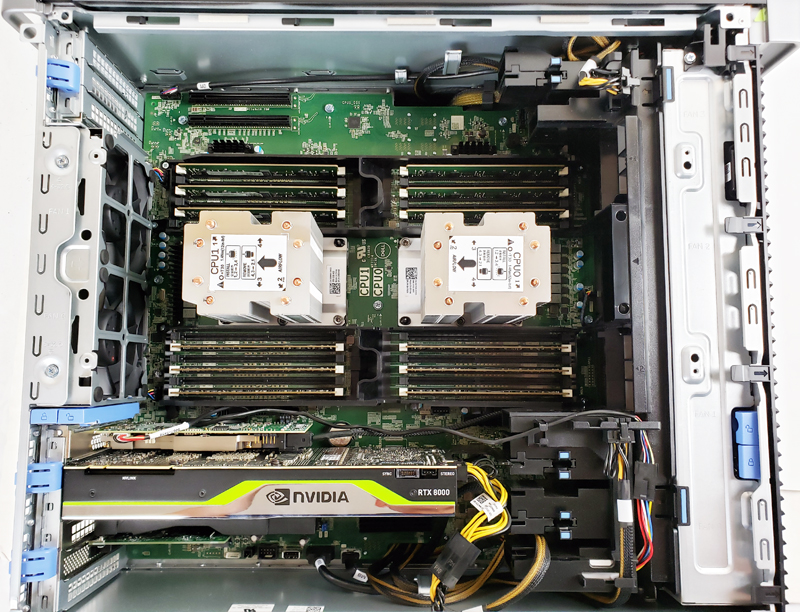
With the air-shroud removed we can see the CPU and RAM locations. Dual Intel Xeon Scalable processors are mounted below large heatpipe heatsinks. We wanted to point out here that the heatsinks do not have fans, instead, these passive assemblies rely on chassis fans to provide airflow. That allows Dell to make cooling redundant. If you were to compare this to many boutique workstation providers, those companies use active assemblies that are vulnerable to a fan failure causing an overheating event. While this is a small detail, the Precision is, in many ways, built like a server. This cooling solution is a great example of that.
Each socket is flanked by a platform maximum of 12 DDR4 DIMMs each (24 total.) PCIe cards are located on either side of the centerline CPUs and memory.
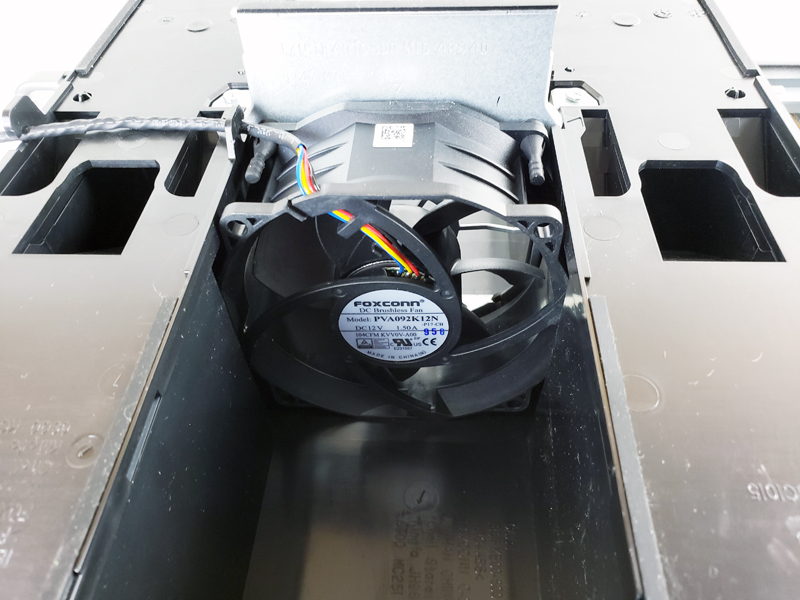
Here, we also gain access to the cooling fans. Removal of these fans requires a screwdriver. Fans rarely die these days, but that is an area for hot-swappable improvement.
Inside the air-shroud, we find the main cooling fan that fits between the dual Intel Xeon Platinum CPUs. The power cable we see coming off the fan connects to the motherboard. We found the cable length is short and does not allow one to remove the air-shroud and move to the side without disconnecting the power cable, it can be a challenge to re-plug back in.
The blue PCIe locking tabs are simple enough to use, push to the left and flip-up. PCIe cards can then be added or removed with ease.
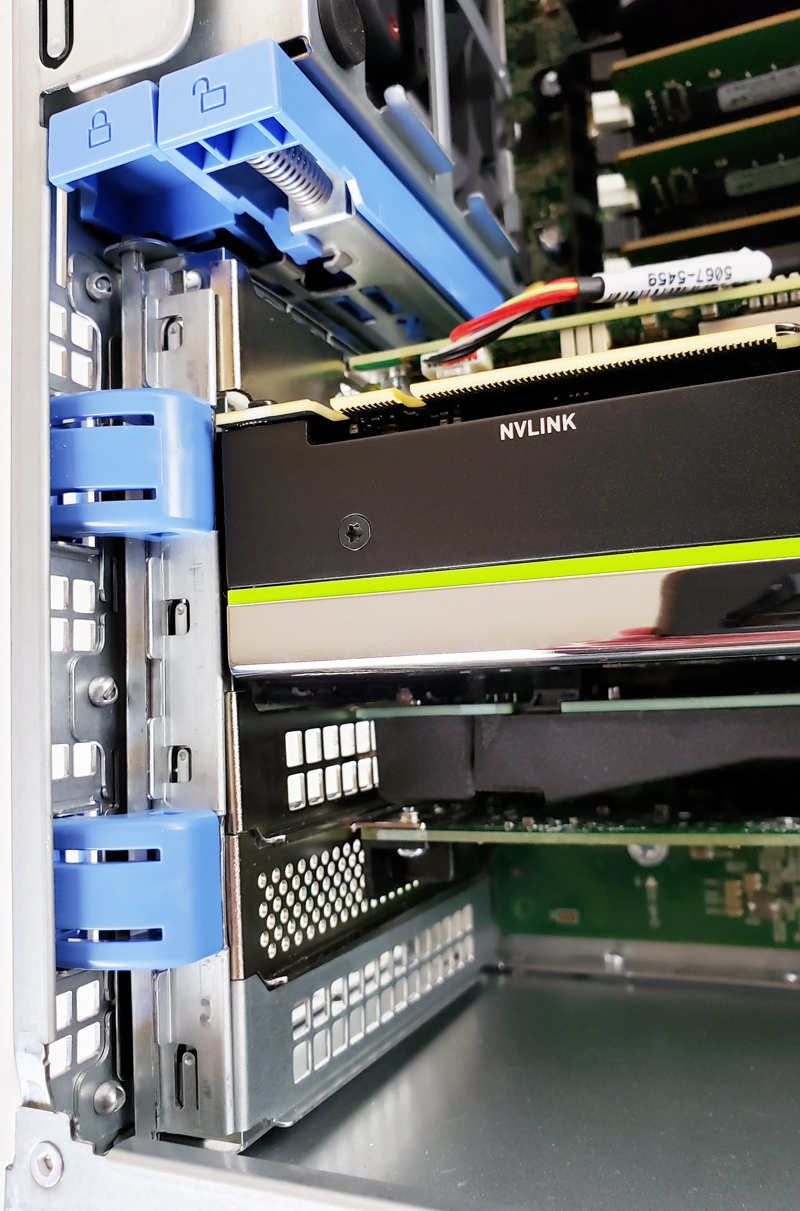
PCIe Gen3 slots in the system with two CPUs installed are:
- 4x PCIe x16,
- 1x PCIe x8 (open-ended)
- 1x PCIe x16 (x4 electrical)
- 1x PCIe x16 (x1 electrical)
One loses PCIe capacity with only a single CPU. For example, one loses two of the PCIe x16 slots. That is a reality of Intel Xeon systems so you will want to configure two CPUs if you want to use all of the PCIe lanes.
A single 1400 watt 80Plus Gold PSU supplies power. This unit can be swapped using a blue locking tab that allows for easy tool-less service.
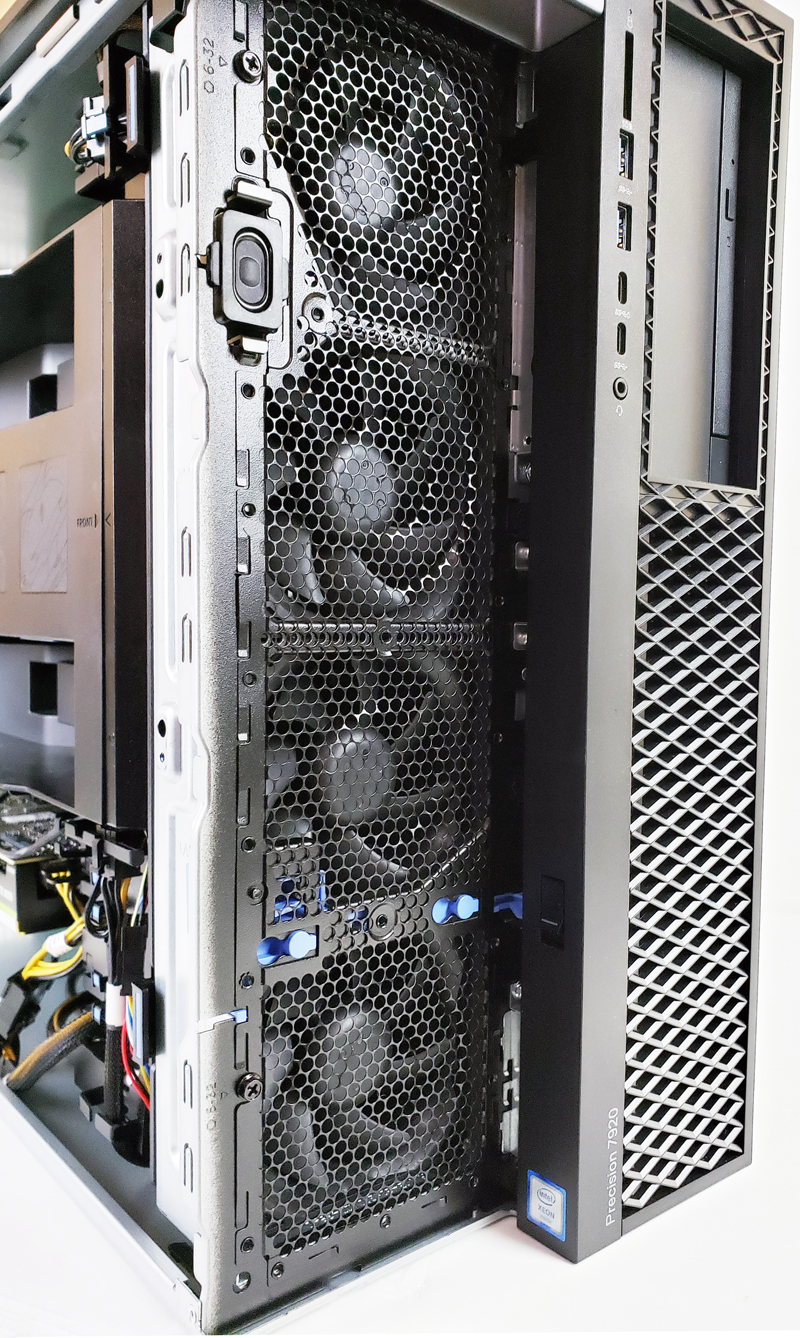
At the front, we find a large bank of 4x fans to cool the entire case. We also spot a speaker on the left side for system audio. This, however, is not a speaker you want playing music.
At the front, the left bottom is the storage cage which can be configured for different storage needs. As we can see our unit came with 4x 2.5” 4TB drives. Dell is more than happy to configure the system with SSDs as well.
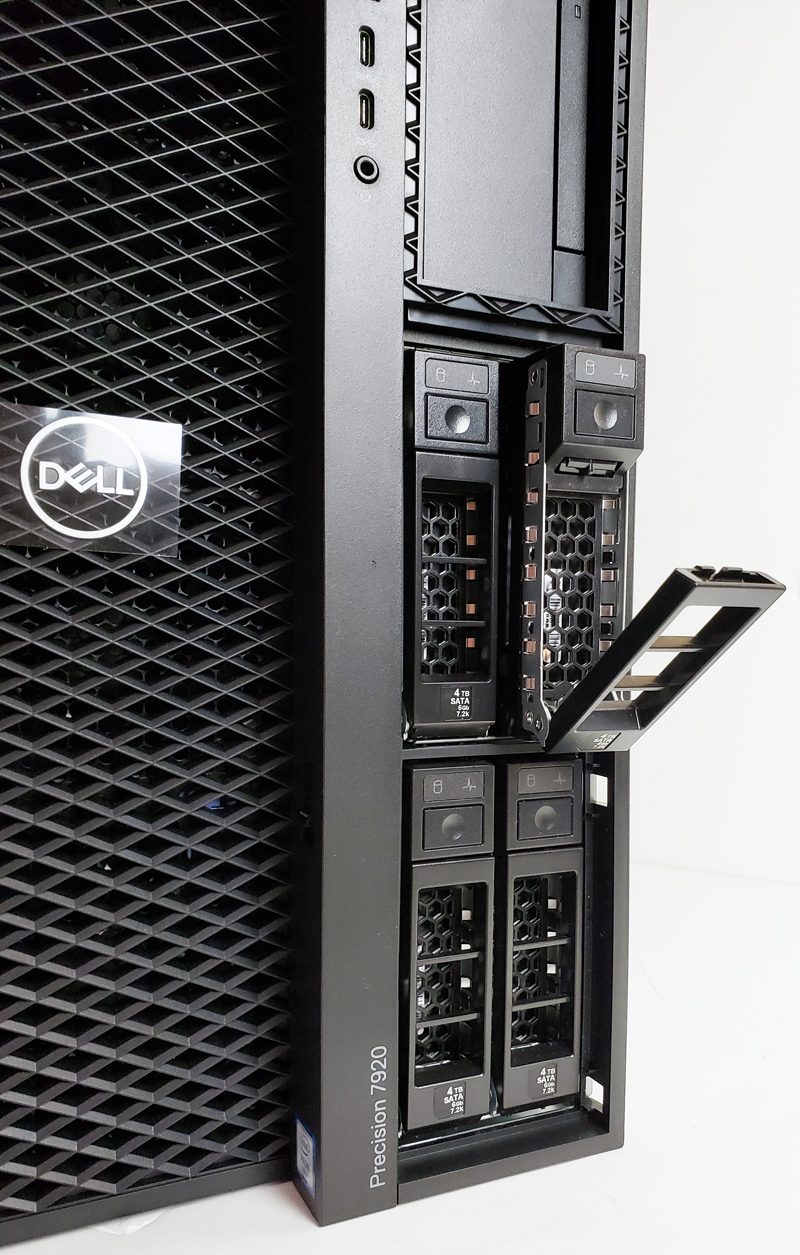
If you are wondering why the Dell logo above looks so shiny, we left the packing tape on and did not see it in the photos until the unit was sent back.
Removing the right-side panel we find another compartment. While the motherboard and expansion cards are in the main compartment, the Precision T7920 has a compartment dedicated to features like storage and power supplies. This is a great way to segment the case while allowing for a compact and modular design.
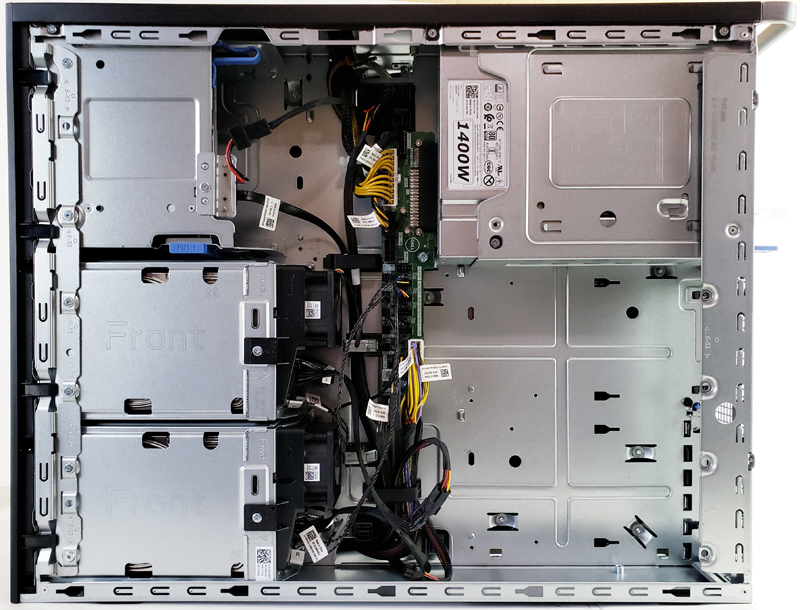
Additional storage locations offer more flexibility in the platform. Providing power cables to all the included components can be a challenge with workstations. The Precision T7920 uses an accessory power PCB for all the various components to plug into. This removes cabling from the main area of the case and allows for better air-flow and accessibility. This is another great design point.
Before we get on with our testing, let us look at the BIOS and software and move on to our testing.

I’ve got one of these in the office – great machine, and I love the layout of the motherboard (lenovo is also using a layout like that now too), but theres some things to look out for depending on what you’re using it for and how you’re using it:
1- if you have nosy coworkers who like looking at the hardware in the chassis, just show them the machine before its turned on, since opening the chassis during operation will shut the machine down while triggering a chassis intrusion alarm. At least on my early model, it also bugged out the dell support assist feature so it permanently thinks a fan is broken, when that fan was never installed on that model.
2- in order to keep the overall width of the unit within reason for product dimensions and cooling reasons, the clearance for cards is roughly equivalent to a 3U server. In places, that is actually slightly less, because the side panel latch has an internal bump running the height of the server. Tall cards like some consumer GPUs will not fit in this case, nor will short-length consumer GPUs that have outward/side facing (as opposed to front facing) pcie power plugs, as the bump will be in the way of the cable. Long standard height consumer GPUs with side facing pcie power plugs will fit, but you might have to squeeze the cabling a bit
3- There were 3 included pcie 8/6pin cables. If you are using consumer GPUs, you may need to buy additional cables from dell or use splitters. At the time I bought my unit, dell did not have the cables for purchase individually, but I managed to cludge an equivalent cable together out of adapters, since the PSU breakout board’s connectors for the pcie power plugs have the same pinout as (cont in next)
3 (cont)- the plug would on the pcie card as well.
4- If you want NVME support, you’ll need an adapter. You can bifurcate the lanes, but not explicitly – there is a setting in the bios (i forget which, but it has to do with pcie ssds), that you can toggle. Out of the box it was set to a setting where it would not detect dell’s own quad nvme adapter card, and dell’s enterprise support doesn’t have enough experience with those cards (or even the product specifications on hand) to do more than manually walk through trial and error experimentation of figuring out how to use the card in this machine. Turns out its that bios setting.
5- If you need audio for the work you intend to do on this machine and are expecting to get by with the motherboard audio since its usually ‘good enough’ on highend prosumer motherboards, you will be disappointed. Get a soundcard for this – I didn’t need amazing audio or anything, just audio good enough to listen to people speaking during meetings and checking the contents of files I was processing or working with, but the built in audio was really bad.
It should be kept in mind that my forewarnings are based on a very early unit (I got it within a month of launch, since I needed something more powerful right then in order to complete a project)
Despite these issues I encountered, I still very much like this machine, and they wont be problems for everyone.
Thanks for the info Syr. I am curious about your point #3 — I have avoided Dell workstations because they only offer 8/6 pin PCIe power connectors, while most consumer GPUs (e.g. 2080 Ti) require 8/8 connectors. It would be great to learn more about how you figured this out.
Dell, HP and Lenovo have very nice laptops, their workstations… not really value for money
Hi Michael – to clarify what I had meant by 8/6 was that the cables included with the system supported the full 6+2 connector, but only 1 per cable. The system came with 3 such cables pre-installed, but had 4 available headers, thus I was able to determine the pinout by simply matching the cables on the card side to the PSU breakout board side. It helped that Dell used standard cable color codes (yellow for +12 and black for 0).
I’m using 2x 1080ti cards in the system with 2x 8-pin plugs on them for a total of 4 plugs required, so I had to cobble together a cable out of adapters to power the second plug on the second card from the 4th empty plug on the PSU breakout board.
Syr–thanks for the reply! So it sounds like there are a maximum of 4 x 8 PCIe plugs available. That’s enough for 2 consumer GPUs. A 3rd GPU may not be possible.
If Dell went for AMD route, a system with 2x EPYC 7352 would be much cheaper with more PCIe lanes.
How well did the Thunderbolt work?
Thanks for the review. Also curious about the Thunderbolt support.
I hope this will help someone who is considering the purchase of a Dell workstation make a better decision. I loved my old T7600 – it worked perfectly for close to 6 years. There was no question in my mind when I replaced it – I was going with a Dell Precision Workstation. Since purchasing the T7920 in the summer of 2018, Dell has replaced it twice and replaced several major components in those replacements.
Today, a Dell level 3 tech told me they have known of systemic issues with the T7920.
I have Dell 7920 Workstation , purchased in March 2018. Although , There was a problem in the begining , now working OK. Can some one advise , how to add Thunderbolt card ? It does not have TB header . Although a area is marked TBT , but no socket on it.
In fact i see the same unsoldered spot as shown in one the photos ( when Zoomed out) . However , at the back i see the card with TB ports.
$25,000 machine. With a megaraid 9460 NVME Hardware Raid Controller alternatively configured with a quad of garbage 4tb 7.2k sata rust disks. LOL wtf? huge fail!
Plus why in the world throw a single garbage nvme on the mainboard and call it a day?
If Dell is watching, probably want to fire the guy that sent out your hottest high end professional workstation for a performance review with THAT raid controller not running a raid10 of nvme’s. You could have smashed 7000MB/s easy. PLUS on RAID10 redundancy.
@Syr Why bifurcate lanes and run NVME’s in software raid? You’ll soak the CPU and effectively turn a $25k workstation into a very expensive hardware raid controller.
Unless you like your CPU busy doing things a CPU shouldn’t busy itself with doing?
Dell implemented that thing with Secure Boot that if you have non-Dell GPU, you’ll have to turn it off and on multiple times with no guaranteed result. Which is honestly annoying. No wonder it’s cheaper on eBay than HP or Lenovo. I bought one and had to return it (I believe it just died due to endless powercycles). Should’ve paid slightly more $ for HP or Lenovo thus saving time and emotional energy.