A few years ago we discussed ways to backup Promox VE virtual machines. Promxox has an extremely simple to use backup feature that can get your backups running in only a few clicks. In this guide, we are going to show you the basics.
If you want to use pve-zsync for ZFS backups, we have older guides at: Automating Proxmox ZFS backups with pve-zsync and Automating Proxmox VE ZFS offsite backup (rsync.net).
Backup Proxmox VE VMs and Containers Easily
The first step in making a backup is to have a virtual machine and also storage for the backup. We are going to assume you have a virtual machine already deployed. One reason that many users do not realize that Proxmox VE has great backup features is that they test Proxmox VE on a single node, with a single type of storage, and without network storage. Simply put, step 1 is really ensuring you have a place to backup to. Not all types of storage in Proxmox VE support being backup targets. What is a valid backup target can change over time, but generally, one aims to use network storage. If you have an extra ZFS array in a system, it may not be a valid backup storage type.
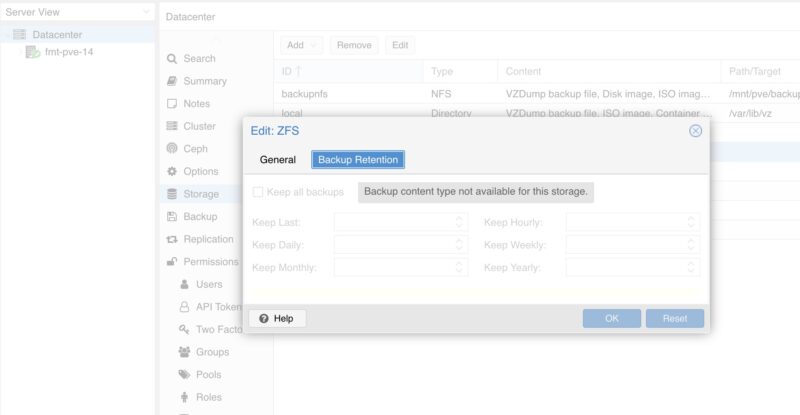
Instead, we often use network storage. A common example is NFS. Just as a quick one for our readers, if you have a ZFS array on a Proxmox VE server and export it as a NFS share, and then add that storage to a Proxmox VE host, it will be a valid option. Commonly, we use network storage but there are tons of different types of supported storage in Proxmox VE.
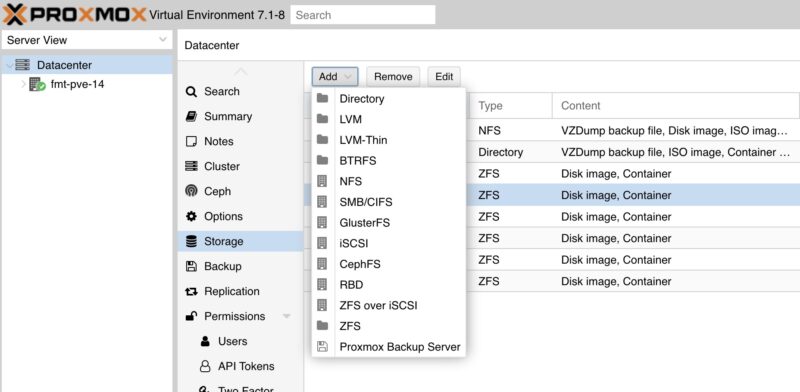
Just for fun, we setup a host with a ZFS mirror and then exported it as a NFS share named “backupnfs” for this. One could just as easily use a TrueNAS, Synology, or QNAP NAS as a backup target. For those, the goal is usually to export storage an import it into Proxmox VE under Datacenter -> Storage -> Add. Once you do that, you can go to the Datacenter -> Backup -> Add and then get the main screen.
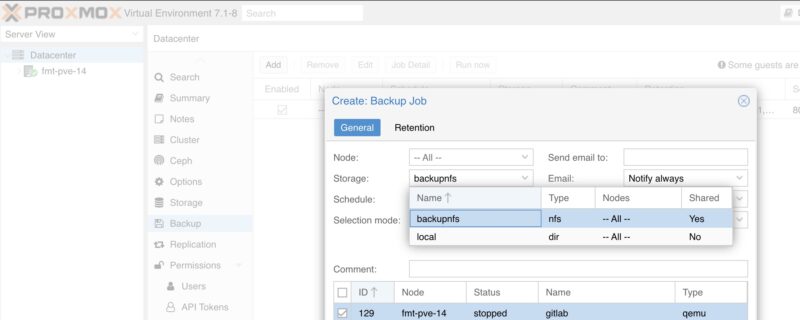
Here we picked our backup NFS server and an old Gitlab VM on node 14 as the VM we are backing up. Proxmox VE has a number of options that you can include or exclude certain VMs. Usually it is easier to pick the VMs from the list and then just Include selected VMs.
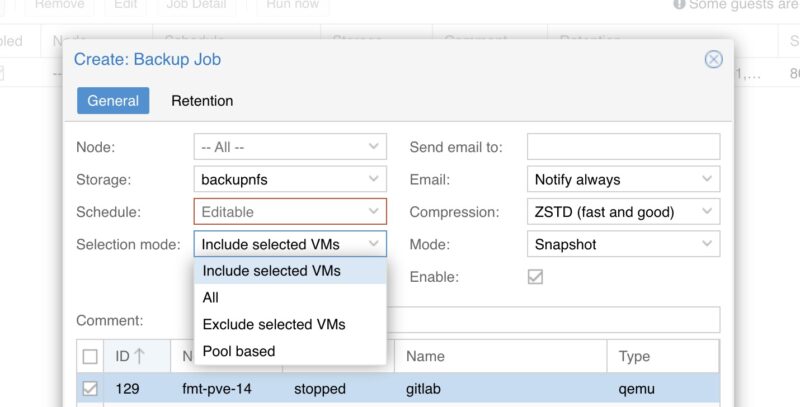
Once we have picked the VM and storage, we then need to set a schedule. You can go in and edit this later, but you may want a backup every 30 min, or maybe once a week. There are a number of pre-configured schedule options there, our sense is to use the closest you can find to make it easier to edit later.
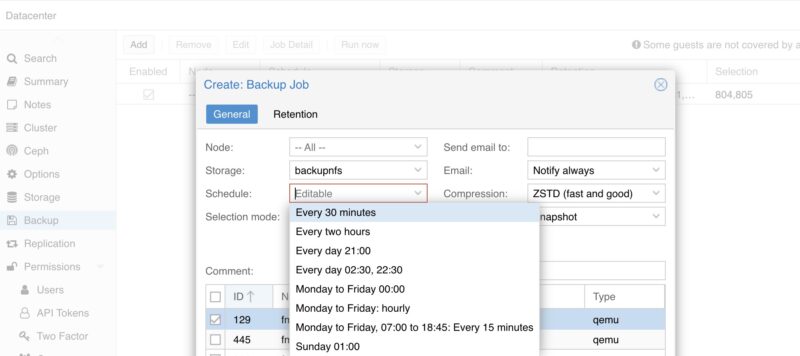
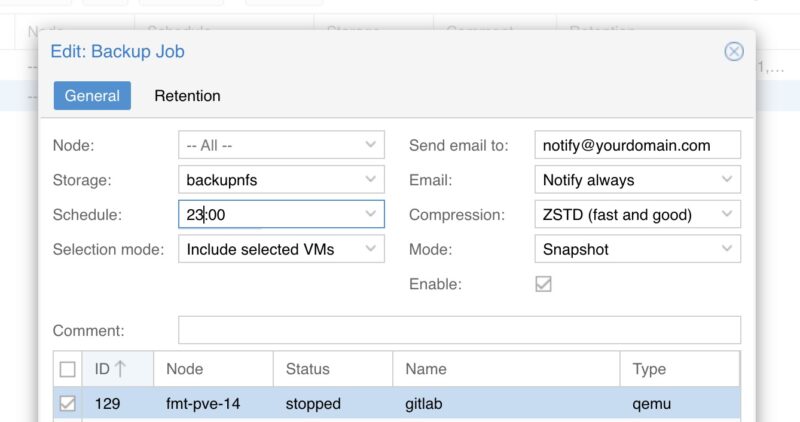
If you are busy at 21:00 for your daily backup default, and prefer the backup to happen later at say 23:00, then you can just edit the timing. You can also edit this later if you want.
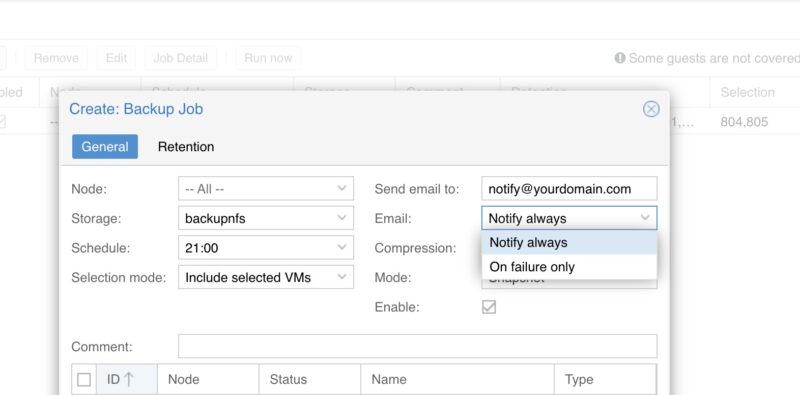
Next is something we covered in Proxmox VE E-mail Notifications are Important. You can put an e-mail address in the “Send email to” field, and then under “Email, the default is notify always. If you are backing up every 30 minutes, that may be too frequent. If that is the case, you may just want to know when a failure occurs, and so then you would pick “On failure only.”
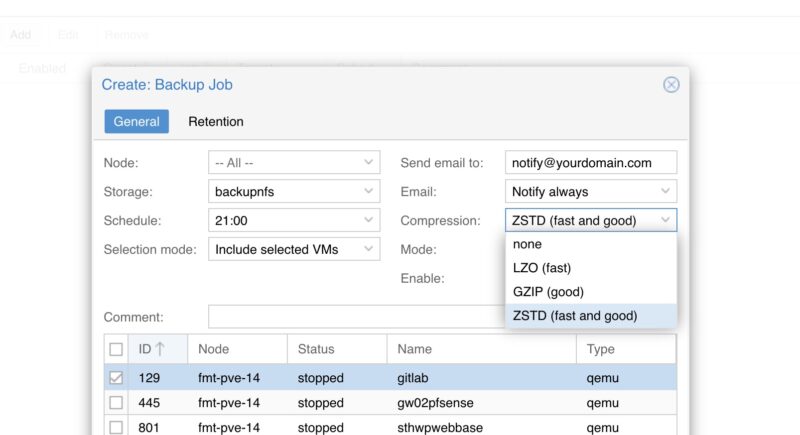
The next option is “Compression”. Here, use ZSTD unless there is a good reason not to.
The next one is the “Mode”. This is one where most of our readers will want to snapshot instead of fully suspending or stopping a VM. In snapshot mode, Proxmox VE will wait until it has the filesystem lock to perform the snapshot, then create a VM snapshot and backup the snapshot from there. The benefit here is that it does not take down the VM.
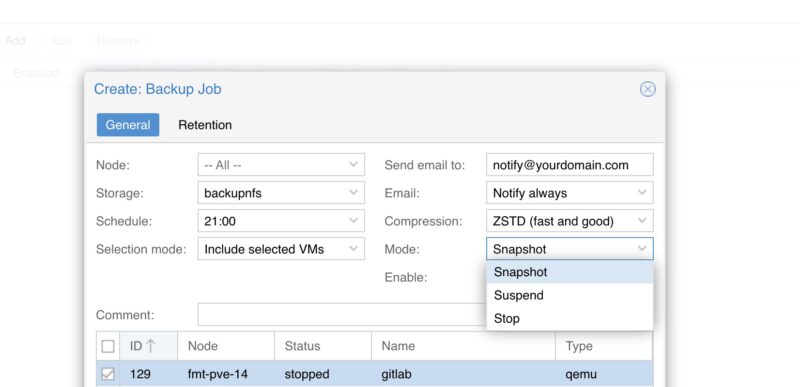
At this point, you have a backup job, but you should really go to the next tab. Clicking on the Retention tab brings up retention options. If you want to keep hourly backups for the last 24 hours, daily backups for the last week, and then weekly backups past there, this is where you specify those options.
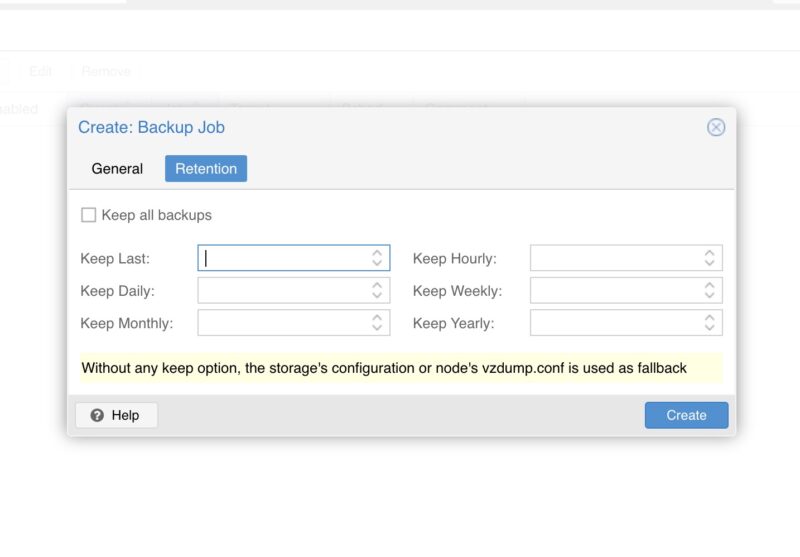
This may seem trivial, but if you have 10 VMs on a system, backing up daily, that gets to be a lot of backups.
Restoring from Proxmox VE Backups
If you want to restore a VM from a backup, it is very easy, and it can be done by going to the VM, clicking “Backup” and then picking the date and time of the backup you want to restore. You can restore it to different storage as well.
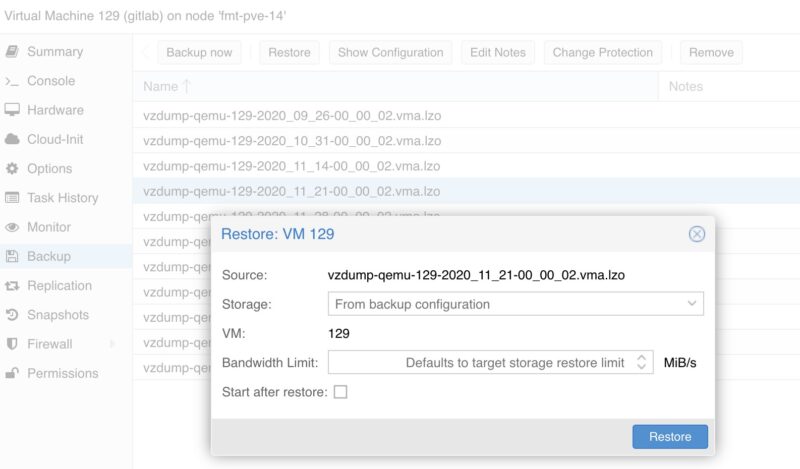
One other super useful trick is that you can select the backup storage, in our case the backupnfs, and then look at all of the backups on that storage.

Here you can backup not just to the original node and cluster, but also to a completely different node in a completely different cluster so long as it can access the backup storage.
Final Words
Hopefully this helps our readers start backing up their VMs easily. Of course, Proxmox also has a backup solution called Proxmox Backup Server. Still, just do to how many of our readers try Proxmox VE with limited network storage, many do not get to test the backup feature. We thought this quick guide would be useful to help our readers make quick and easy backups with Proxmox VE, without having to get another backup solution.



I was trying to get Proxmox Backup Server to backup my VMs (running PBS in a VM on my Qnap NAS) and the issue I ran into was that PBS expects the backup user to have a specific user id and group ID which is the same on the NFS share, and which is not configurable in PBS. And QNAP’s Web GUI does not allow you to change/set the specific uid/gid because it is too low of a number. If you create the user and group manually with the command line, the new user and group are not visible and selectable in the web interface to allow setting ownership permissions on the new backup NFS share. (and if you try to delete the group from the command line the group delete command doesn’t exist…)
Overall, a somewhat frustrating experience which could be made better if they would just let you configure the backup user uid/gid in PBS to match the NFS share permissions on the Qnap.
you forgot to mention that you have to install the nfs-kernel-server onto the node to do the export, and one has to do that via command line….
You can backup to a ZFS cluster after you create a Directory there and designate it for backups. No need to export it as NFS and connect back to it.