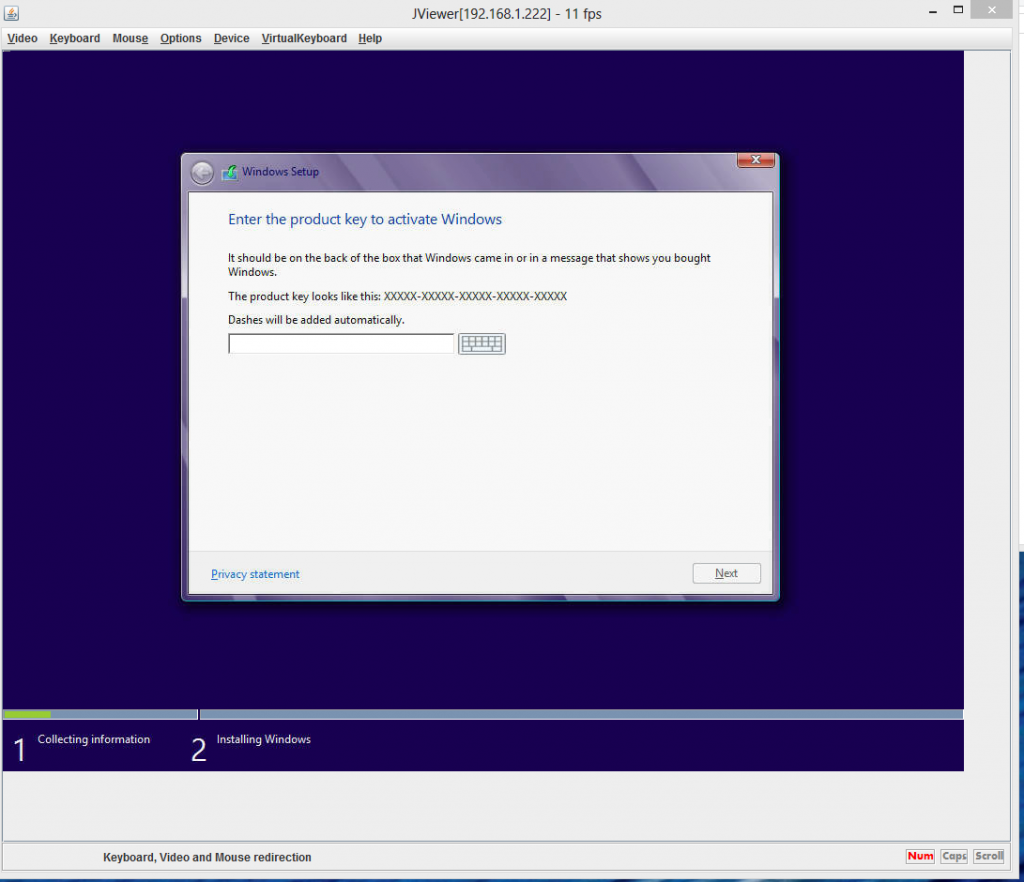
Recently ASUS sent over the ASUS KGPE-D16 dual AMD G34 motherboard for review. I tried installing both Windows 8 Enterprise and Windows Server 2012 to no avail. The machine would stop just before entering the Windows Activation key. Having seen this problem more than once, I had a good idea regarding the issue. When I double checked the BIOS it was version 2005. Many existing motherboards require a BIOS update to work with Windows Server 2012 or Windows 8. As time passes, motherboards come standard with newer BIOS. This was a review board so sometimes they do have older BIOS versions. I saw the issue. Surprisingly, it was easy to fix.
Since the AMD G34 socket is an aging platform now on its third CPU generation, older motherboards may still have BIOS that support only Magny Cours. Version 2005 works with Interlagos, a good thing since I had dual AMD Opteron 6234 12 core CPUs installed. I found out that the review board did not have the latest 3001 BIOS on it. In the words of Homer Simpson, “D’oh!” Not to worry, ASUS makes it very simple to update BIOS using the ASUS EZ Flash 2 utility. Luckily, the ASUS KGPE-D16 had a simple way to BIOS flash even using IPMI which was great since it is a $400 motherboard.
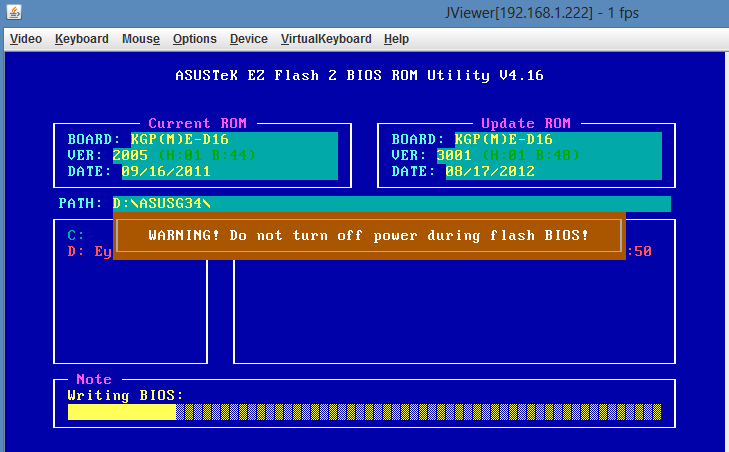
Upgrading the ASUS KGPE-D16 BIOS
Here are the steps to get the ASUS KGPE-D16 working with Windows Server 2012 or Windows 8 Enterprise/ Windows 8 Pro. This version updated the BIOS to version 3001 but it could be used for subsequent versions.
- Get ASUS BUPDATER.EXE and the newest ROM KGPE-D16-ASUS-3001.ROM or newer from the ASUS site. We will just need the BIOS but no big deal if we get the EXE in the event we need to use a LiveCD.
- Add the KGPE-D16-ASUS-3001.ROM file to your USB drive
- Insert USB drive with the KGPE-D16-ASUS-3001.ROM on it
- Start the machine and either hit Alt+F2 to enter ASUS EZ Flash 2 directly or hit DEL and go to the Tools menu to enter ASUS EZ Flash 2
- From there, navigate to the USB drive that was inserted into the ASUS KGPE-D16 and the directory with the ROM file
- Select the ROM file
- If you get an error reading the ROM file, the most likely cause is either your download was corrupt or you removed the flash drive when writing the ROM file. If this happens, start again from 1 but allow more time to write the file and use a different USB drive if you have one available.
The total time for this took about 5 minutes so it is not very difficult. After the BIOS flash, the ASUS KGPE-D16 got past the starting installation screen and had no issues installing Windows 8 and Windows Server 2012. For those who are having trouble installing Windows Server 2012 or Windows 8 on the ASUS KGPE-D16, hopefully this helps.
For those with other motherboards, you will likely need to do something similar. We had to do a BIOS flash with the Supermicro X9SCM-F also when trying Windows 8. I did manage to verify with Windows Server 2012, Windows 8 Pro and Windows 8 Enterprise and this works fine.

First thing i do on any new build is check the BIOS versions. If there is a newer one available than came on the MB I spend about 5 minutes with Google to see if there is an obvious reason NOT to load it and if nothing obvious comes up I flash it to current.
That is BEFORE i run memtest86+, which always gets at least one full pass before trying to load any OS.
Just good practice. Ultimately it saves more time than it costs.
Great tip PL. I generally do too, but I did want to see if the original Interlagos BIOS would load Windows Server 2012 and Windows 8.
Most bios changes since windows xp.
Didn’t everyone move to UEFI for exactly this reason?
What about the RAID drivers? Is that an issue?
Newer versions of firmware are not just BIOS, they’re UEFI. And you probably don’t want upgrade to UEFI firmware unless you absolutely HAVE to. Be careful.