After completing the first DAS/ SAS Expander JBOD enclosure project I realized that there was a major area of improvement. Using less than 30% of a large 4U case’s volume for useful purposes seemed like the key area to improve upon. As I was completing that build I soon realized that I wanted a secondary server to be able to access some of the drives for EXSi or Hyper-V virtual machines. Further, NAS operating systems that run poorly in virtual machines, such as unRaid require dedicated server for testing. I could have built another server in another enclosure, but I decided that I could improve upon the original design and access drives that are housed in the Big WHS ecosystem through a simple cable swap. This eliminates the need to physically move drives from enclosure to enclosure. The following is a slightly (approximately $20) more expensive version of the original Build Your Own JBOD DAS Enclosure with a HP SAS Expander iteration.
As one can see from the original build your own project, the low cost motherboard takes up lots of useful space, yet provides little value as it only powering the HP SAS Expander.

The Norco RPC-4220 and RPC-4020 can both house large ATX motherboards that use all expansion slots to the rear of the case. From the above shot I realized that there was room to fit a mATX based motherboard (or mini ITX of course) and also the HP SAS Expander.
Setting up the PCMIG and HP SAS Expander solution
After searching for solutions, I saw a post by odditory at [H]ard|Forum where he used a PICMG based board to power the expander. After ordering the PICMG 1U backplane with 1x PCIe slot (you can search for PE-2SD1-R10 on Google to find a local retailer. It is made by a company called IEI). I waited… two weeks for the PICMG board to ship and another few days for it to get here using ground shipping. It seems like these parts are not regularly stocked everywhere. Certainly this is not as convenient as using a low cost mATX board.

One large consideration with this solution is that the PICMG connectors (bottom of the board) are very large. Looking at the bottom edge of the above pictures lets one see the back-side of where the pin outs for those slots connect to the board. The Norco RPC-470 does not have a raised motherboard tray and the PICMG board fit no problem. In the RPC-4220 the PICMG connectors were too tall and therefore I could not seat the PICMG board in the case and still have the HP SAS Expander seat properly in the chassis expansion slot. The simple solution, 100% guaranteed to void warranties on the PICMG board, is to dremel off the PICMG 1.3 slots. There was quite a bit of room between the PICMG slots and the PCB so this was very simple.

With the PCMIG board modified, I was able to use bumpers and drill new PCB mount holes for the PCB. It should be noted that the board is VERY long (I haven’t measured it but it is likely over 30cm long just fitting between the mid-case fan mounting point and the rear of the Norco case.) Practically speaking, this means that using motherboard bumpers to keep the board well supported is important. Securing the installed HP SAS Expander to the chassis helps a lot with the setups stability.
Next, I used a jumper on the power button pins. This allows me to power on and off the enclosure using the primary (large) power supply.

This is a very important point. Without separate power supplies, a powered down secondary server in the chassis would cause the HP SAS Expander to lose power and attached drives would drop from raid arrays. Using a jumper on the power button header makes the on/ off switch the power supply switch at the rear of the case. If one only wanted to implement the PICMG solution as an alternative to the low cost motherboard (and not have a secondary server), then one might try connecting the power button normally.
Pictures of the full server setup
The big question at this point is, of course, what does this look like installed? Here are some pictures.
First, I installed the HP SAS Expander in the second to last expansion slot. The HP SAS Expander card has a passive heatsink as one can see from the below picture. If it is installed in the last expansion slot, airflow and cooling become issues.

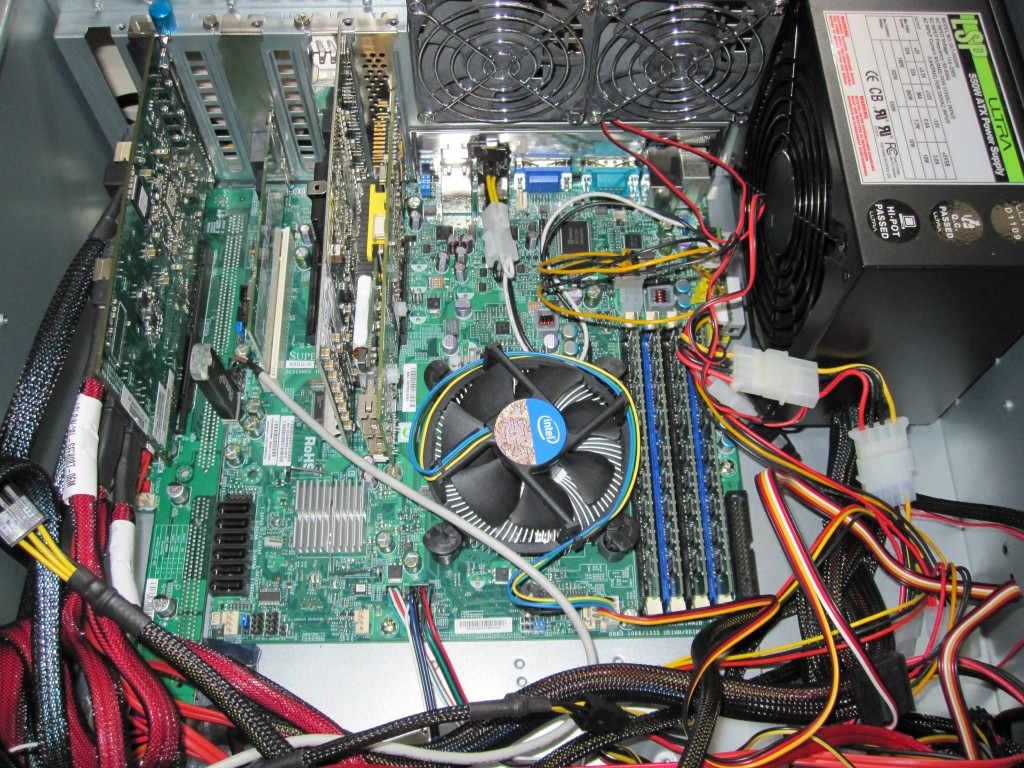
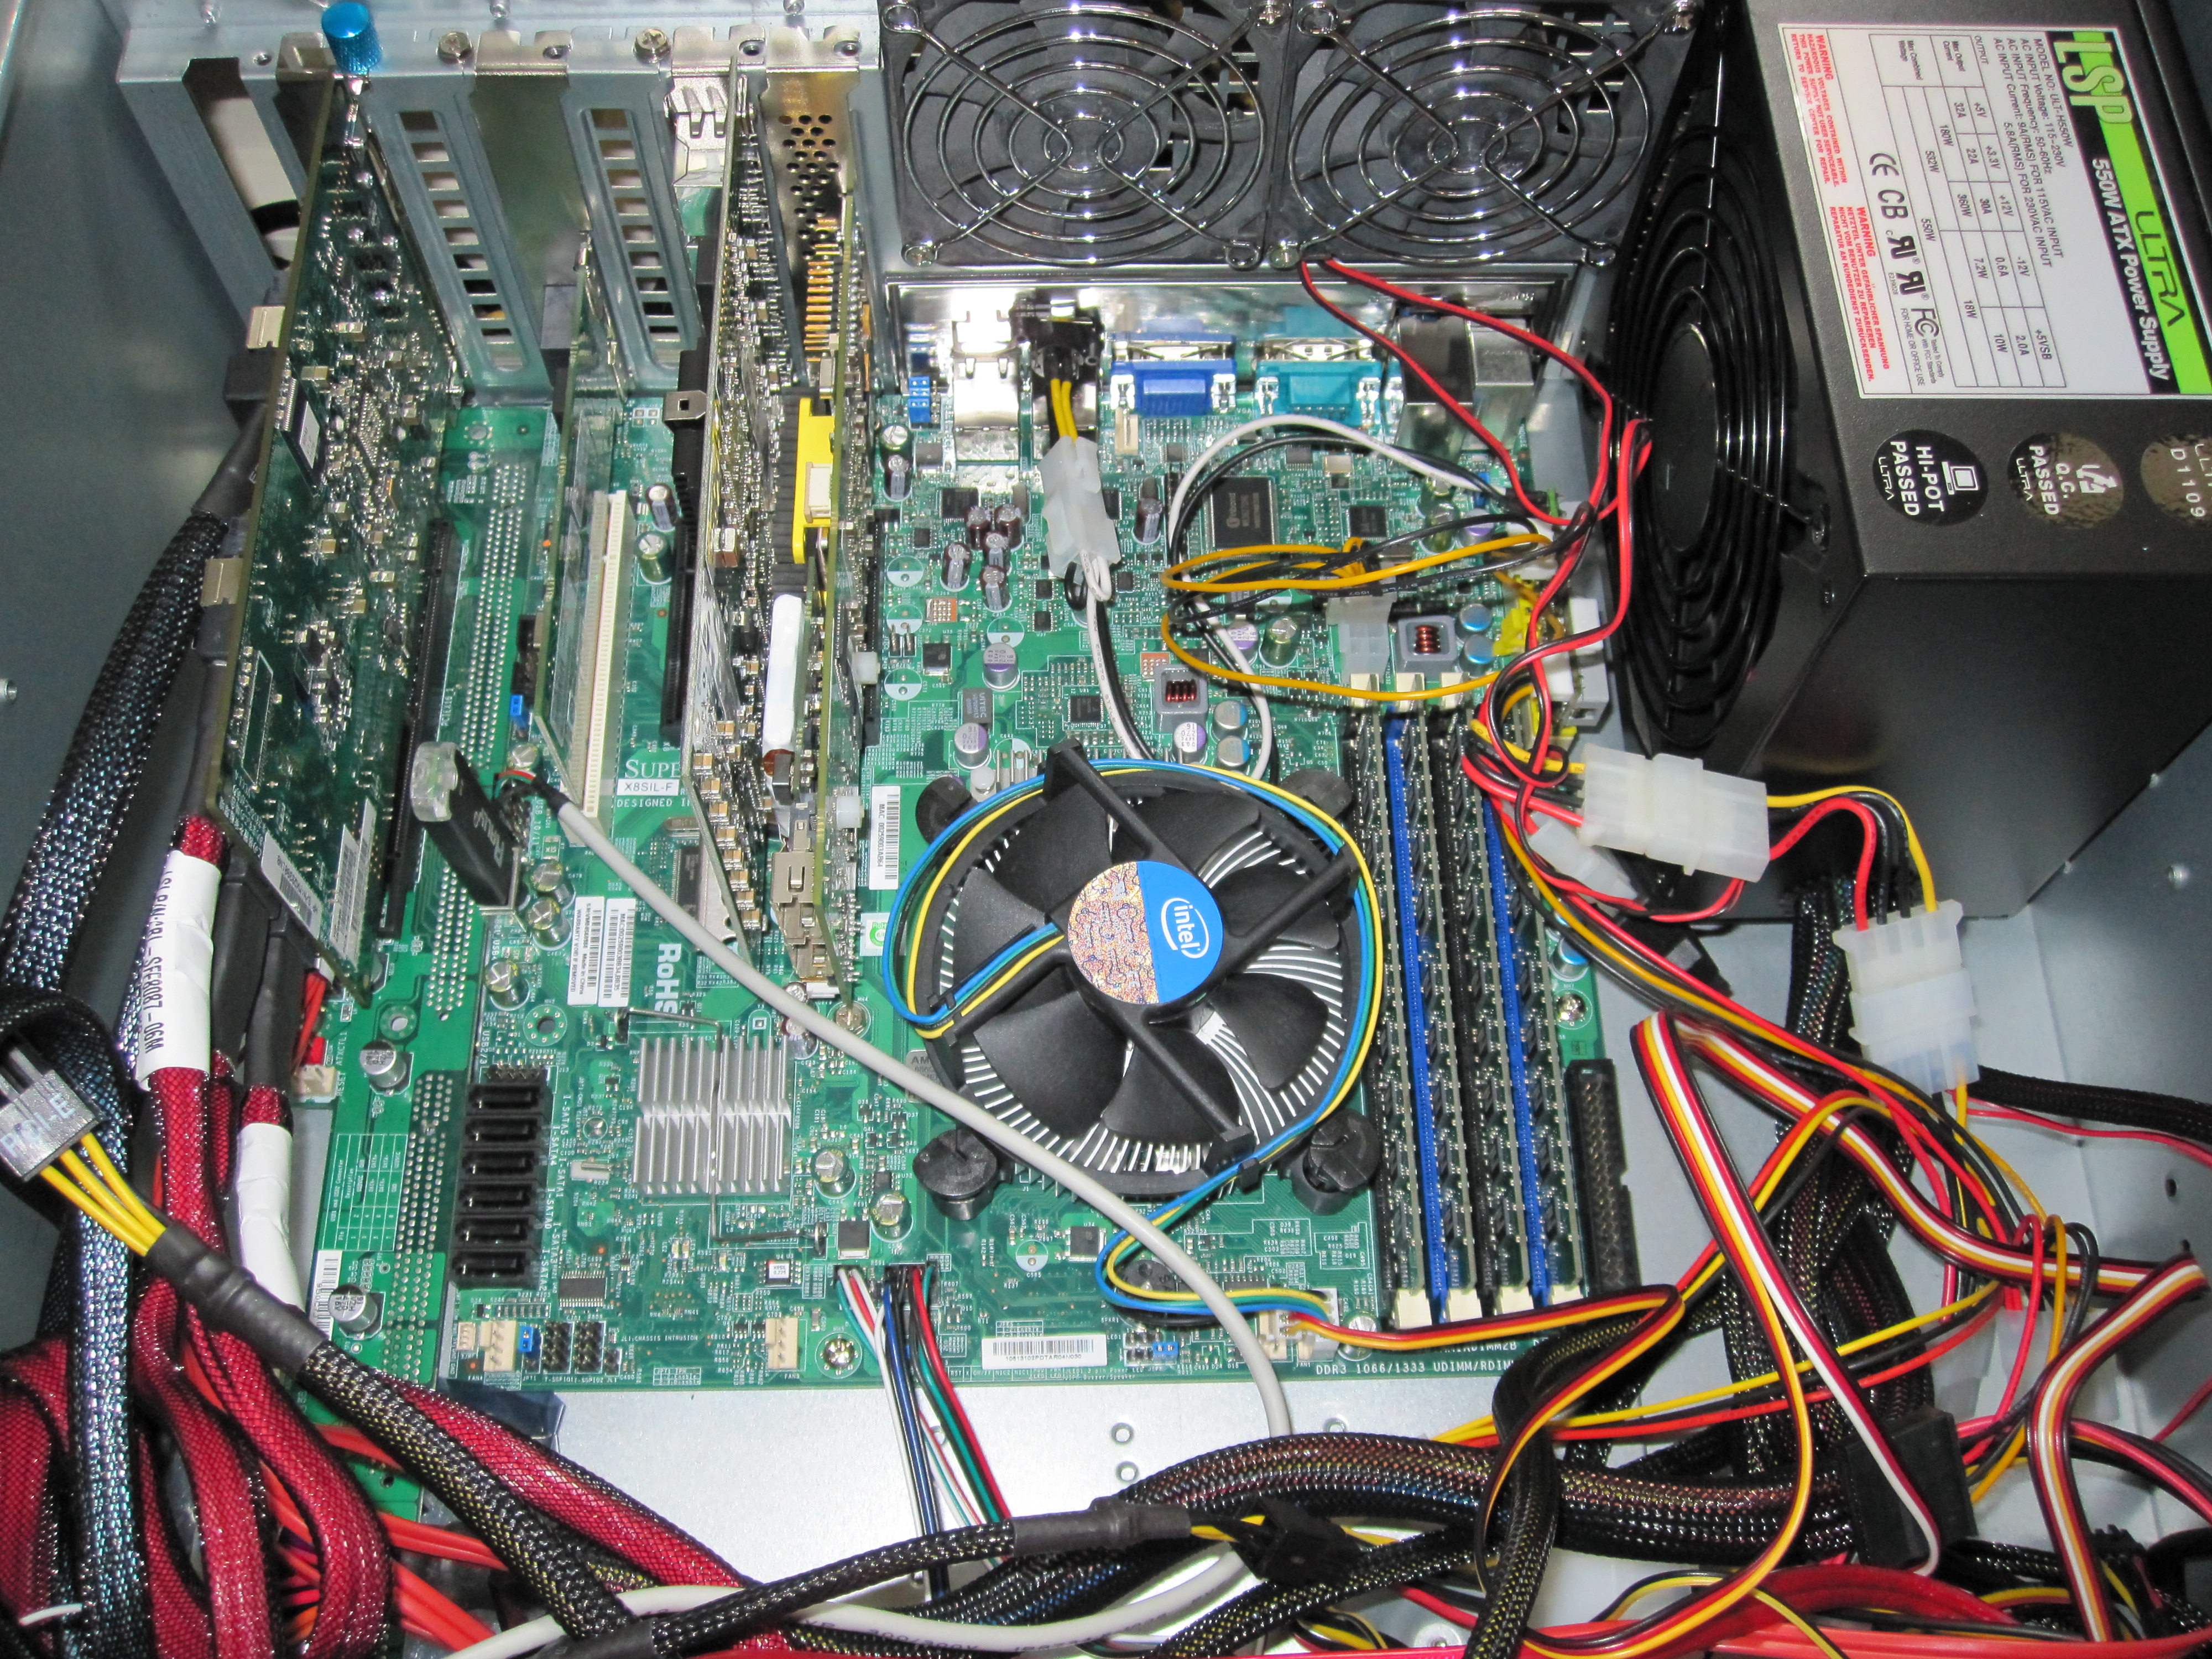
Here is a shot of the other side of the installed PICMG-HP SAS Expander next to the Supermicro X8SIL-F.

Clearly this is a tight fit solution. Expansion slots 1 through 4 can be used on the mATX board, expansion slots 5 and 7 are unused, and expansion slot 6 has the HP SAS Expander. In the above picture there is an Adaptec 5805 installed in slot 1, Intel Pro/1000 PT Quad in slot 2, and an Intel Pro/1000 GT (PCI) installed in slot 4. One can also see the OCZ Rally USB drive on the internal Supermicro X8SIL-F USB header. The setup affords plenty of room to work on the bottom edge of mATX server boards which typically have many cable connections and jumpers.
Just to give an overall view of what the case looks like with the SAS Expander infrastructure installed alongside the independently powered CPU and motherboard here is a picture of the entire setup.

I routed the PicoPSU 150XT wire to the external power supply through an unused LAN port slot. Overall cable management is quite challenging because the 24 pin ATX power cable needs to cross the entire enclosure. Also, there are cables for 22 drives, fans, fan controllers, and two power supplies so spending a few minutes to tidy everything up is worth it once you have done a test fitting. Here’s a quick picture of the PicoPSU peaking through the unused LAN cutout:

Not an elaborate setup, however it does work because the PicoPSU takes up very little space.
I am sure some readers will be confused why I do not just connect the drives to the server board installed inside the same 4U. The simple reason is that the drives are being used by a server in a second chassis. The Supermicro X8SIL-F was only installed because I wanted to utilize otherwise wasted space. One could easily build one of these DAS enclosures only with a HP SAS Expander and PICMG board not bothering with the secondary mATX server.
Conclusion
This DIY solution is a significant improvement over the original design. I was able to reclaim otherwise underutilized space using a modified PICMG board. Since it does require modifying a more expensive (I paid just over $55 US) piece of PCB versus the original low-cost and off-the-shelf mATX power board solution (less than $35 US), this is not going to be for everyone. On the other hand, I would offer that if someone is using a second 4U chassis (and therefore over 20 drives) for DAS storage, there is a good chance they will have use for a secondary server.


Cool I was looking to do something similar!
thx. will be trying this soon.
Hey Patrick,
I just found this…. http://usa.chenbro.com/corporatesite/products_detail.php?sku=75
Would that work in place of your PCMIG device? Not sure how HP compares though.
It would. The negatives of the Chenbro SAS expander are a smaller RAID card compatibility list, no SAS 6.0gbps support, lower availability in retail channels (some say it may be discontinued), and finally many users have issues with drives dropping/ drive compatibility.
The HP SAS Expander is a solution that fixes most of these issues. My guess is Chenbro will come out with a new expander line soon, but until they do, the HP SAS expander is one of the better options out there.
Finally, if you want to look at alternative expanders, both Areca and Supermicro have SAS Expanders that are pretty solid. For some the Chenbro is either very good, or very bad which is why I am not using them. Do homework before using the Chenbro expanders and make sure that you have a supported raid controller and drives.
Patrick,
One more quick question… you seem to be good with the mods, I’m looking at a Chenbro case (I hear they are a bit higher quality) and I just spoke with a tech over there and he said the 5 80mm fans are 3pin power and I’m wondering if you have any idea what I’d use to control all of these fans on 1 controller? I’m sure there are some sort of POTs out there that I could use for this purpose, just not sure how hard it is going to be.
On a side note, I like the 3x 120mm fan mod that cavediver (from [h]) is selling. Maybe a Norco would be better for noise, I just wish the Norco supported SGPIO for failed drive identification purposes. Can you comment on this feature? Have you had a drive fail and if so, is it hard to find it?
On the fan controller, you can actually see one fan controller I use on the pic above at: “Bottom of modified PE-2SD1-R10-1 PCMIG 1U Backplane with PCIe Slot”. It works OK since in reality I set between 70%-75% and close the case. It isn’t the most elegant solution but for $12 and 3 minutes I won’t complain.
I actually had a 2TB drive fail last night in the RPC-4020. I just logged into the Areca raid console, figured out the port/ S/N of the drive (to confirm) and then just pulled the drive. If you want, you can just label each tray with the S/N of the drive or the controller port, and that lets you know which one failed. It takes a few minutes but is not a big deal.
Great infomration on this and you other builds.
I just got my chenbro expander on Friday. Hooked everything up and …. flames came out of the SAS card!
Yes flames, not just smoke. Because I did a special order from CDW now I have to deal with Chenbro to get it replaced. They did respond Friday evening with RMA form which I sent back. Now I am just waiting for my response.
Good thing the rest of my equipment was not damaged.
Yikes! Good luck with the RMA. Was it one of the older 3.0gbps expanders?
Maybe this is interesting an all-in-one kit 24-48 port (250-500 USD) from Chenbro:
http://usa.chenbro.com/corporatesite/products_detail.php?sku=76
Stefan: That is very similar to the HP SAS Expander which can be had for a bit less. A big driver is the SAS card you are using to connect the expanders. Some work well with the HP units some work well with the Chenbro making one or the other a better option for an application based on the controller used.
IBM 59Y3825
Does anyone know anything about this.
It appears to do the same as the HP Expander but claims 6GB/s support
Are you installing an OS on this machine? And if so, which one?
Hello everyone, I would like to know how you solved the lighting of Norco cabinet. Are present on the PE-2SD1-R10-1 PCMIG 1U Power Switch Connector ?
Great article – hopefully very usefor for the many many people who are building their own budget storage servers.
One comment: The article mentions “PCMIG” many times. It’s actually “PICMG”, which stands for PCI Industrial Computer Manufacturers Group (PICMG). I make this comment only because I want folks who search for “PICMG” to find your article.
Hey Gang,
way late to the party but this is a great project. I have a possibly stupid question but cant seem to find an answer anywhere.
I love that you made a secondary mobo for the Expander. Is it possible to plug the expander into a mobo, use the expander for an array accessed by a different computer and then use the mobo as an independent computer? or would that cause all sorts of issues?
Thanks, and great build!
DISCLAIMER: I have not personally tried this and cannot vouch.
Per STH’s own SAS Expanders, Build Your Own JBOD DAS Enclosure and Save – Iteration 1 , step five says “… The HP SAS Expander does not use the PCIe bus for data transfer.”
That being true, you should be able to just plug the HP SAS Expander into a motherboard being used as an independent computer with no issue.
My question is as about the wiring! I was wondering why you didn’t use a 24 pin and 4 pin atx Y adapter to power both boards. and modify the case to accept a small 12v toggle to use with triggering the sas expander card? 1 PSU less hassle I would think. i know that frozencpu.com does pre-made switches. Just wondering, not knocking your set up at all sir. for months I’ve been wondering how to do this!
Know this is old but I found these on amazon
https://www.amazon.com/gp/product/B00IMYODGS/ref=ox_sc_act_title_5?smid=AK0NY35OKGA14&psc=1