Touted as an entry level NAS for home use the Asustor AS1002T 2-bay NAS comes equipped with features that cater to this audience. This is the fourth installment in our 2-bay NAS review series that has already covered the QNAP TurboNAS TS-251, Synology DiskStation DS216j, and Buffalo LS220D NAS units. You can check out those reviews to see how competitive products fare. The AS1002T is simple to use, inexpensive and offers good performance for home private use or for cloud use when you are on the go.
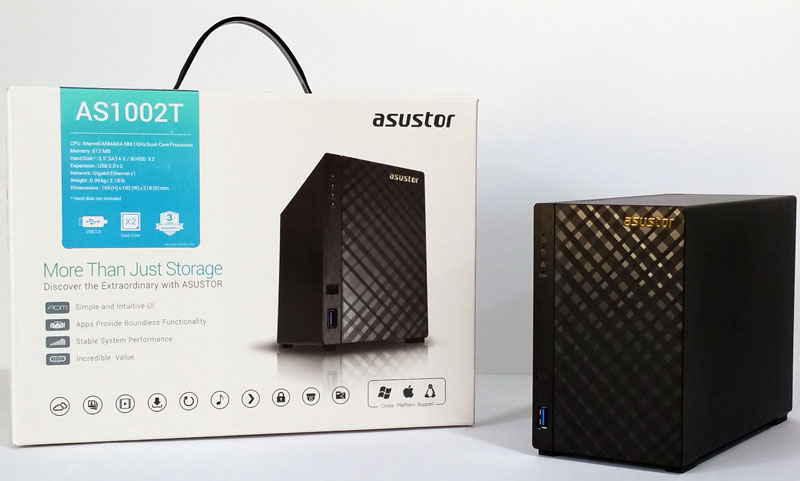
Asustor AS1002T – 2 Bay NAS Specifications
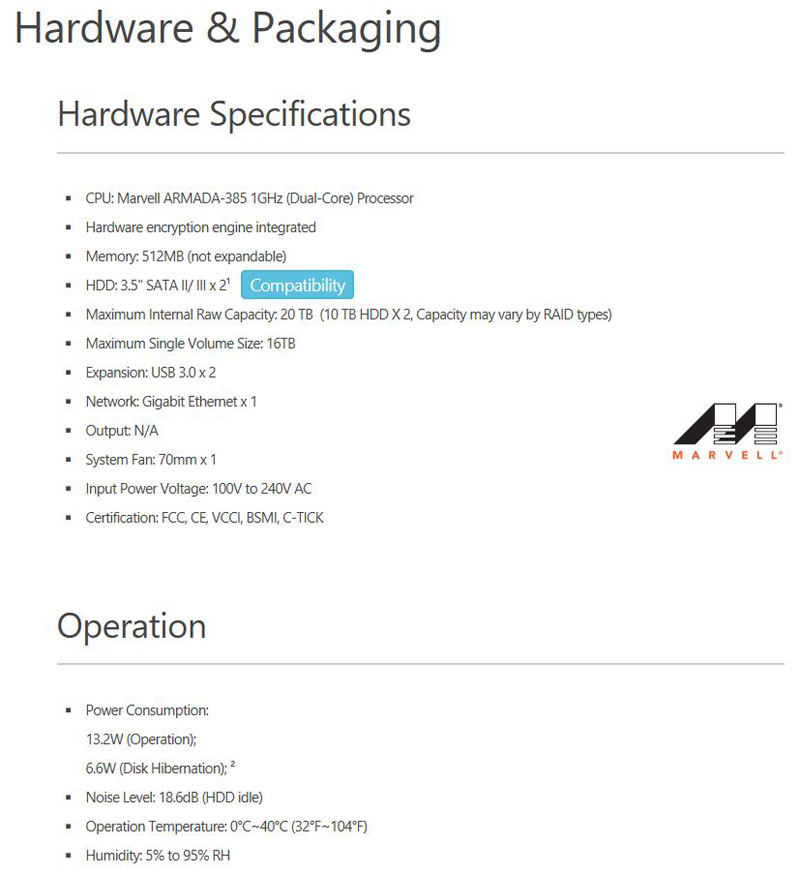
- CPU: Marvell ARMADA-385 1GHz (Dual-Core) Processor (ARM)
- Hardware encryption engine integrated
- Memory: 512MB (not expandable)
- HDD: 3.5″ SATA II/ III x 2
- Maximum Internal Raw Capacity: 16 TB (8 TB HDD X 2, Capacity may vary by RAID types)
- Expansion: USB 3.0 x 2
- Network: Gigabit Ethernet x 1
- Output: N/A
- System Fan: 70mm x 1
- Input Power Voltage: 100V to 240V AC
- Certification: FCC, CE, VCCI, BSMI, C-TICK
- Size: 165(H) x 102(W) x 218(D) mm
- Weight: 0.99 kg / 2.18 lb
- Raid Support: Single disk, JBOD, RAID 0, RAID 1
The complete specification list is rather long, you find the full details at Asustor AS1002T Specifications
Asustor AS1002T – 2 Bay NAS Overview
The AS1002T retail box art is simple and shows the main operating features on the front and each side.
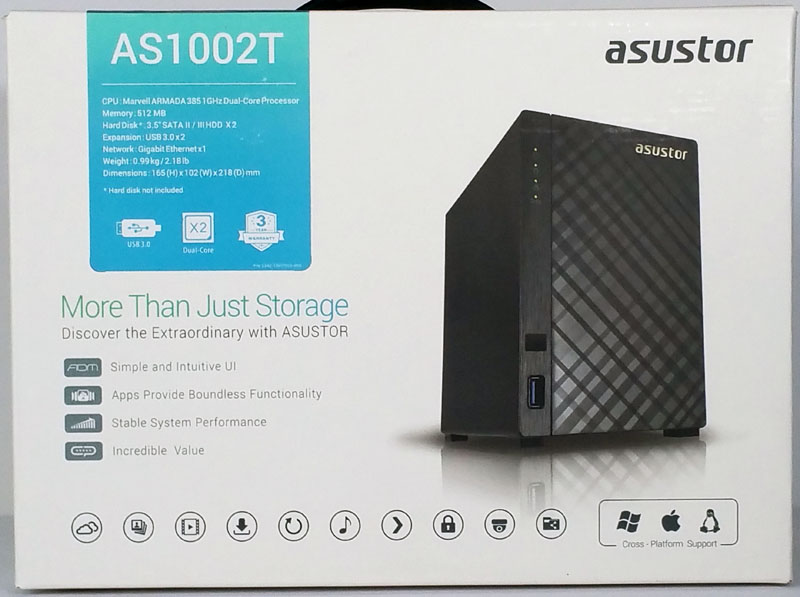
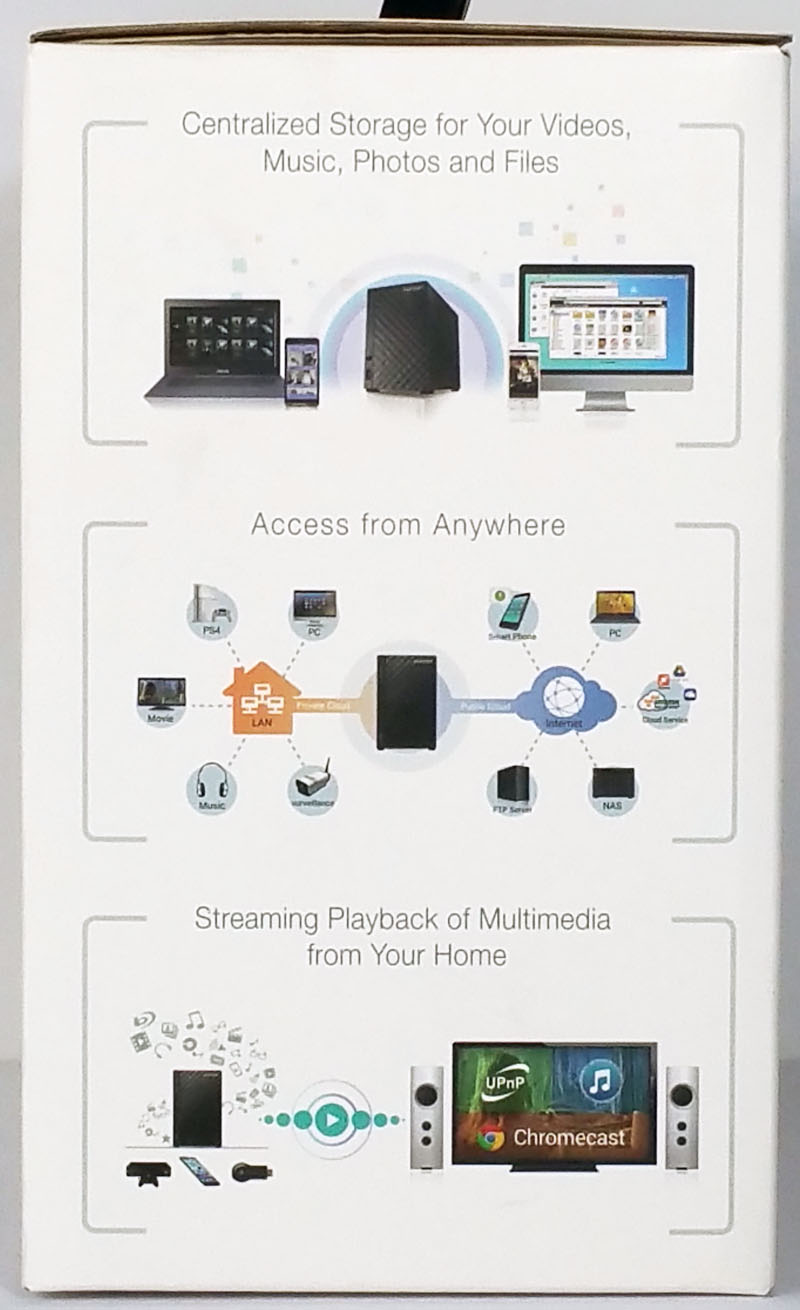
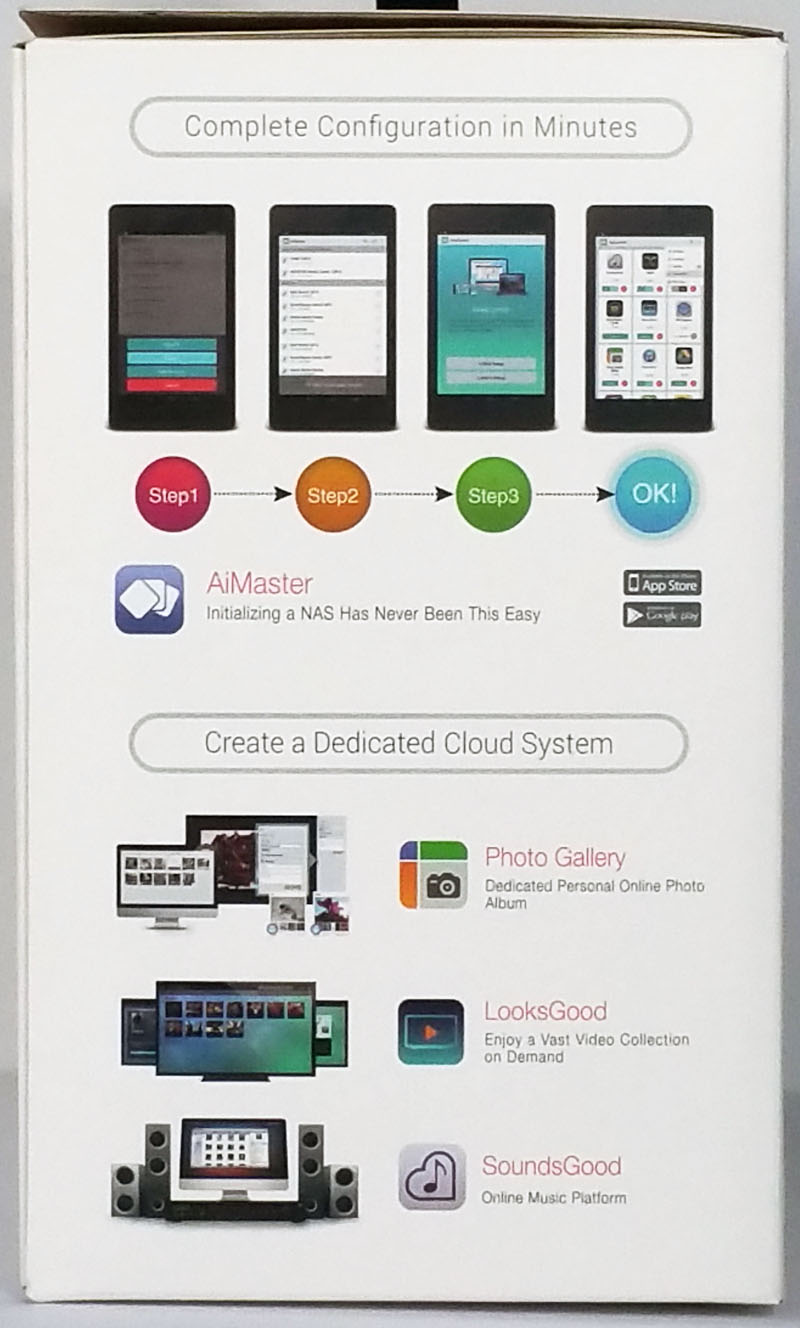
One of the main selling points is the AS1002T is simple to setup and if you want this can be done over a cell phone connection using Asustor apps, or on your PC with the supplied DVD. Since admins are using mobile devices and DVD drives are becoming more rare, that is a great approach.
After opening the box, we get a nice Thank You from Asustor along with links to support resources.
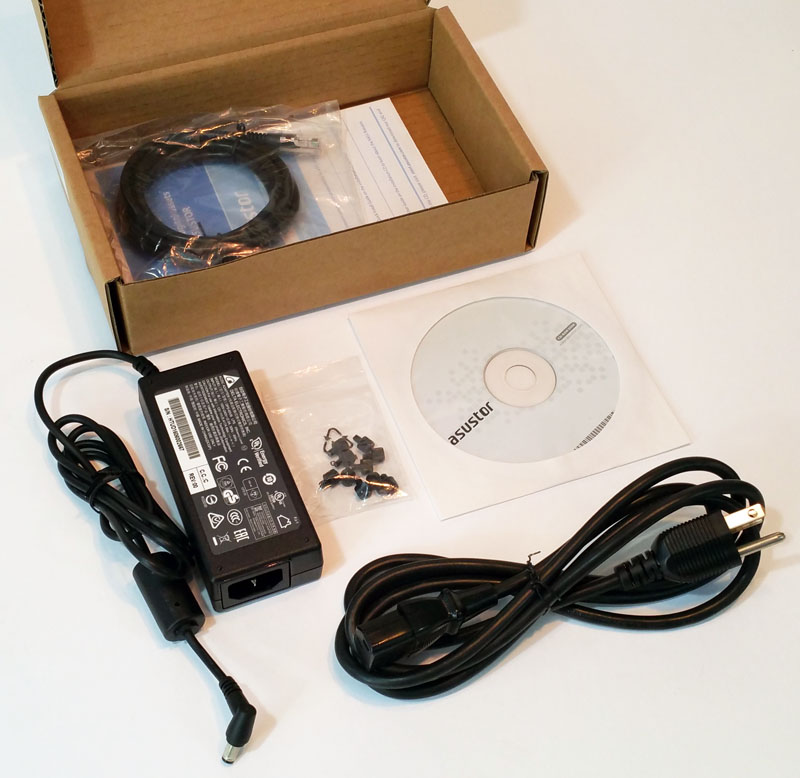
Accessories that come with the Asustor AS1002T include:
- AS1002T empty 2-bay NAS
- Installation DVD
- Quick Installation Guide
- 1x Ethernet Cable
- AC Adapter and Power Cord
- 8x mounting screws are included for 3.5” drives.
The AS1002T itself is also wrapped in plastic and padded with foam inserts that provide added protection.
Asustor AS1002T – 2 Bay NAS Installation
After removing the Asustor AS1002T from the retail box we can now take a look at the NAS.
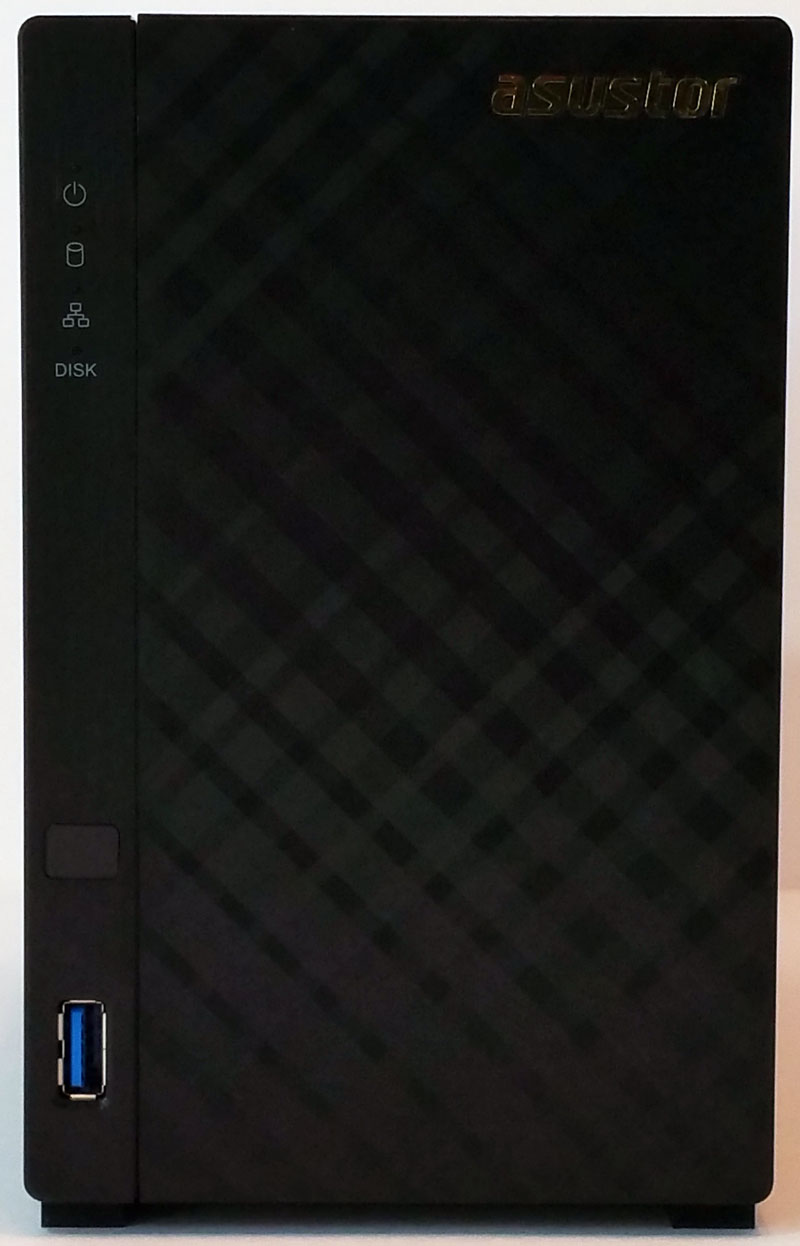
The front of the AS1002T is covered with a diamond-plate finish that is attractive and adds style to an otherwise simple box. Status LEDs are located at the upper left side and a USB 3.0 port is down at the bottom. All though the unit is dark black the diamond finish does reflect light and looks good.
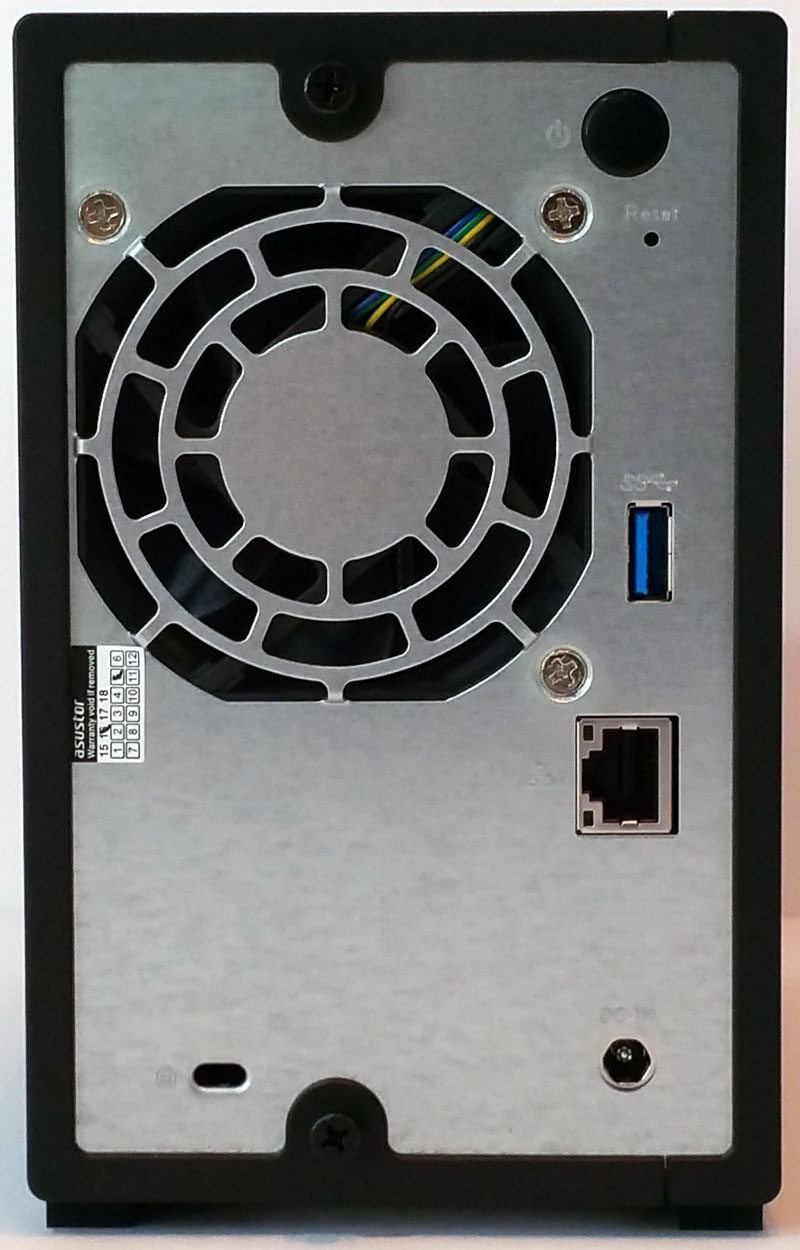
For an entry level NAS box we expect to see the minimal I/O ports at the back, a USB 3.0 port and a RJ-45 network port sums up available ports. The AS1002T does have a large 70mm fan with auto fan control to reduce power use and keep the unit cool. There is a Kensington lock point, a power input and a recessed reset button to round out features.
Let’s move on to installing the hard drives.
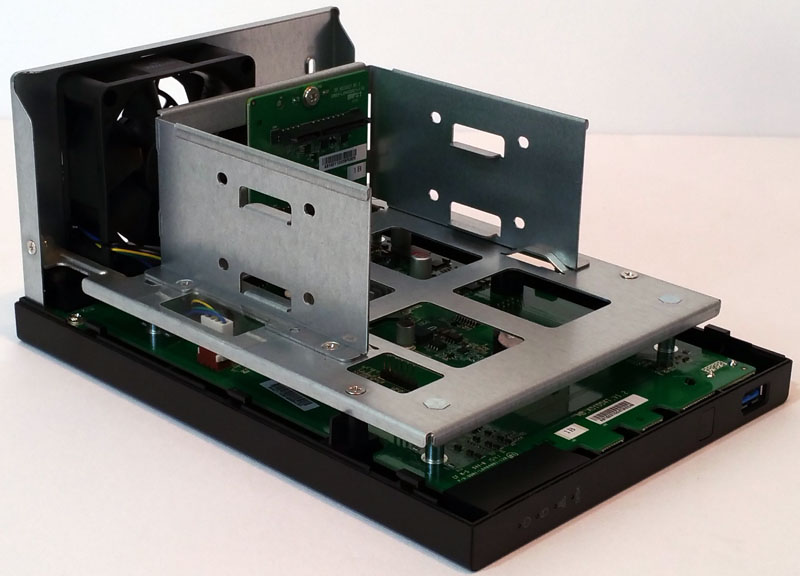
The AS1002T features a sliding cover and tool-less drive installation. Two screws hold the outer cover on, remove these and slide the cover off to access the drive mounting bracket. Hard drives simply slide into place and thumb screws secure them in place. Slide the cover back on and secure it in place and your done.
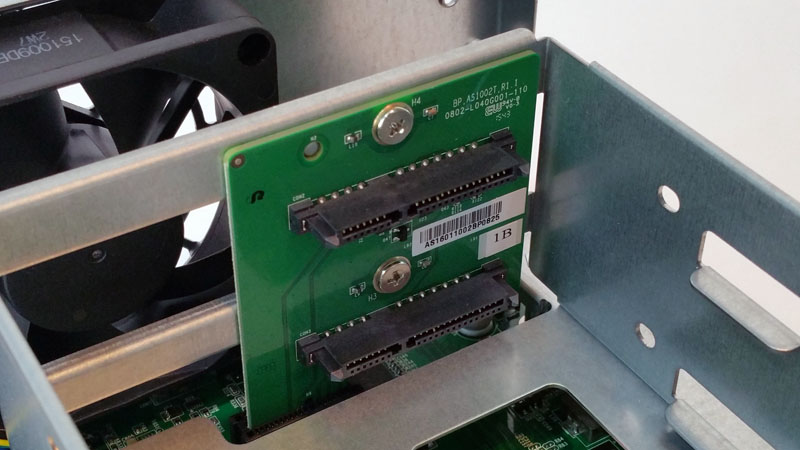
Here we get a look at the backplane the hard drives connect to. We will be using WD Red 4TB NAS focused hard drives as we have used in our other reviews.
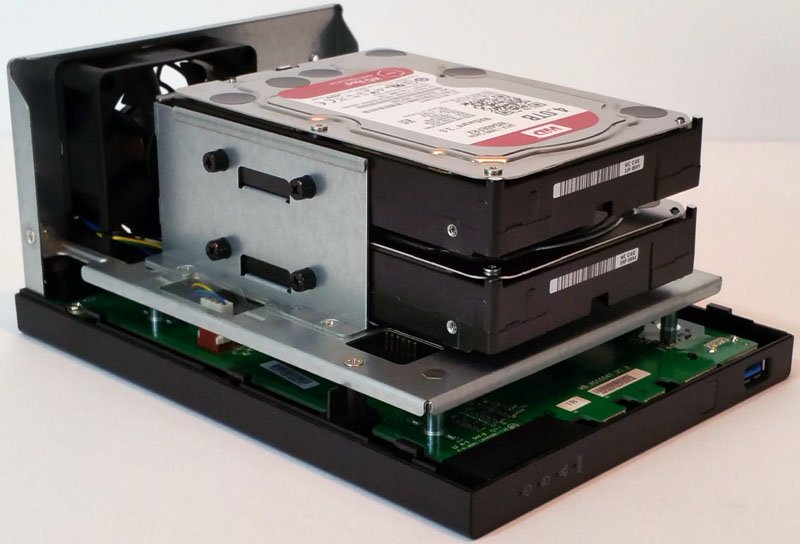
After a few minutes we have the hard drives in place and ready to button up the AS1002T and get it ready for use.
Asustor AS1002T – 2 Bay NAS Management
Connecting the AS1002T to our network and then turning the unit on we insert the Installation DVD on our workstation and bring up the installation program.
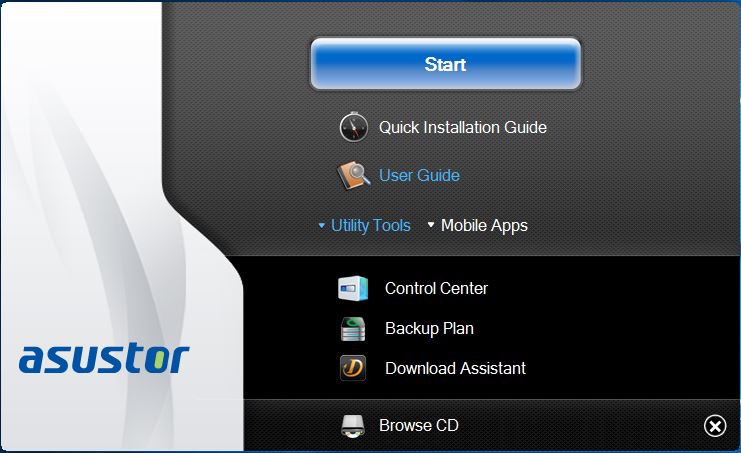
Clicking the Blue “Start” button installs the Asustor Control Center.
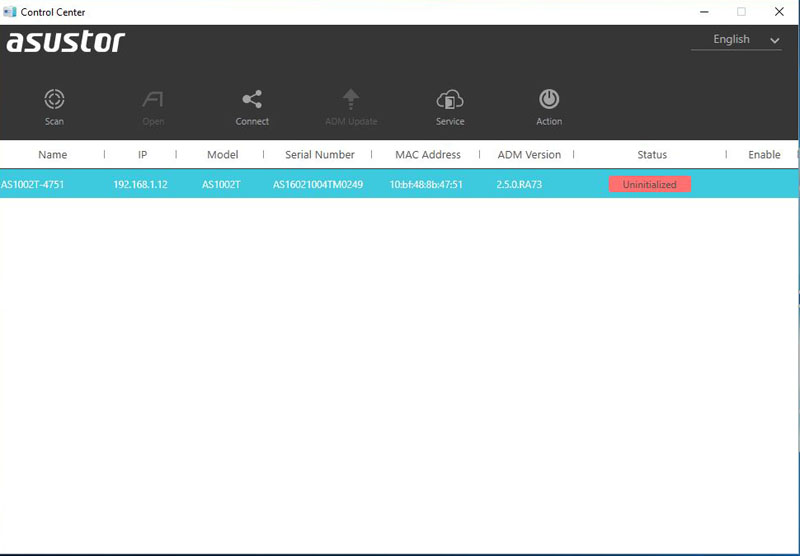
After the Control Center application is installed we see the main interface. The Red notice indicates the NAS has not been initialized so we click on that to get started.
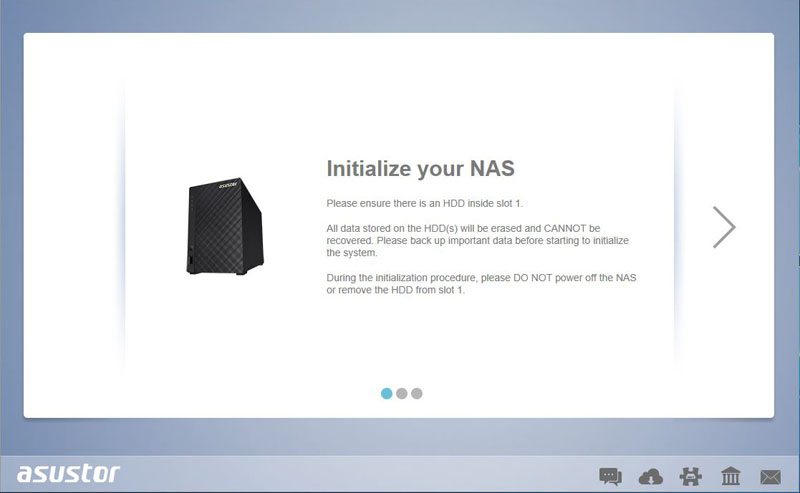
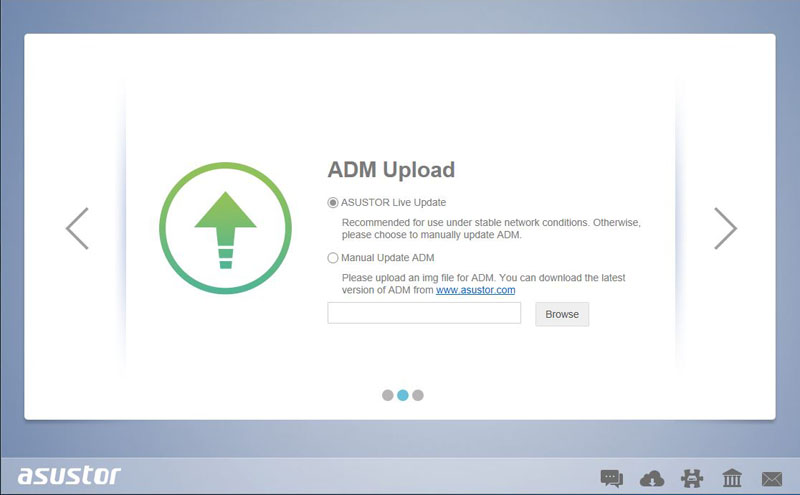
The first screen we see is the Initialize your NAS and we continue by clicking the right arrow.
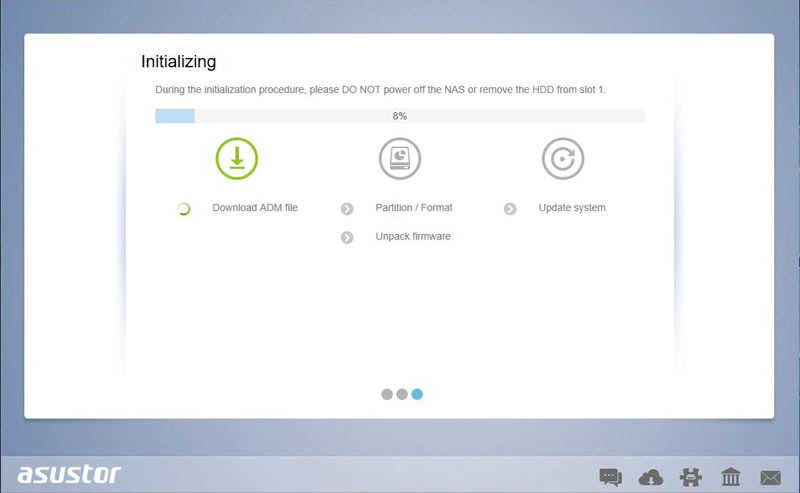
Initializing begins with updating the firmware and preparing the NAS.
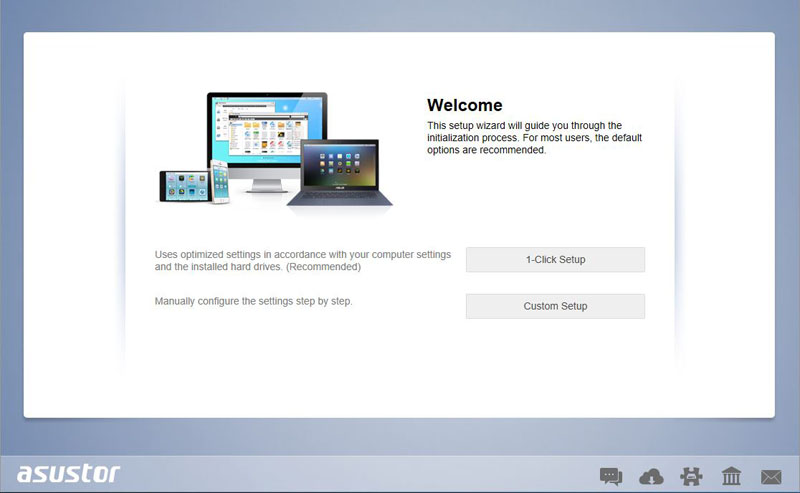
Here we can select the 1-Click Setup or move to the more advanced Custom Setup.
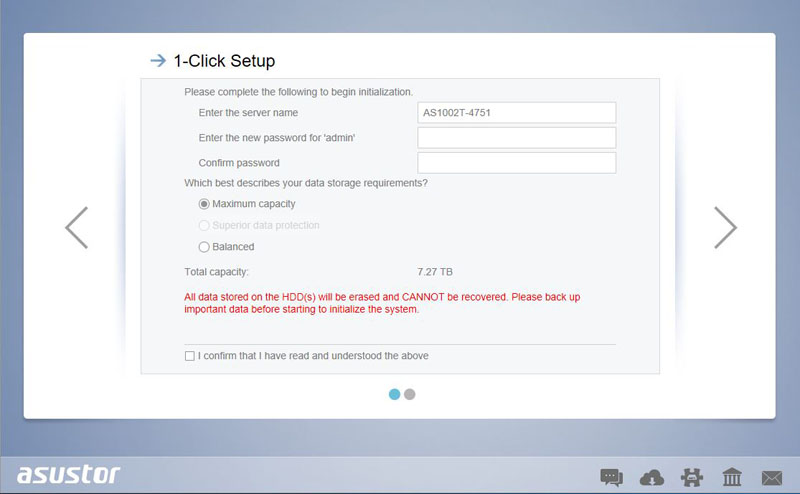
1-Click Setup offers a few simple options, server name and password and two choices for storage setup.
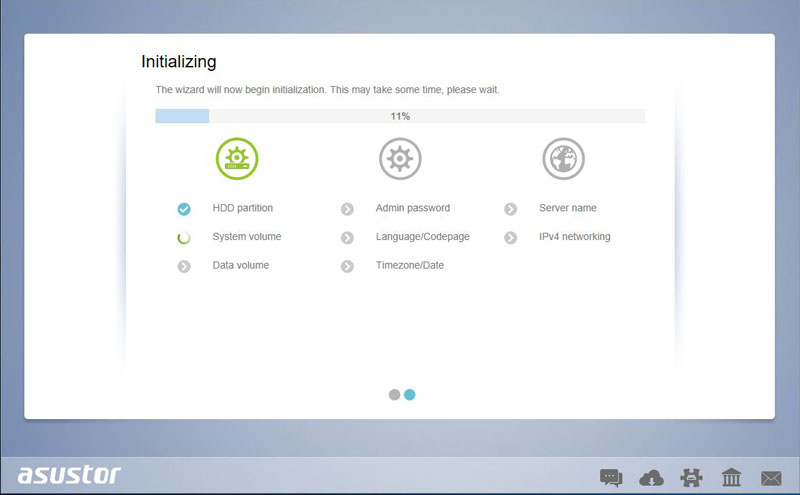
If we decided to use Custom Setup we would then select how we want the hard drives to be configured, Single, JBOD, RAID 0 and RAID 1. It would then continue with initializing the NAS.
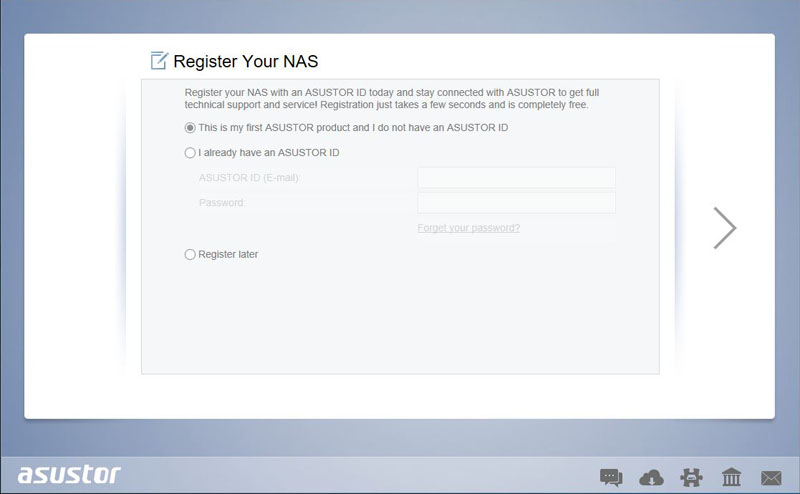
After the NAS has finished initializing we can register our NAS with Asustor.

Initializing the NAS only took a few minutes and when it is all finished up we are at the NAS Management Desktop.
Asustor AS1002T – 2-Bay NAS Performance
Our AS1002T can be setup to run in four different configurations Single Drive, JBOD, RAID 0 and RAID 1. For our testing we will configure the AS1002T in each of these different RAID types and run our tests. All though we cannot encrypt the entire storage configuration we can encrypt folders. We also test encryption on our test folder.
The performance benchmarks we will use are Intel NAS Performance Toolkit and ATTO Disk Benchmark. This is not the full test suite we run on larger rackmount systems, then again, these are not systems designed to deliver millions of IOPS in a data center. Instead, these systems are meant to provide file sharing, backup, media streaming and other features directly from the NAS.
Our network consists of a Quanta LB4M 1/10GbE switch that connects our AS1002T to our workstation. This is not a consumer switch; however, it was a very popular 1GbE/10GbE switch for large cloud providers. For hard drives we will be using two Western Digital 4TB Red NAS drives
Intel NAS Performance Toolkit
The Intel NAS Performance Toolkit (Intel NASPT) is a file system exerciser and analysis tool designed to enable performance comparisons between network-attached storage (NAS) devices. We run the various tests in different drive configurations.
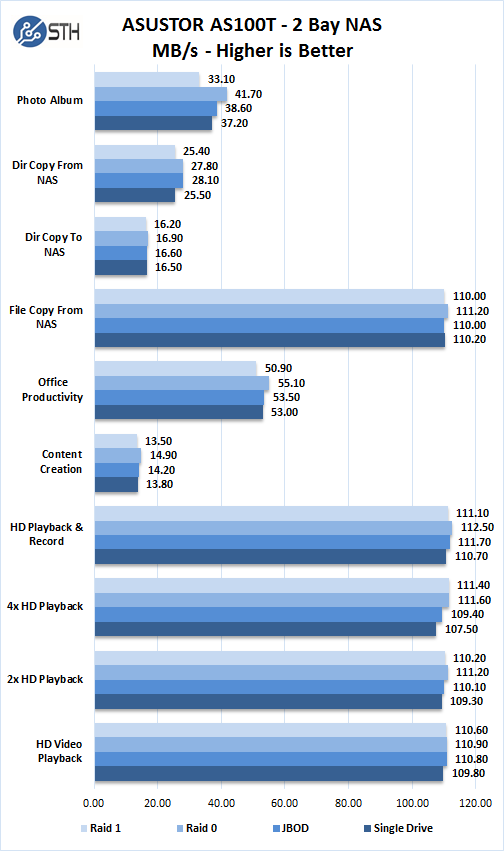
In each of the four different Raid configurations we notice the numbers are relatively close, just like in past 2-Bay NAS reviews. The main consideration is how you want your data stored. RAID 0 and JBOD modes do not offer protection but give the highest storage capacity. RAID 1 offers protection but halves the storage capacity and is slightly lower in performance. We recommend using RAID 1.
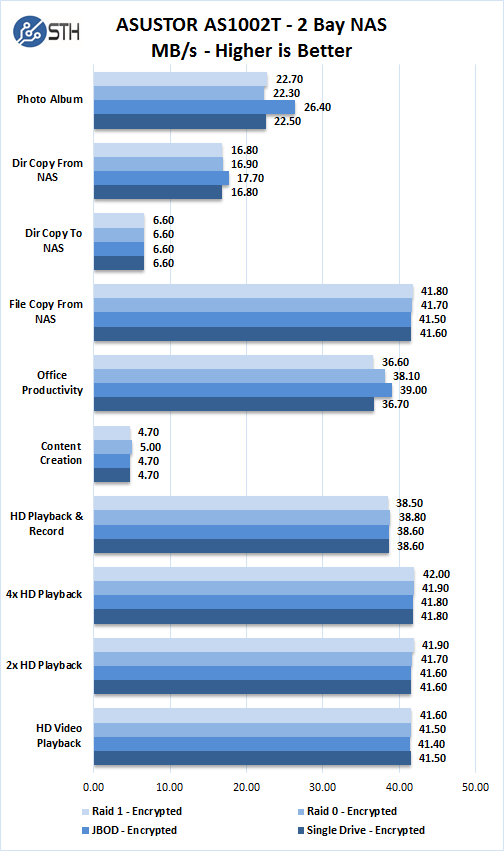
When setting up shared folders we can select to have the folder encrypted as an option for those who need extra security. We ran all our tests again with this option set. There is a performance hit when doing this which is about half of what you might see without encryption turned on.
ATTO Disk Benchmark
ATTO Disk Benchmark identifies performance in hard drives, solid state drives, RAID arrays as well as the host connection to attached storage.
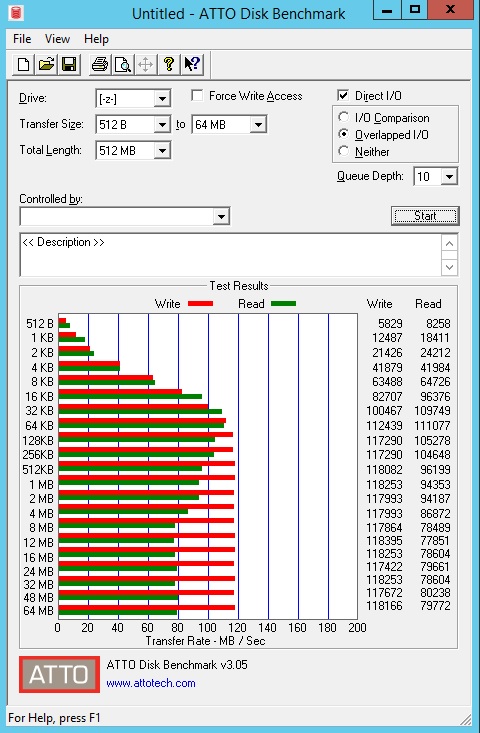
In a Single Drive configuration, we see max transfer rates of 111 MB/s reads and 118 MB/s writes. Reads do fall off to around 77 MB/s while writes hold steady.
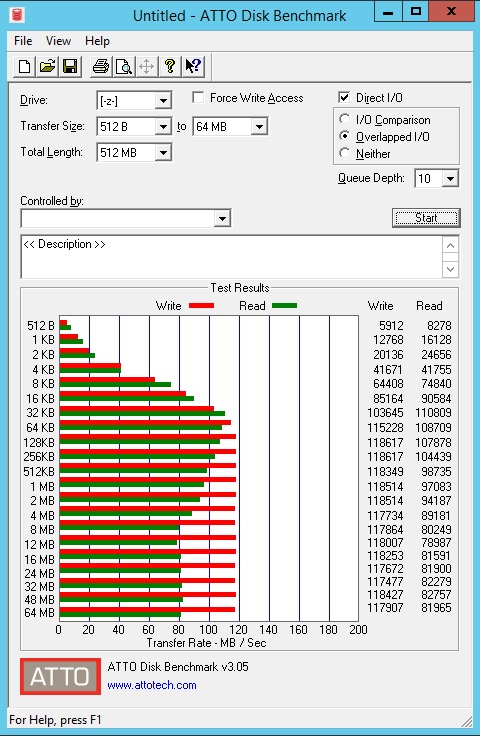
In a JBOD configuration, we see max transfer rates of 110 MB/s reads and 118 MB/s writes. Again, we see reads fall off to about 78 MB/s while writes hold steady.
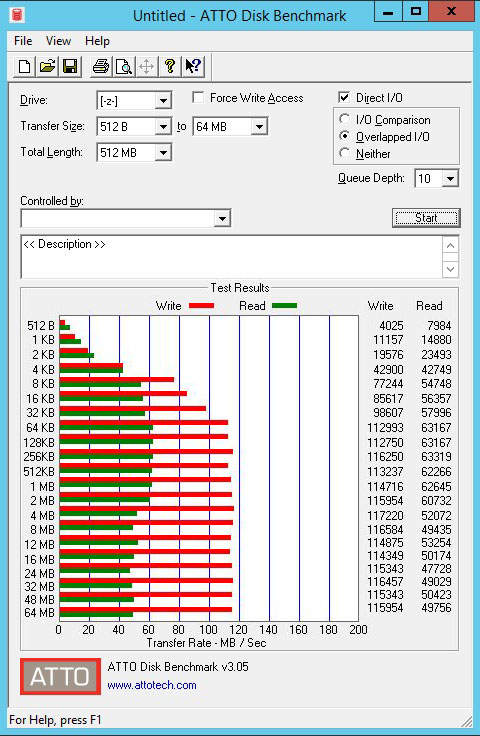
In RAID 0 configuration, we see max transfer rates of 111 MB/s reads and 118 MB/s writes. Reads do fall off to about 47 MB/s while writes hold steady.
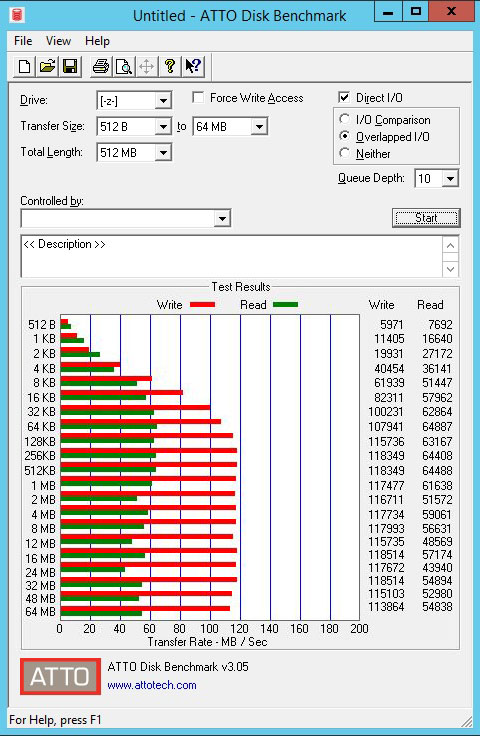
In RAID 1 configuration, we see max transfer rates of 64 MB/s reads and 118 MB/s writes. Reads do fall off about 43 MB/s while writes hold steady.
In higher-performance (and more expensive) 2-bay NAS units we will see reads and writes hit 120MB/s. The fact that our writes are significantly higher than reads on a sequential test like ATTO means that the units are likely using RAM as a write cache. As a result, we recommend using this NAS with a UPS to ensure that the unit does not suffer an abrupt power failure.
Power Test
For our power testing needs we use a Yokogawa WT310 power meter which can feed its data through a USB cable to another machine where we can capture the test results.
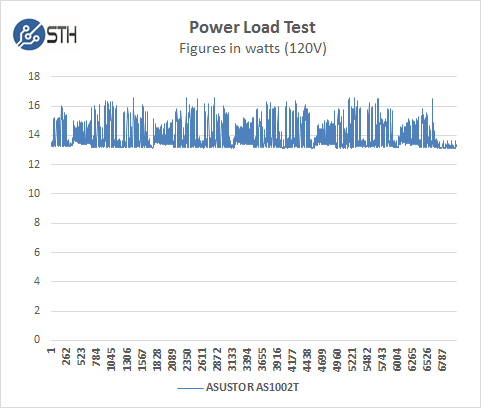
The AS1002T idles at around 13.125 watts and under max load during our tests we saw a peak of 16.61 watts.
Asustor AS1002T Software
The AS1002T base install provides for basic unit functionality. Each of these applications can be accessed from the Management screen.
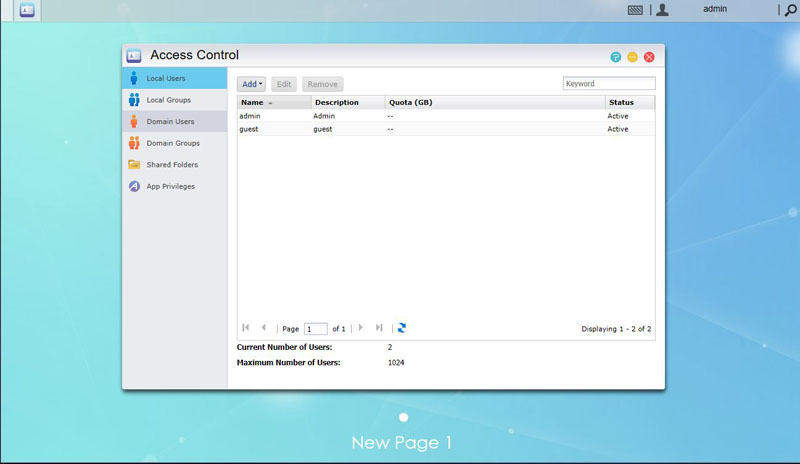
Access Control allows you to set access privileges for a variety of use settings. Here you can add users, quotas and form groups.
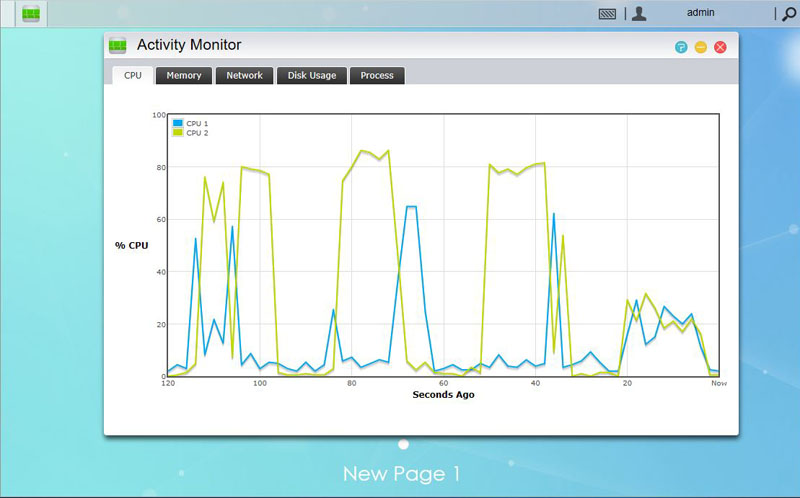
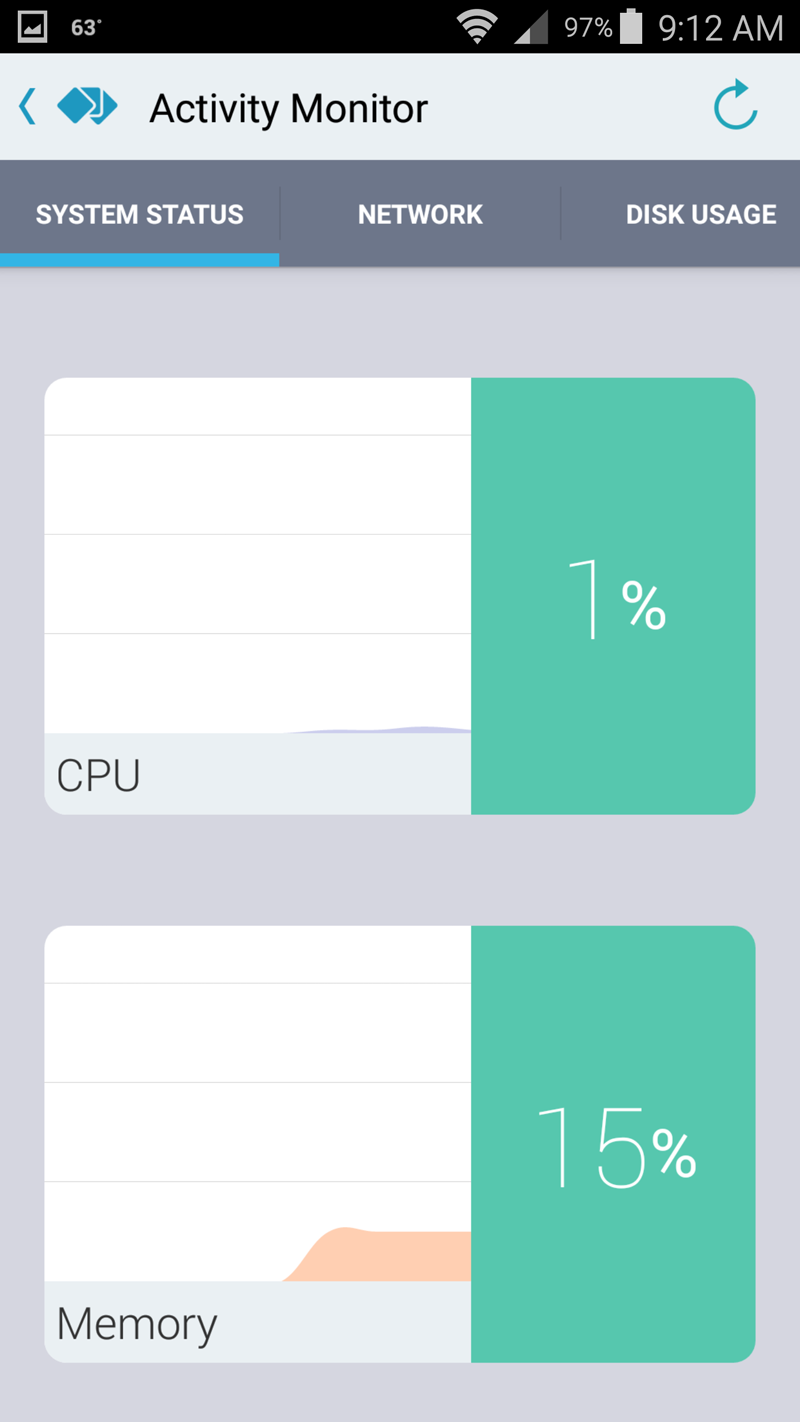
The Activity Monitor allows you to see performance statistics for the NAS. We like to monitor our devices and Activity Monitor provides the basic information we are looking for. We would like an option that shows all five categories on one screen.
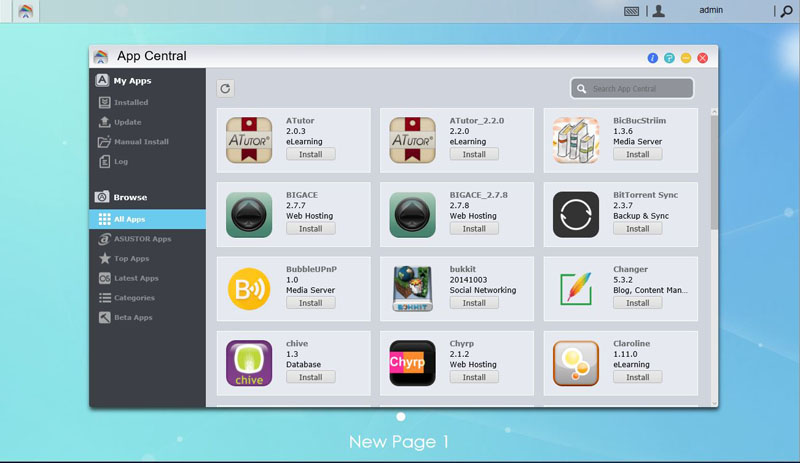
The AS1002T does not come with a wealth of applications pre-installed. There is a rather large number of applications that can be downloaded and installed through App Center. The AS1002T does come with limited memory that is not expandable, we recommend only download and use applications that you actually need.
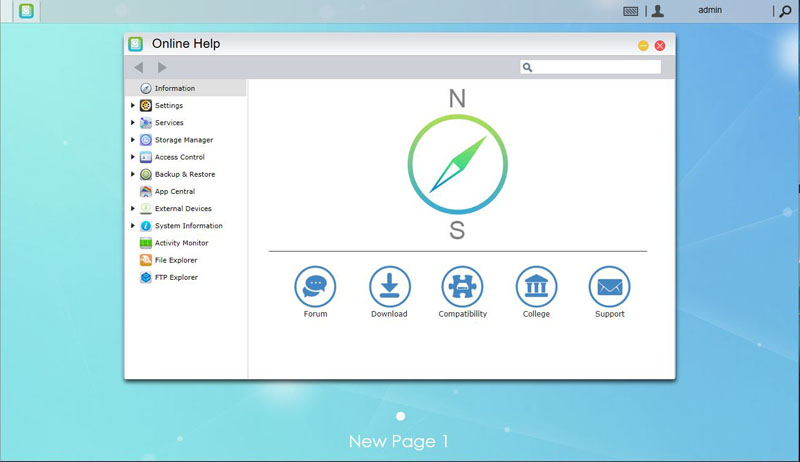
If you need help deciding on how you want your NAS to function, the Online Help app is there to assist you. This is important for novice users looking to setup technical features.
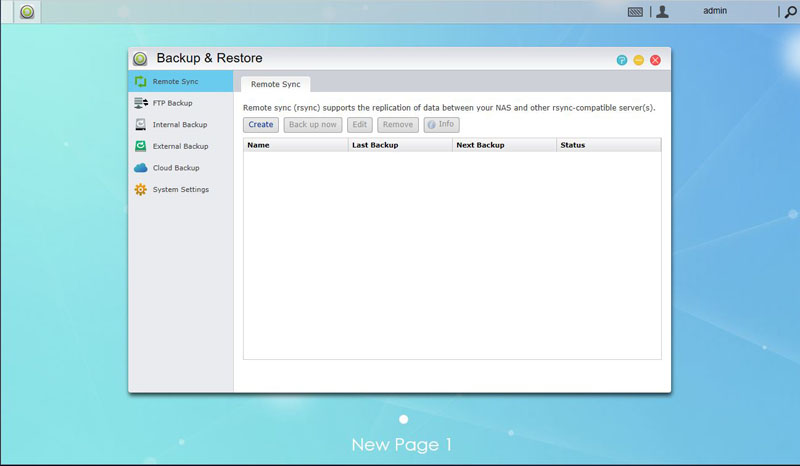
With Back & Restore you can set a variety of different backup options for your network. We have several options here, for local and remote backups and we can synchronize with other compatible devices.
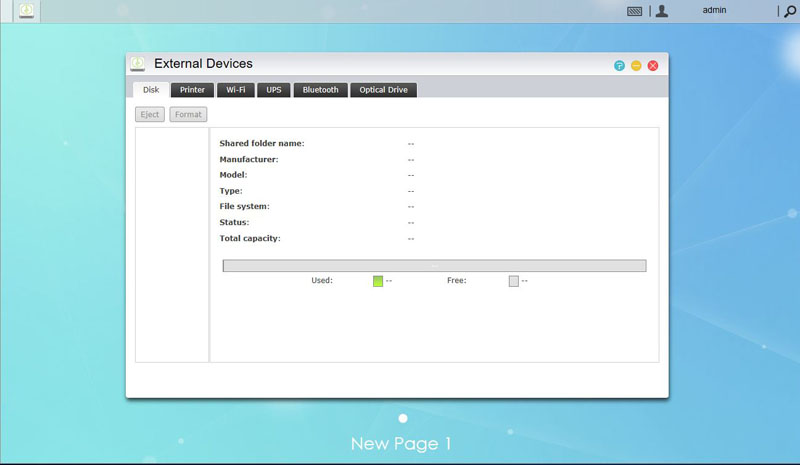
The External Devices application allows you to see devices connected to the AS1002T. Plugging in flash drives into the USB 3.0 ports or even printers allow these devices to be used as network connected devices.
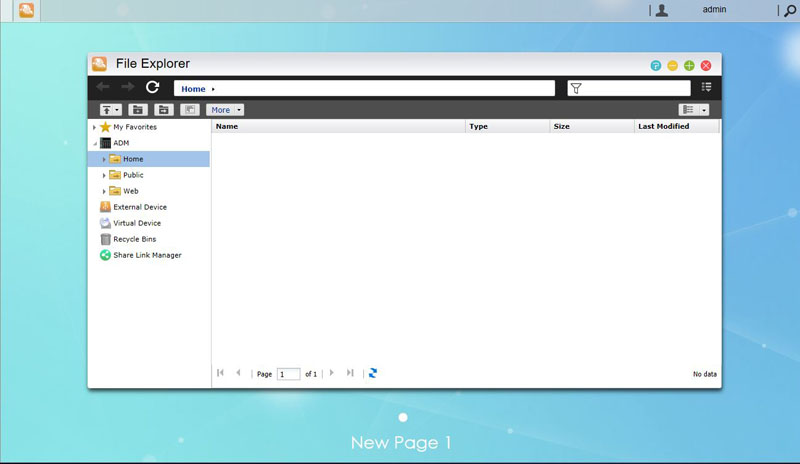
With the File Explorer you can create folders and shared folders and even encrypted them if desired. Properties and Permissions can also be set here for folders and files.
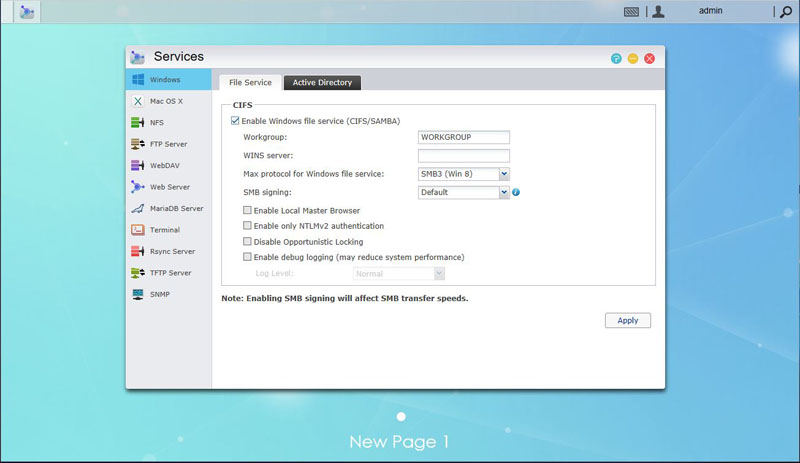
In the Services app options for windows users include Active Directory and NTLMv2 authentication and Mac OS X users can turn on Bonjour and the Time Machine, meanwhile Linux users can select NFS and control privileges.
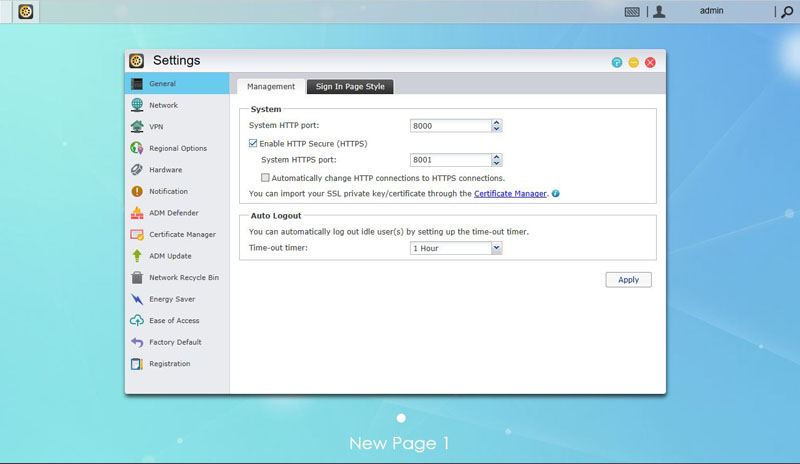
Various NAS configurations can be set in the Settings app. Most of these settings are configured with the 1-Click setup but they can also be changed and configured here if you need to. Energy saving features and fan settings can also be changed.
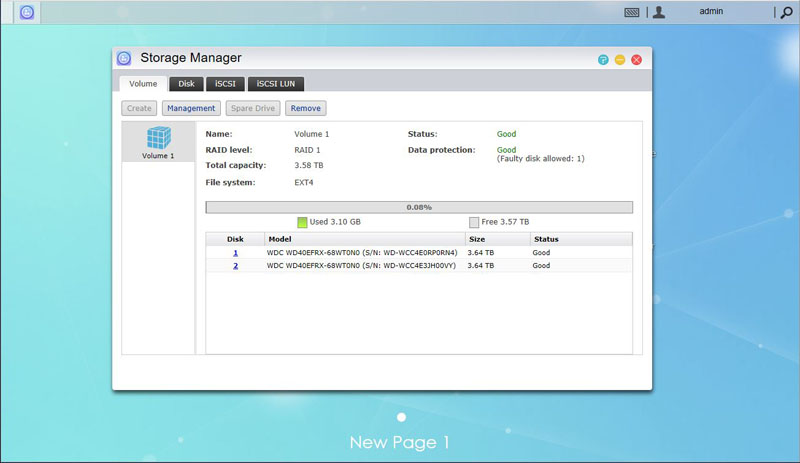
Although this is usually completed in the NAS setup, if you decide to change the NAS configuration it can be done in the Storage Manager. Note, this can result in data loss if you use the feature with data already stored on the disks. You can see how full your disks are and monitor drive status in this window.
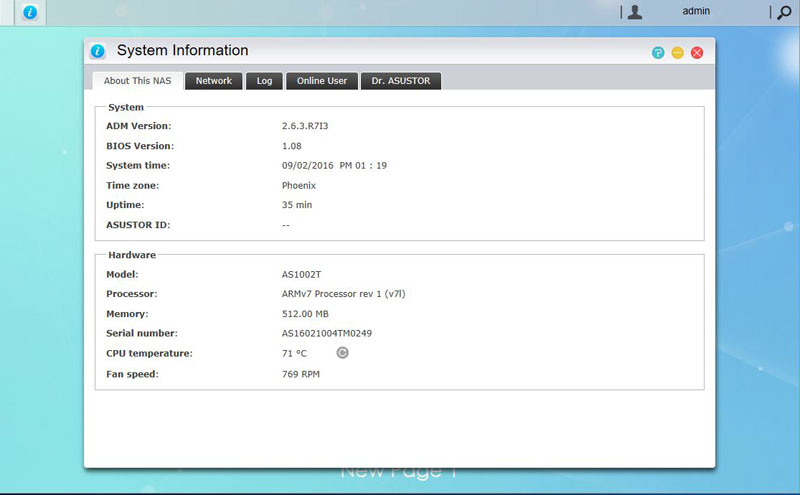
System Information can be displayed in this app. The Dr. ASUSTOR tab will give you diagnostic tools for the AS1002T.
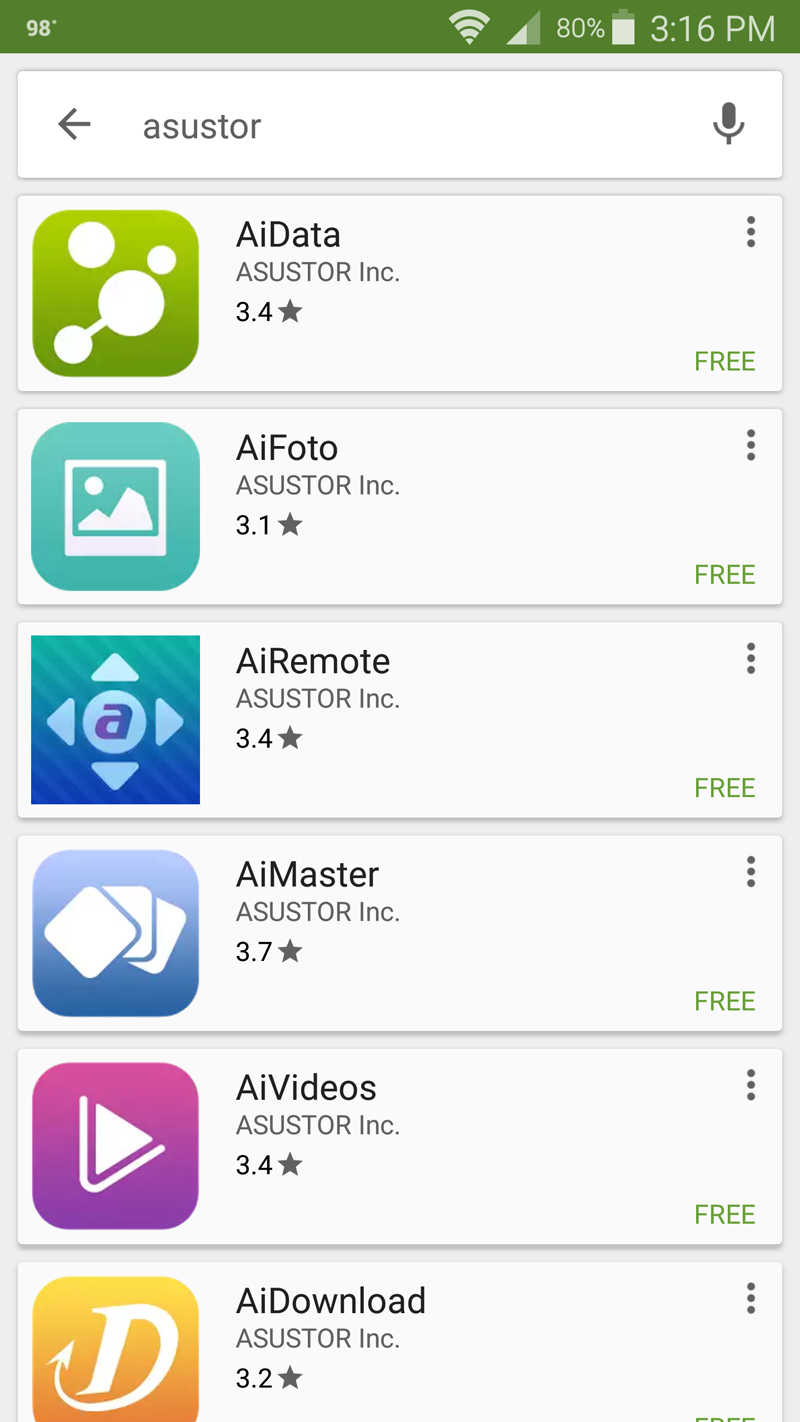
In addition to all the features we have just shown there are also apps you can download for your cell phone to control and monitor your Asustor NAS. We use a Samsung Galaxy Note 4 so we entered the Google Play Store and searched for Asustor and found a list of apps that we can use.
We selected and installed the AiMaster which found our AS1002T right away. We then logged in and found the home screen.
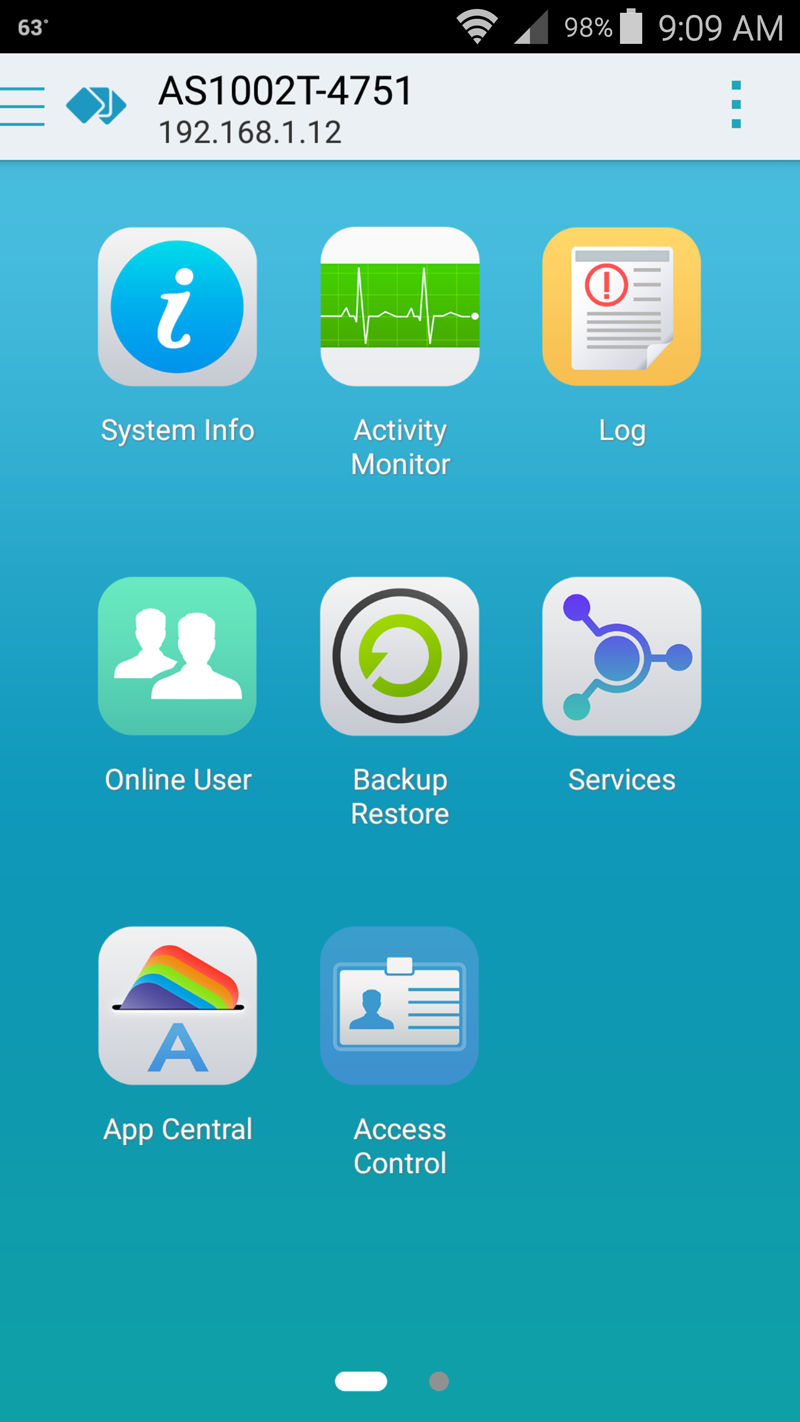
AiMaster allows the use of the same applications we saw in the Management Screen on our desktop.
An additional app that is used to create or modify folders is AiData.

There are many more apps that can be found in the Google Play Store to use with your AS1002T. Download and use the ones like or feel useful in your day-to-day operation of the AS1002T.
Conclusion
Setting up the AS1002T was as simple as it gets with NAS boxes of this type. Perhaps one of the easiest to get up and running yet, it really boils down to setting up a server name and password and a few clicks later it’s up and running and ready to start file sharing.
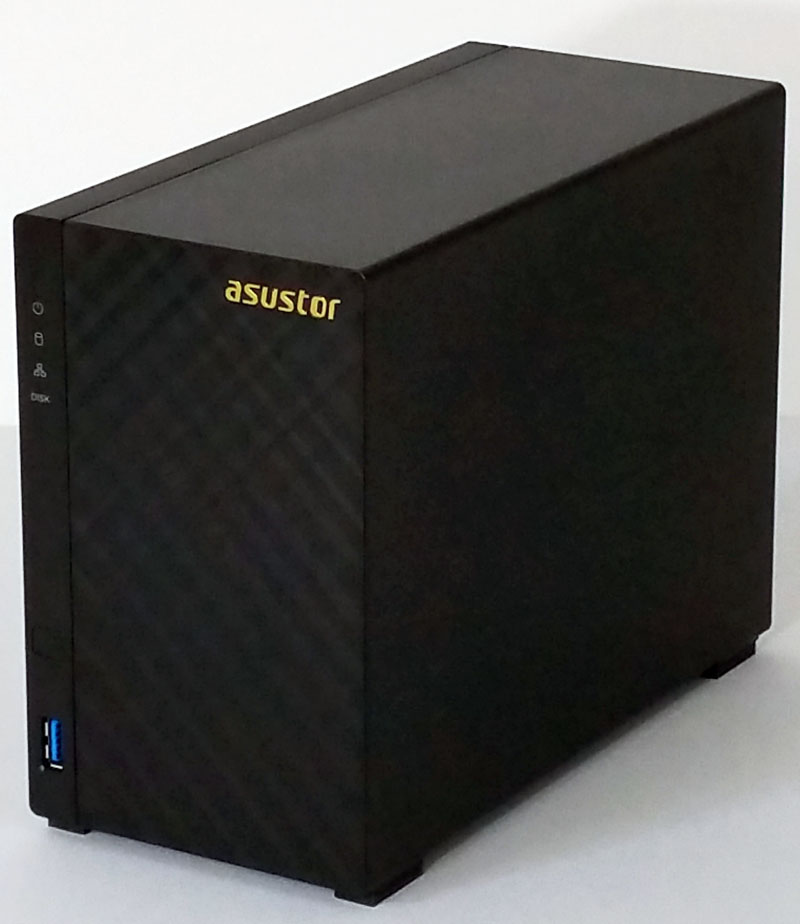
The design of the NAS itself is classy with its diamond texture on the front face of the NAS and it should look very nice in your home media center. Like the other 2-Bay NAS boxes we have tested so far the AS1002T makes next to no noise and runs nice and cool. Noise level is important when you have your media center running and do not want any distractions while streaming a movie to your main display, the AS1002T will not let you down in this regard.
While the ARM based processor is very typical of NAS boxes of this type, it is not a speed demon only running at 1GHz with dual cores it is ample enough for the task at hand. Limited USB ports is one drawback if you wish to connect your USB printer and additional devices such as a WiFi adapter and other devices. However, the Gigabit Ethernet port should be able to handle 99% of typical user’s setups.
We also like that the AS1002T did not come with any additional apps pre-installed. This frees up the limited amount of memory and gives you the option of installing only what you need.


I have a Asustor NAS 1002 . Recently I have had two WD purples fail on this device within 3 months. (both less than 18 months old). I have been carrying out a lot of disk intensive operations (that’s what purples are designed for) and I can’t help thinking that this system just cannot cope with it. Anyone else have any Disk problems with the Asustor 1002T??