Continuing with our 2-Bay NAS reviews we have a Synology DiskStation DS216j as the next unit up for review. According to Synology the DS216j is designed for home and personal use with its data sharing and multimedia streaming capabilities. The best part is that it we purchased our review unit for around $170 on Amazon.
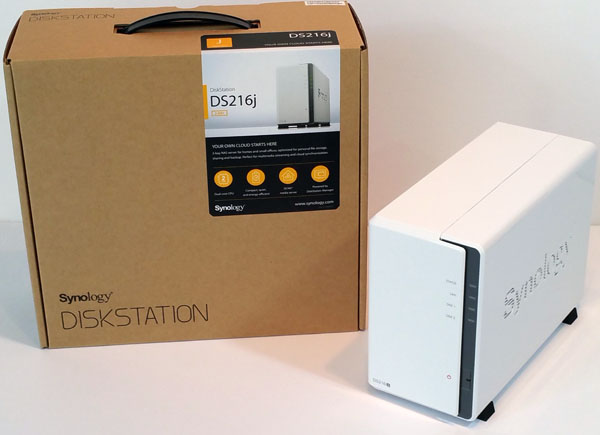
The Synology DiskStation Manager comes with much expanded media sharing abilities. With additional cloud sharing services, the DS216j has the ability to share files and media across a wide range of devices. This is a significantly higher-end 2-bay NAS unit than the Buffalo LS220D we recently reviewed.
Synology DiskStation DS216j – 2 Bay NAS Specifications
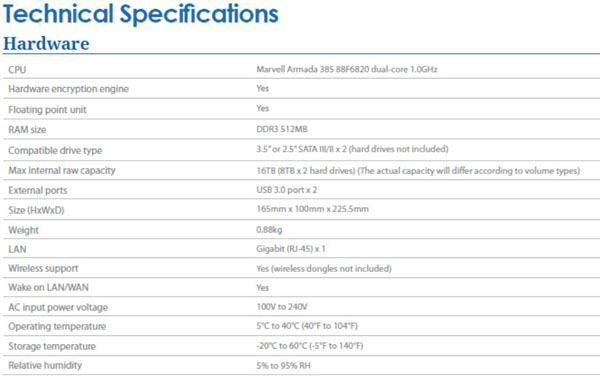
- CPU: Marvell Armada 385 88F6820, Dual Core up to 2.0GHz
- RAM: 512 MB DDR3
- Number of Drives: 2
- Drive Interface: SATA 2, 3 Gbps
- Maximum Internal Raw Capacity: 16 TB (8 TB HDD x 2) (Capacity may vary by RAID types)
- Maximum Single Volume Size: 16 TB Supported RAID: 0/1/JBOD (Individual Disks)
- Data Transfer Rates: 10/100/1000 Mbps
- Dimensions: (Height x Width x Depth): 165 mm x 100 mm x 225.5 mm
- Weight: 5.5 lbs with drives – 0.88 kg / 1.94 lbs empty
- Power Consumption: Max 60W
- Power Supply: External AC 100-240V Universal, 50/60Hz
Synology DiskStation DS216j – 2 Bay NAS Overview
Packaging for the DS216j is in the form of a cardboard box with a carrying handle at the top. The box itself is heavy duty and protects the contents well.


The front and back of the retail box does include product labels that give a brief look at the IO options of the DS216j. Not much else is labeled so it’s wise to look at the product website Synology DS216j if you require more information on capabilities of this NAS.
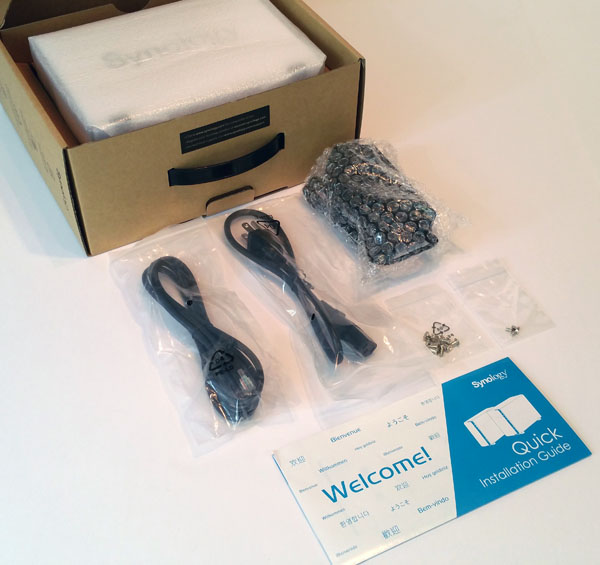
Accessories included with the DS216j include
- DiskStation DS216j empty enclosure
- Quick Setup Guide
- Ethernet Cable
- AC Adapter
- Two small bags of mounting screws are included, these are hard drive mounting screws and screw’s to secure the case after hard drives are installed. Several extra screws are included for both the hard drives and case
The DS216j itself is also wrapped in foam for added protection.
Synology DiskStation DS216j – 2 Bay NAS Installation
After removing the DS216j from it’s packing material we can now take a look at the NAS.
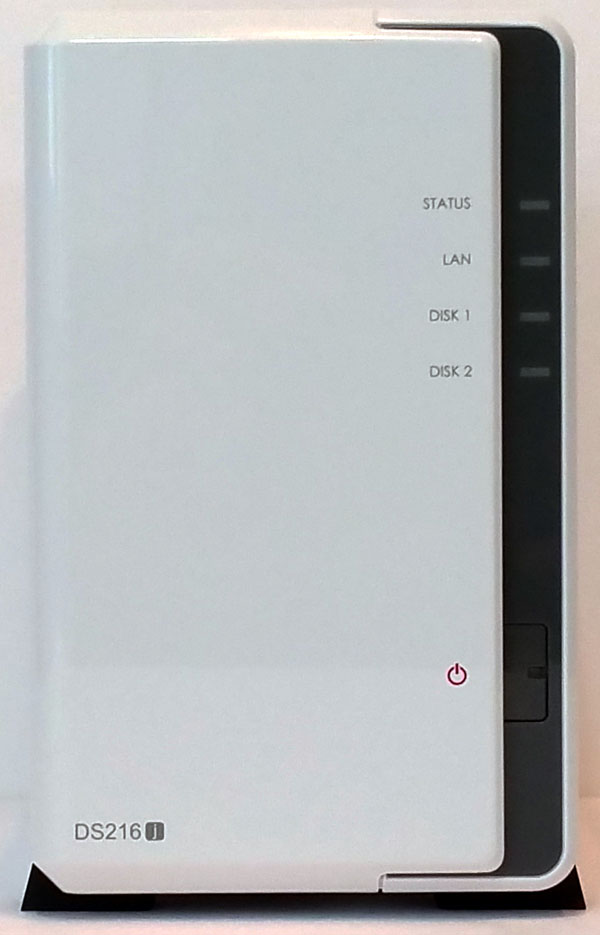
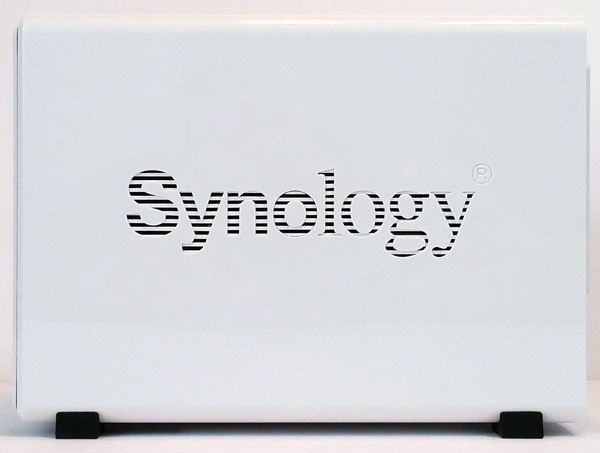
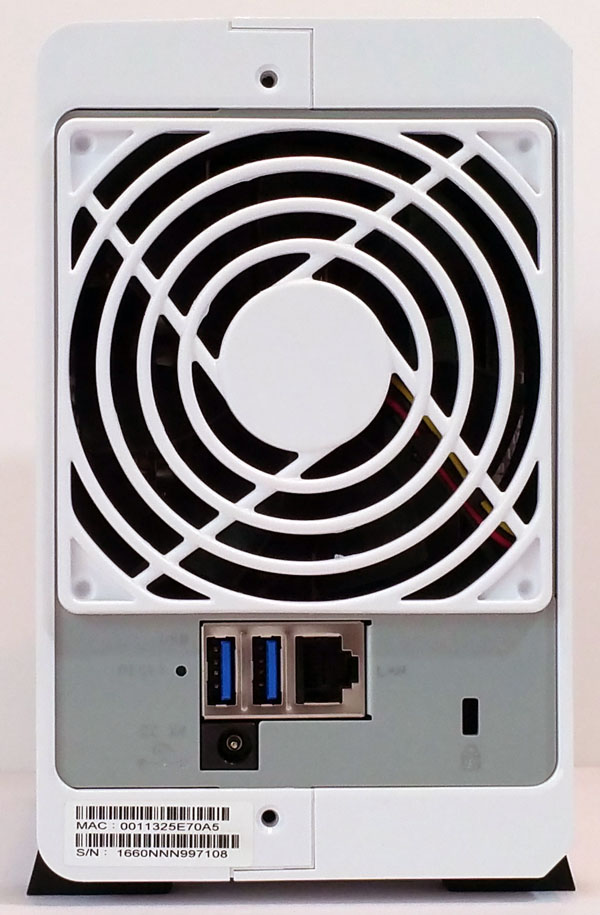
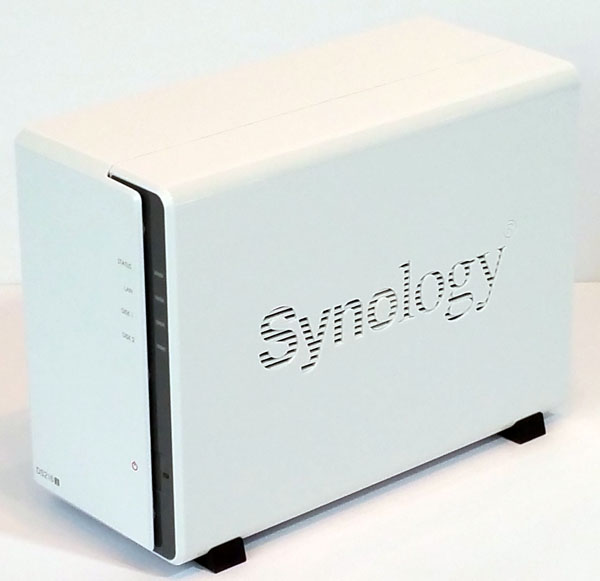
The DS216j is a nice looking NAS, very clean lines and the engraved Synology logo on the sides does provide extra ventilation for the NAS which will help to keep it cool.
The back of the NAS has 2x USB 3.0 ports, RJ-45 1GbE LAN Port and power connector. In addition there is a security port to lock the unit down at a location.
We can also see the two holes for case screws to secure the lid on the NAS after installing hard drives.
Let’s move on to installing the hard drives.
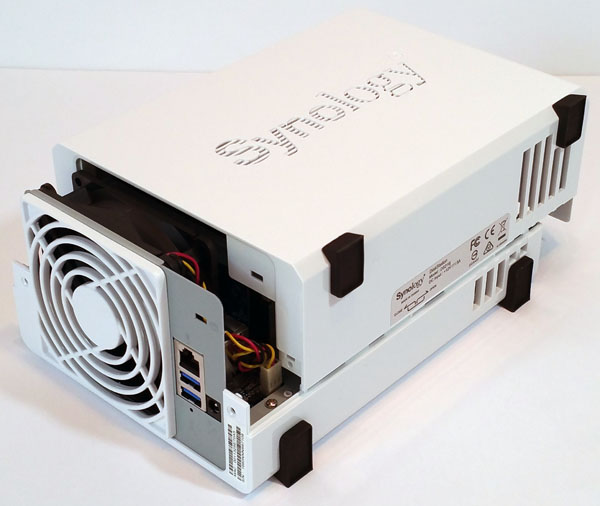
In order to install drives the side cover needs to be removed. This is a rather simple task, simply slide the cover back and lift off. Our unit did not have screws in place but if yours does they will need to be removed before doing this.
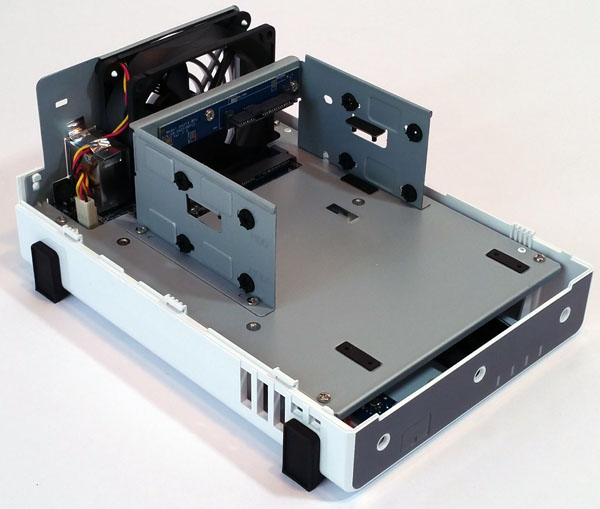
With the cover off we get a chance to see the insides of the DS216j. This NAS has dives that mount inside the NAS and here we can see the bracket that holds them in place. Also at the back we can spot a rather large 92 mm x 92 mm cooling fan for the unit.
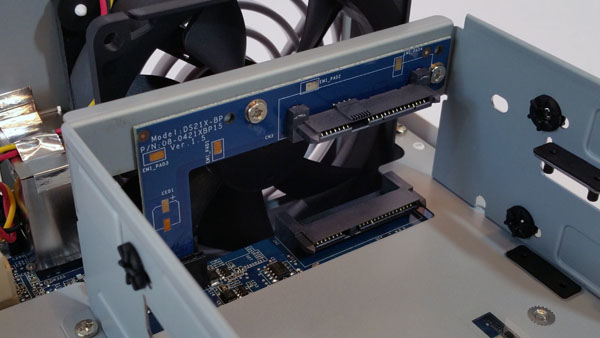
Here is a close up of the hard drive back plane. Care should be taken when installing drives so this does not get broken. As one can see, these are longer SATA data and power connectors which could break off if too much leveraged force is applied.

Hard drives simply slide in with a little care with alignment so they plug into the SATA socket at the back. Each of the drive slots and mounting screw holes has rubber padding to help reduce vibrations.
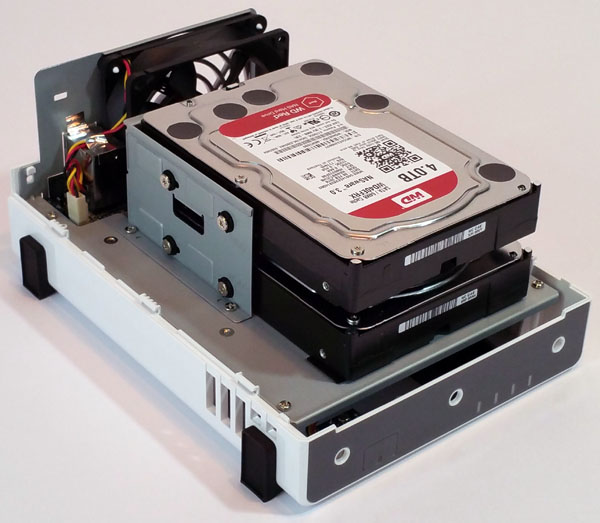
Here we have the pair of WD 4TB RED NAS drives installed. Everything looks good so we will slide on and secure the case side cover and begin testing. While this installation is simple, the device is not a hot swap unit. These 2-bay NAS units are intended for lighter workloads but replacing a drive will likely mean that the NAS unit goes down during servicing.
Synology DiskStation DS216j – 2-bay NAS Management
After turning on the NAS and connecting it to your network type in “find.synology.com” in your browser to bring up the management interface. This is a very slick feature.

After this page comes up we can now connect to the DS216j.
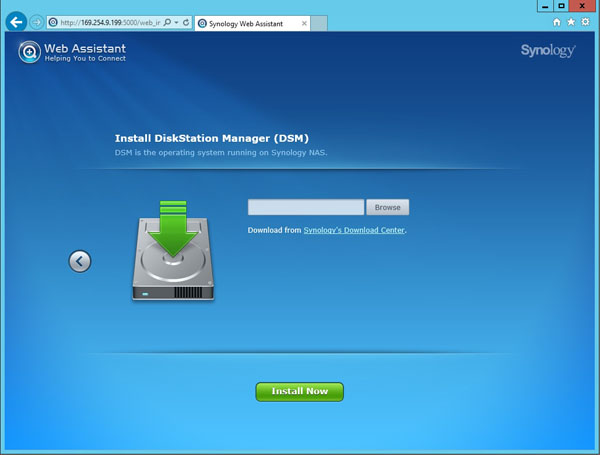
The first item we are presented with is a firmware update. For this we need to connect to Synology’s website to download the needed update.
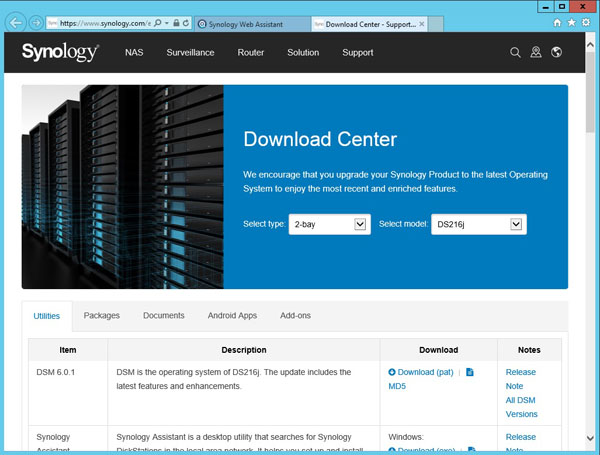
Let’s go ahead and download this update to our desktop, then go back to the update page and hit browse, locate the update file and click Install Now.
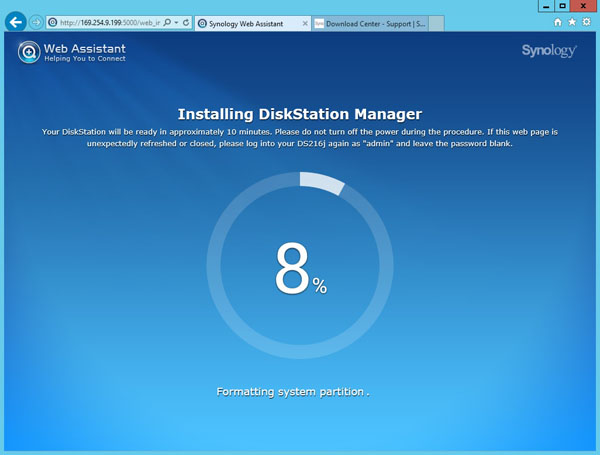
After the firmware has been update the system begins to initialize the DS216j and we can now see a progress meter so we can watch the progress which only takes a minute or two.
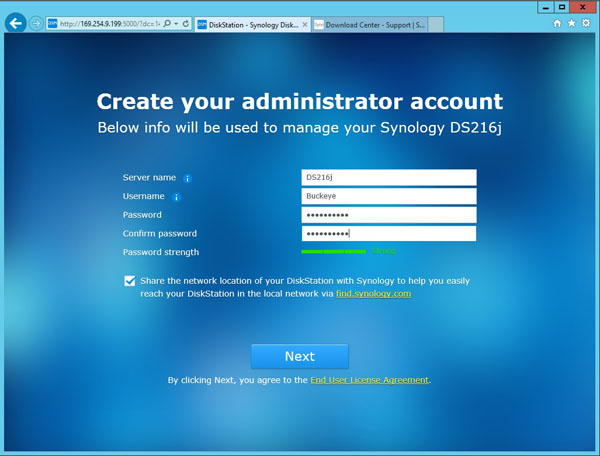
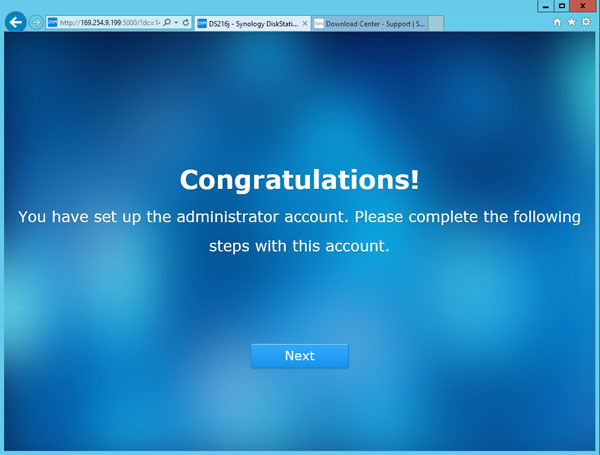
The next step is to create a admin account and password and you can also give it a server name, clicking next and we are finished.
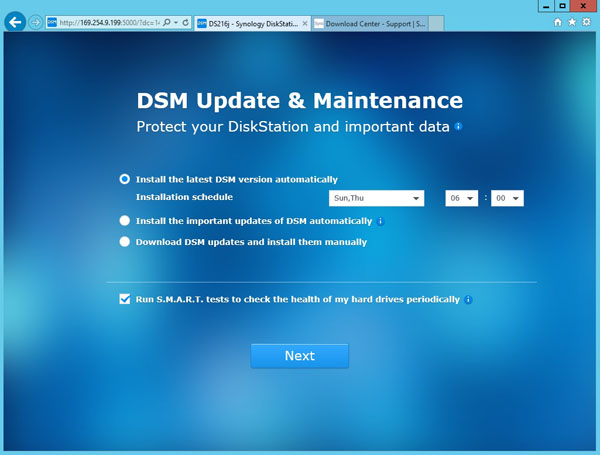
The next step is to configure DSM updates and Maintenance.
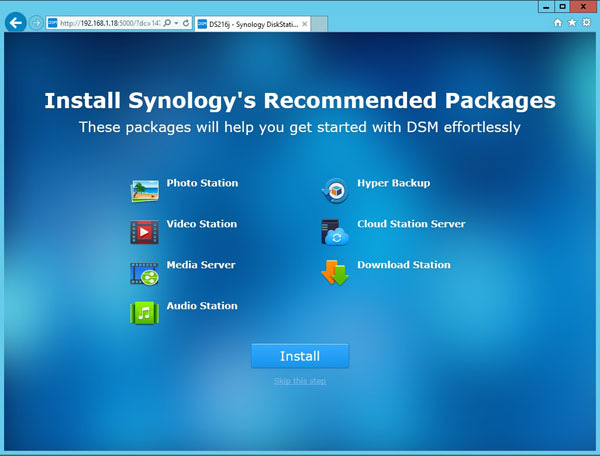
The next to final step is installing packages that you might want. We installed all of the packages, if you are not interested in these you can skip this step.
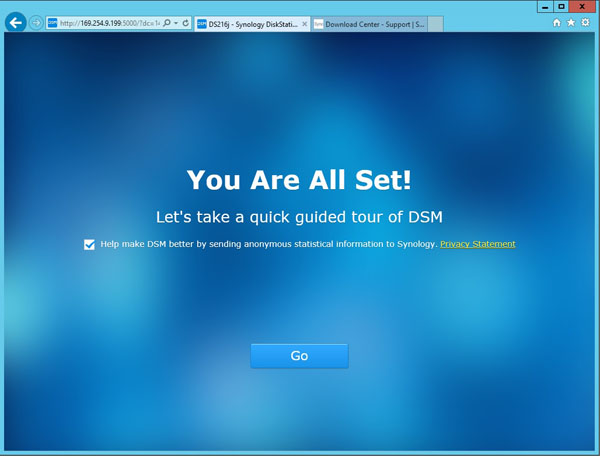
And finally we are finished with getting the system up and running.
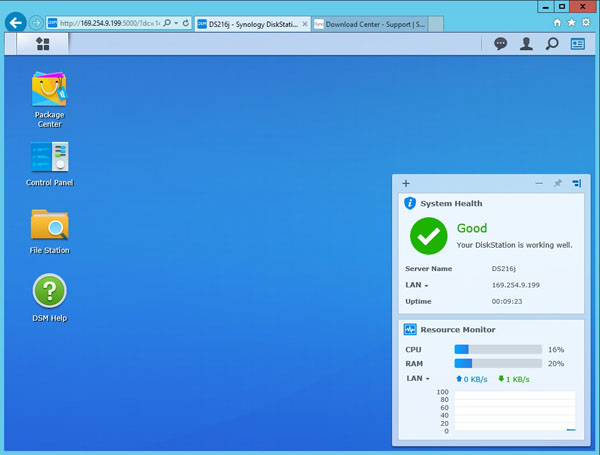
After pressing “Go” we find ourselves at the main configuration screen for administering the DS216j.
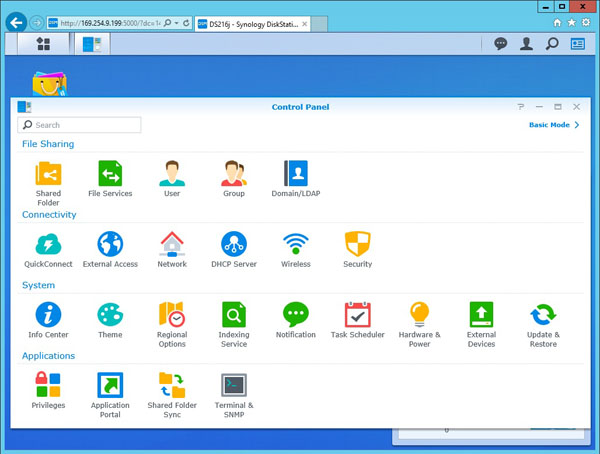
By clicking the “Control Panel” icon and selecting Advanced Mode we can see the features the DS216j supports.
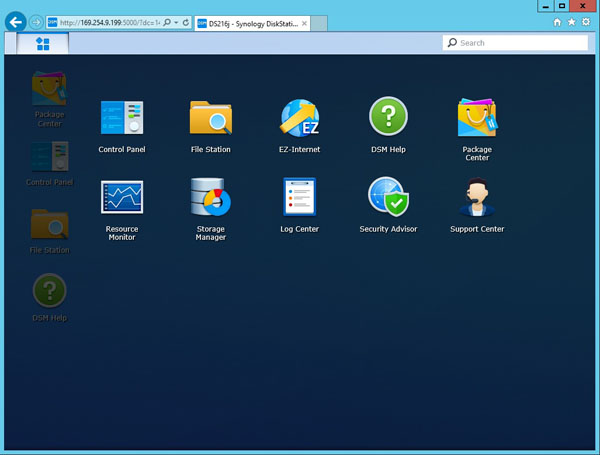
Clicking on the top menu bar options icon we find an abbreviated control panel. Let’s click on the “Storage Manager” to get the DS216j setup.
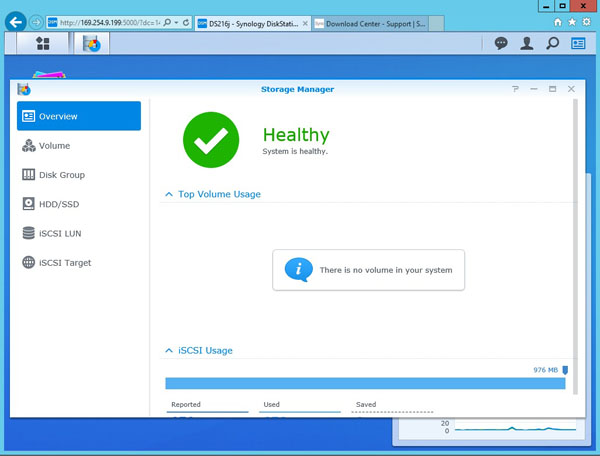
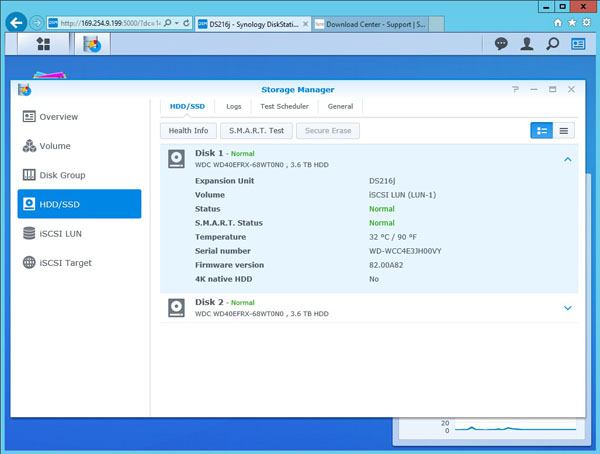
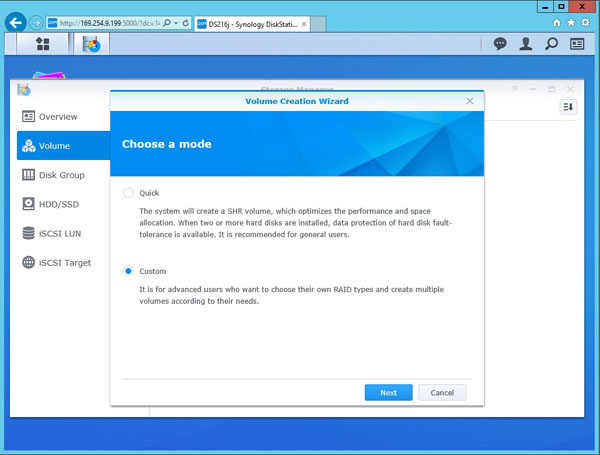
The first step is to create a Volume and we will use Custom so we can see a list of available options.
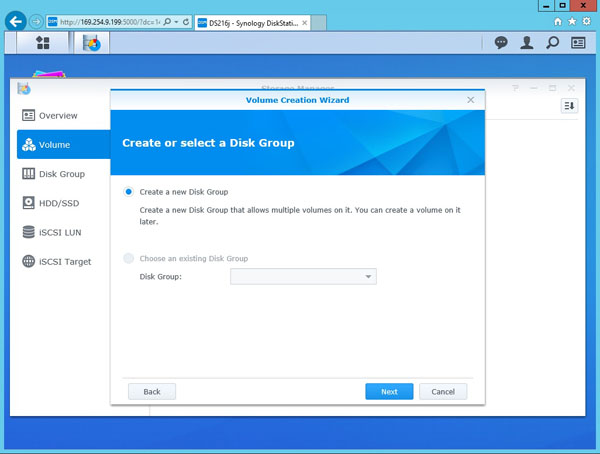
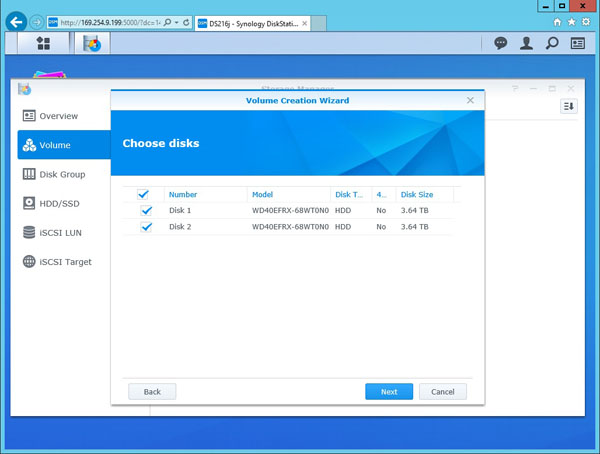
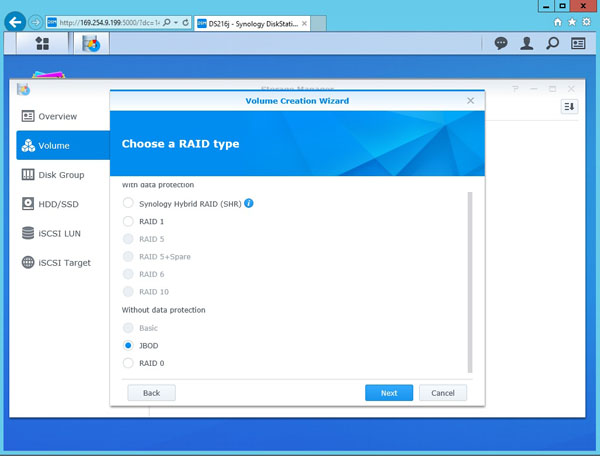
After following along with the setup we now see a list of Raids available to use. We will start off our testing with JBOD. There is also a Synology Hybrid Raid (SHR) which we can use.
From Synology’s website we find information about SHR:
What is Synology Hybrid RAID (SHR)?
SHR is an automated RAID management system that makes storage volume deployment easier than traditional RAID systems. SHR will allow users to handle RAID management, expand storage, and maximize storage capability even if they do not have a fine grasp of various RAID levels. SHR allows for 1-disk or 2-disk worth of redundancy – meaning the SHR volume can suffer up to two disks lost, and the data volume will still be available for use. Note that a RAID volume (either Classic RAID or SHR) is not a backup system.
In our case we only have two drives installed, SHR will gives us data protection if we loose a disk due to failure. You can read more about Synology Hybrid RAID (SHR) here.
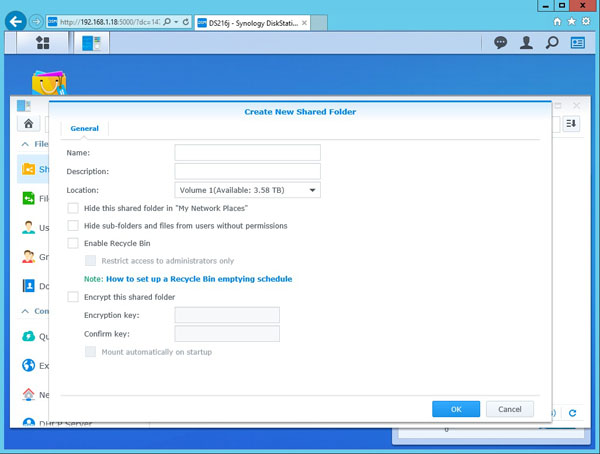
The last thing to do is enter a Shared Folder name.
Now we have configured our DS216j, let’s move on to performance testing.
Synology DiskStation DS216j – 2-bay NAS Performance
Our Synology DiskStation DS216j can be setup to run in four different configurations, SHR, JBOD, Raid 0 and Raid 1 and also iSCSI for more advanced uses. For our testing we will configure the DS216j in SHR, JBOD, Raid 0 and Raid 1 configurations and run our tests.
The performance benchmarks we will use are Intel NAS Performance Toolkit and ATTO Disk Benchmark
Our network consists of a Quanta LB4M 10Gb Uplink Switch that connects our DS216j to our workstation. This is not a consumer switch, however it was a very popular 1GbE/ 10GbE switch for large cloud providers. For hard drives we will be using two Western Digital 4TB Red NAS drives.
Intel NAS Performance Toolkit
The Intel NAS Performance Toolkit (Intel NASPT) is a file system exerciser and analysis tool designed to enable performance comparisons between network-attached storage (NAS) devices.
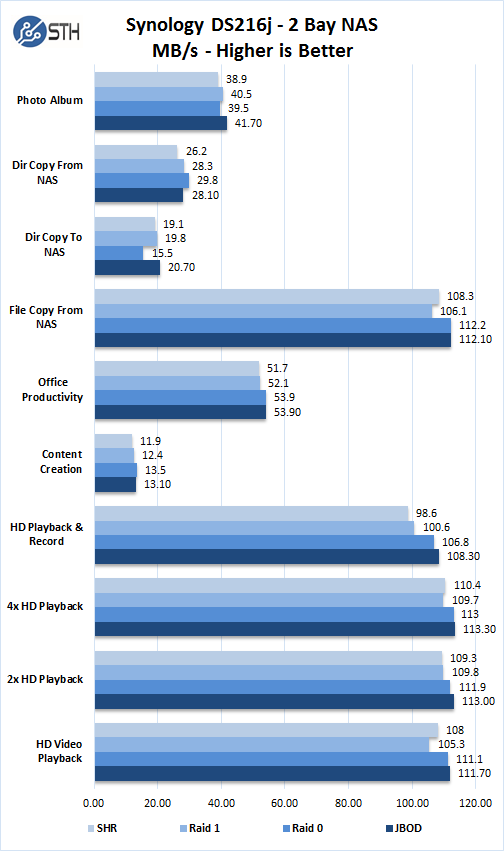
In each of the four different RAID configurations we see strong performance in our benchmarks. JBOD configuration gives us very good performance except in the Dir Copy to NAS benchmark. RAID 0 shows us the best overall results but with this configuration we lose data protection. Given the fact we are limited to 1GbE, RAID 0 is unlikely to be the best choice. We would suggest SHR or RAID 1 with this unit.
ATTO Disk Benchmark
ATTO Disk Benchmark identifies performance in hard drives, solid state drives, RAID arrays as well as the host connection to attached storage. Here are the Synology DiskStation DS216j JBOD results:

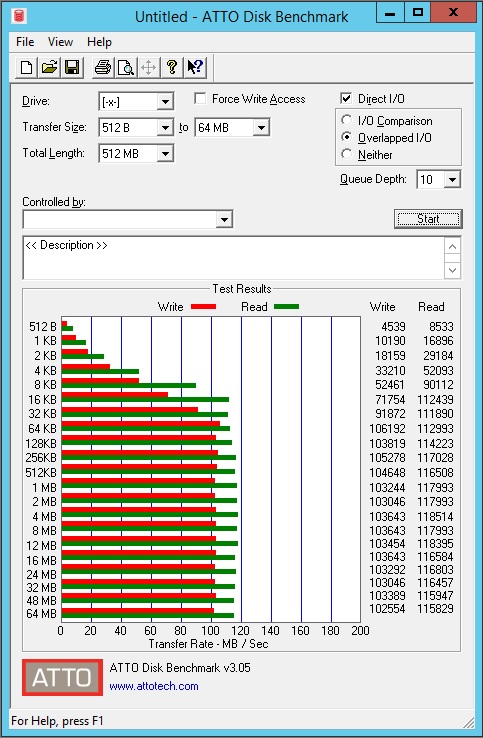
Synology DiskStation DS216j RAID 0 results:
Synology DiskStation DS216j RAID 1 results:

Synology DiskStation DS216j SHR results:
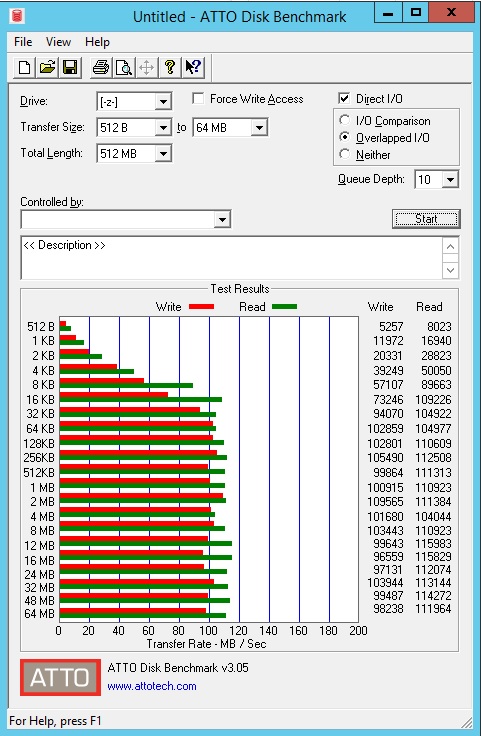
Performance in the 100MB/s to 115MB/s range is respectable for 1GbE networks common in SMB and SOHO environments. We have even seen these small Synology 2-bay units used on data center shelves as low cost in-data center backup appliances.
Power Consumption
For our power testing needs we use a Yokogawa WT310 power meter which can feed its data through a USB cable to another machine where we can capture the test results.
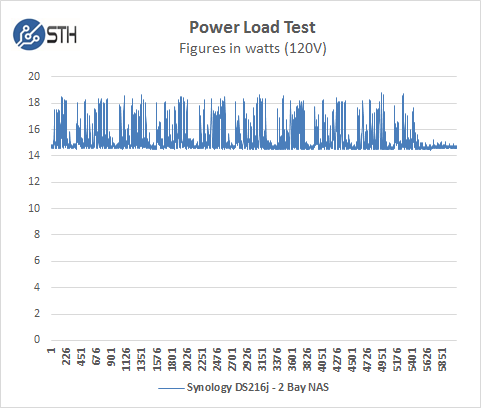
The DS216j idles at around 14.6 watts and under max load during our tests we saw a peak of 18.357 watts.
Performance Monitoring
One of the features we really liked about the DS216j is the “Resource Monitor” which you can view performance, processes, connected users and speed limits.
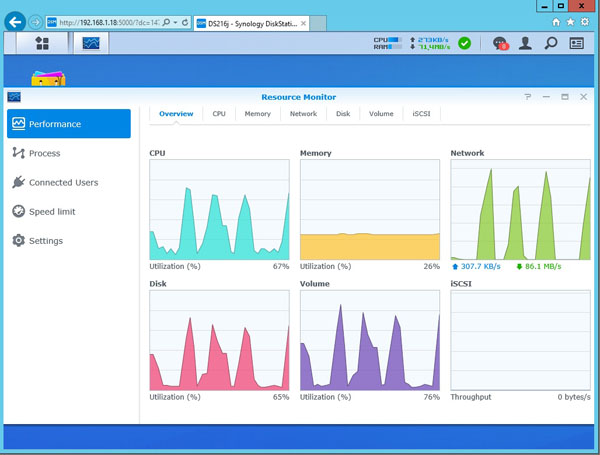
This is great to see how the NAS unit is performing over time and what resources/ users are generating the most load.
Conclusion
The Synology DiskStation DS216j 2-bay NAS drive has more functionality than almost any other 2-bay NAS in our roundup. At $170 it is still an affordable way to get two drives online yet with a lot more functionality than some of the other offerings on the market.
Setup for the DS216j does take a little bit of time since the drives are not hot-swap. Connecting to the NAS is very fast and offers good performance in file copies and media use. With cell phone apps the DS216j can be administered remotely and this NAS can also be used to capture surveillance IP camera’s. Synology has one of, if not the best NAS software on the market today. We last looked at Synology DSM several years ago (e.g. here) but we are likely to do a standalone piece in the near future showing of the greatly expanded suite of capabilities.
We also streamed our Blu Ray ISO through our network which was smooth and we had no issues, it can also be used to stream content to your TV or other mobile devices.
Sharing files is not limited to local devices, The DS216j can be configured to share to Amazon Drive, Dropbox, Google Drive, OneDrive, Amazon S3, Microsoft Azure, Google Cloud Storage and OpenStack Swift. There is also a wealth of apps available for your mobile use.
The Marvell Armada 385 88F6820, dual core processor is well suited for this NAS which can do many things including boosting thumbnail processing, enhancing photo browsing experience, as well as transcoding audio tracks into MP3s on demand to reduce streaming bandwidth. In the 2-bay NAS form factor this works.


