As was mentioned in my previous article, I am a big fan of using VirtualBox virtualization on my Windows 7 x64 desktop to sandbox different storage configurations, especially with ZFS capable operating systems like FreeNAS and OpenSolaris. While Microsoft’s Virtual PC works well to virtualize Windows XP instances on the desktop, it lacks the feature set of a more robust virtualization tool like Oracle’s VirtualBox.
In this article, I am going to show how one can install EON ZFS Storage, an OpenSolaris based operating system in VirtualBox to allow one to test ZFS storage solutions out before implementation. For the uninitiated user (to ZFS), I would strongly urge them to experiment with both FreeBSD and OpenSolaris based ZFS implementations before committing to build a full storage solution based on either. Also, I am using my previous article regarding installing VirtualBox on Windows 7 x64 as a basis for this article.
Test Configuration
I noticed that I have done a poor job listing the test system in articles from the first quarter of 2010 and earlier. As a result, here is test configuration:
- CPU: Intel Core i7 920
- Motherboard: Gigabyte X58-Extreme
- Memory: 12GB of Corsair Dominator GT 1600 C7 DDR3
- Case: CoolerMaster Cosmos S
- Drives (OS): 2x OCZ Vertex 120GB in RAID 0
- SSD: OCZ Agility 2 120GB SandForce based SSD
- Video Card: EVGA Geforce GTX 285
- Controller: Intel ICH10R with Intel Rapid Storage Technology (RST) 9.6.0.1014
- NIC (additional): Intel Pro/1000 PT Quad
- Power Supply: Corsair CMPSU-1000HX 1000w Power Supply
- Host OS: Microsoft Windows 7 Ultimate 64-bit
This system has plenty of memory and power to run an OpenSolaris/ FreeBSD ZFS storage system in VirtualBox plus Windows 7 64 bit.
Installing EON ZFS Storage in VirtualBox Step 1: Setting up the Virtual Machine
This part of the guide again is premised upon VirtualBox being installed first. Please see this quick guide on setting up VirtualBox on Windows 7 64 bit if you have not done so already. The easiest way to set up a test machine is to hit new.
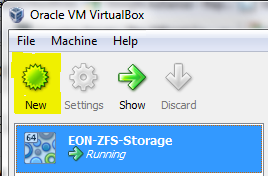
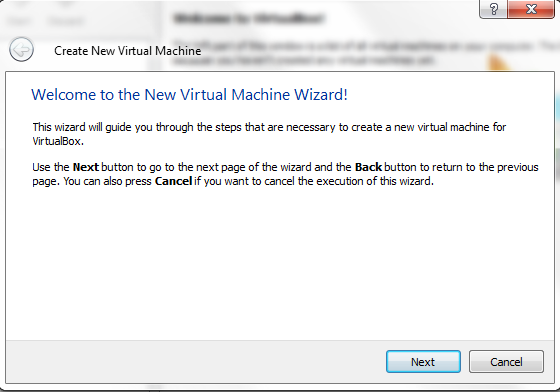
Once you hit new, the Virtual Machine Wizard will run. Luckily this is very simple to navigate.
The next step is to give the VM a name (I use operating system and sometimes a note regarding what I am using it to test) and select the operating system type.
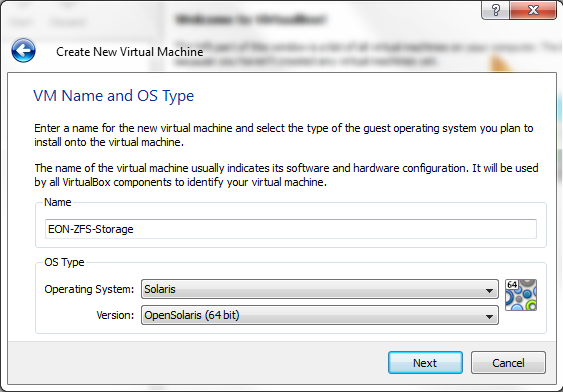
EON ZFS Storage is based upon OpenSolaris. Since a Raid-Z storage server is a very memory hungry application, I use 64-bit versions. As noted above the test machine has 12GB of DDR3 primarily to run these test machines when needed so allocating 4GB or more of RAM is not an uncommon thing to do. The next step is to allocate memory to the virtual machine.
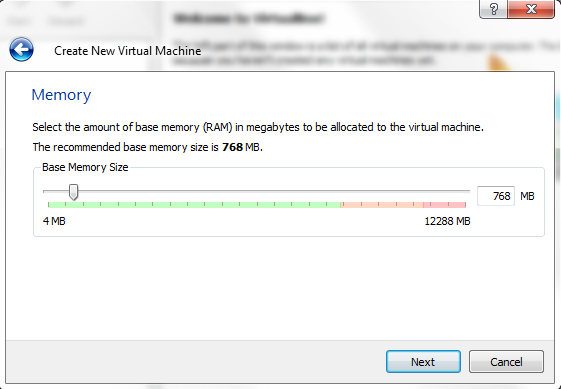
Here I am using only 768MB. While you can use less, I would suggest using at least 2GB if you have the capacity available. Admittedly, these screen shots were taken just to illustrate the process and not make a virtual machine that I use on a regular basis. The next step involves creating the storage disk (main boot disk).
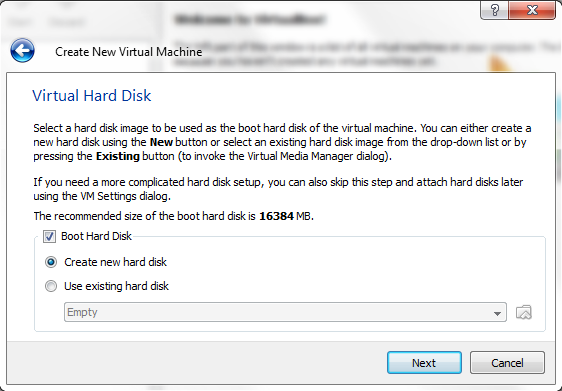
Generally one wants to create a new hard disk for their boot disk. Selecting “Create new hard disk” and then clicking “Next” will start the create new virtual disk wizard (click next through the splash screen.)
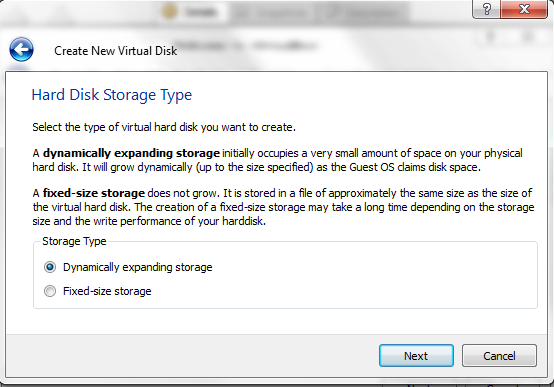
Here one can pick dynamically expanding storage or fixed size storage. Dynamically expanding storage only uses a disk footprint on the host hard disk (usually a physical drive) that is required to hold the virtual machine data. For example, if you have 20GB filled on a 120GB partition in Windows, you have a 120GB disk dedicated to holding only 20GB of data. With a fixed-size storage disk you create/ reserve 120GB of space on the host drive to simulate the 120GB disk storing 20GB of data. With a dynamically expanding disk, you use only 20GB (or a bit more) on the host disk yet the host virtual machine thinks you are using a 120GB drive. Essentially, the virtual hard disk file’s footprint will grow with a dynamically expanding disk as data is stored in the virtual machine. Performance wise, the general rule of thumb is that dynamic disks decrease performance by at least 6% depending upon the host disk’s fragmentation.
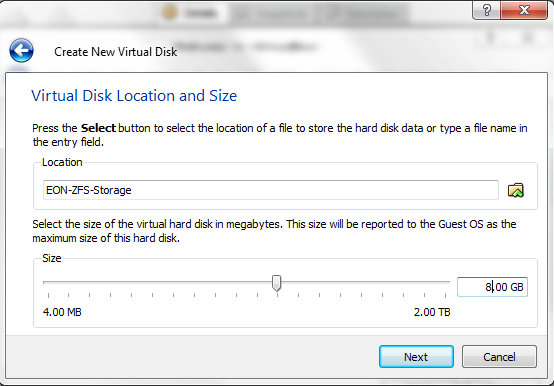
The last step in creating the new virtual disk is to size the virtual disk. This is basically the actual file size of the virtual disk for fixed-size disks and the upper size limit allowed for a dynamically expanding disk (unless you expand the disk size later). EON ZFS Storage needs less than 500MB. To see the resultant stored file size of the dynamic disk above with EON actually installed see:

As one can see, even a 8GB drive (the size of a common USB flash drive) is sufficient for EON’s operating system footprint. At this point, you can just keep clicking next and finished to get through the create new virtual hard disk and virtual machine wizard.
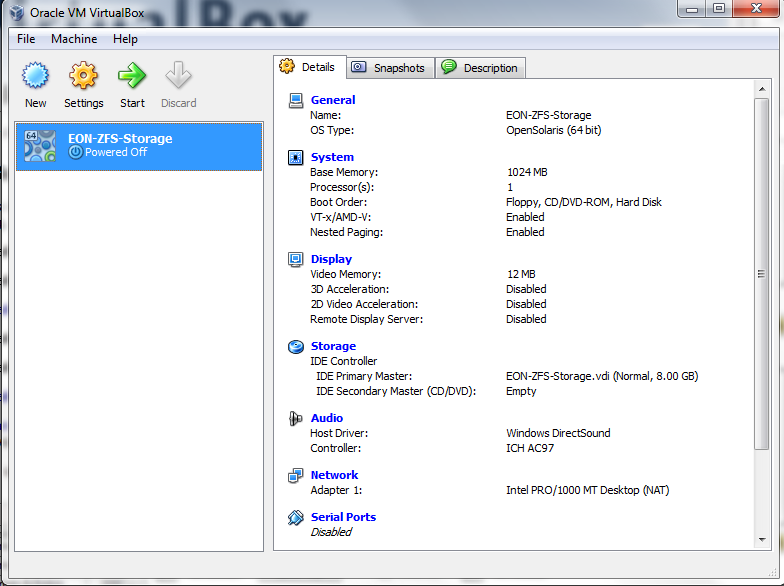
Now it is time to install EON in the virtual machine.
Installing EON ZFS Storage in VirtualBox Step 2: Installing EON ZFS Storage
The first step is to get EON. For this I am using the newest build (as of 1 July 2010) based upon snv_130. Download the version you want to test here. Personally I use the 64-bit CIFS ISO.
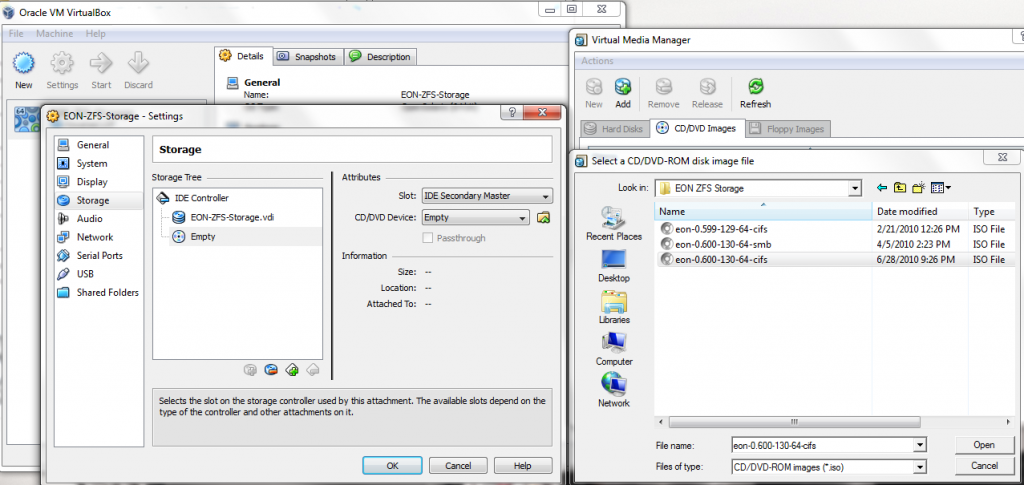
Here you want to click on your new VM and click Settings -> Storage. Then where it shows the CD/DVD device you want to click on the folder icon and navigate to the EON ISO you want to mount and click Open.
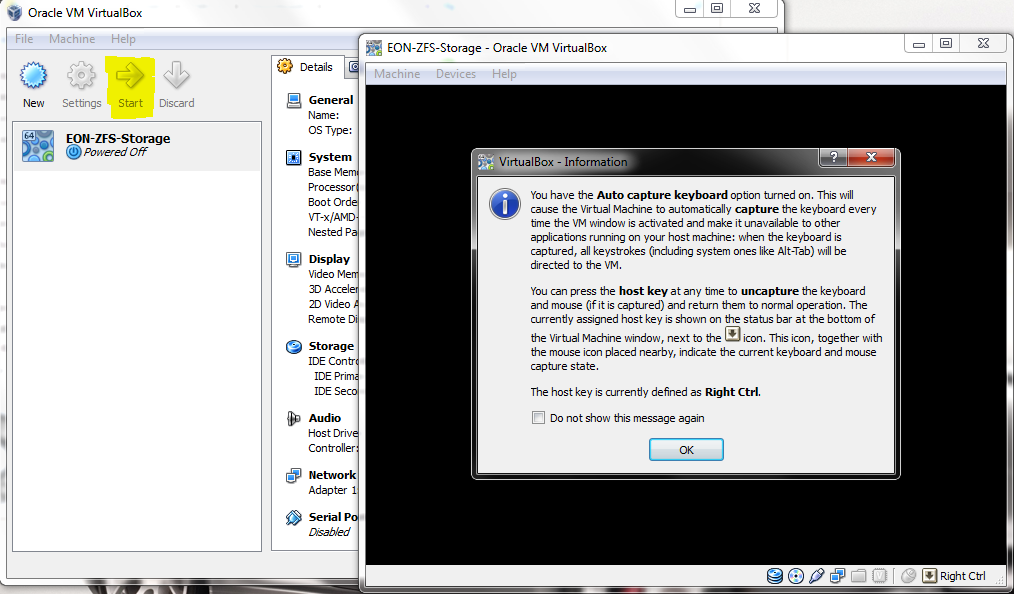
Once the virtual machine is mounted, click start. You may get warning boxes such as the one shown above. It is a good idea to take note of them as it can be frustrating to have a mouse get captured in the VirtualBox window and not be able to leave that window if you do not know to hit the right Ctrl button on the keyboard. Eventually you will be greeted by the following view:
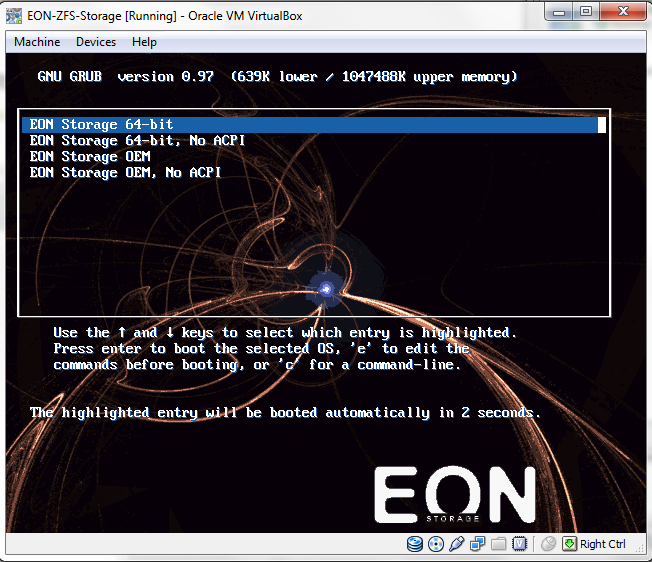
At this point, I would suggest selecting EON Storage 64-bit. You will soon be prompted by the login screen:

You are now ready to play with EON ZFS Storage. Since I know it is tough to hunt down the default username/ login and passwords the two that you may want to use are:
Login: root Password: eonsolaris
Login: admin Password: eonstore
Conclusion
That’s it! Sorry for the huge wall of screen shots above but it should make setting up a ZFS storage testbed very simple. From here one can test various OpenSolaris commands and practice setting up zpools. You will likely want to add additional virtual disks to the virtual machine using the settings tab and new virtual disk wizard as described above. If you do use a single physical drive to host multiple drives for a zpool, I would strongly suggest using a SSD as that works significantly better than a traditional hard disk for testing purposes.



Really thorough guide. Are you going to have a follow-up with how to install CD contents to boot virtual drives? Keep up the super work.
was afraid 2 try this. thanx
Nice guide, but you should make it more obvious that this is for *testing purposes only*, and any data stored in this VM should also be backed up somewhere else.
By default, VirtualBox doesn’t respect disk commands that tell the disk to flush its buffers, so a VirtualBox or OS crash could wipe out all of your data. There is a somewhat famous thread on the ZFS forums/list where this exact situation happened, and the user didn’t have the data backed up.
The site is great, I haven’t found such good home-focused Xeon/server MB reviews anywhere else. Something I’d like to see is some power supply comparisons (with a test config including 4-6 disks), and maybe even a green vs. regular disk comparison (both power and performance).
Sonny, I will work on that in the near future. I actually have the screenshots already taken.
Brendan, thanks for the great feedback. I tried noting that the setup is only for testing, and that is also why I didn’t show how to add virtual disks or install the OS to the virtual disk in this article.
Power supply comparisons I will probably get to at some point. My big issue is that if I do something like that, I would really want to step up to a better power supply testing setup. I will see what I can some up with. On the hard drives, personally, I was a big StorageReview.com fan back in its golden years. Since it is coming back, I may see if they bring back a new version of their awesome testing. I will say that what is intriguing to me in the world of “green” drives is the Western Digital EARS drives with the significantly lower BER. Will keep those comments in mind when planning new content.