Norco has a reputation for providing inexpensive server rackmount cases that are oftentimes good enough for many home and small business applications. Being server cases, popular models like the RPC-4220 and RPC-4020 are built to be installed in server rooms where airflow takes precedence over noise. Traditional 90mm fans were found in the center partitions of those models. While the typical quality Delta units moved a lot of air, the fan speed required with the smaller fans also yielded a lot of noise, which is not desirable for a lot of users. Cavediver (who can be found on the ServeTheHome.com forums and [H]ardforums fabricated a fan bracket for the popular Norco cases that incorporated 120mm fans. 120mm fans can spin slower while moving a similar amount of air due to their larger fin areas. With the introduction of the RPC-4224, Norco started using the 120mm fan center partition design, and made the bracket available to end users for a relatively nominal amount (something like $11 not including shipping). This is pretty much a simple, install fans on the new, unscrew and remove the old, screw in the new, and hook up fans to a power source job so I have some illustrations to show users what this is like.
Let me say this, for home users, you WANT 120mm fans in the center partition! The noise difference is amazing.
The Installation
First, here is a shot of three partitions, the stock RPC-4220 partition with the 90mm Delta fans, the 120mm Norco bracket with three fans, and the 120mm bracket with no fans.

If you have never installed fans before, you need to remember that the fans should be pointed in the direction of the rear of the case when they are on after the bracket’s installation. You do not want the airflow to go from the rear of the case to the front. After you have the 120mm bracket prepped, it is time to pull out the old partition (feel free to do this in reverse order).

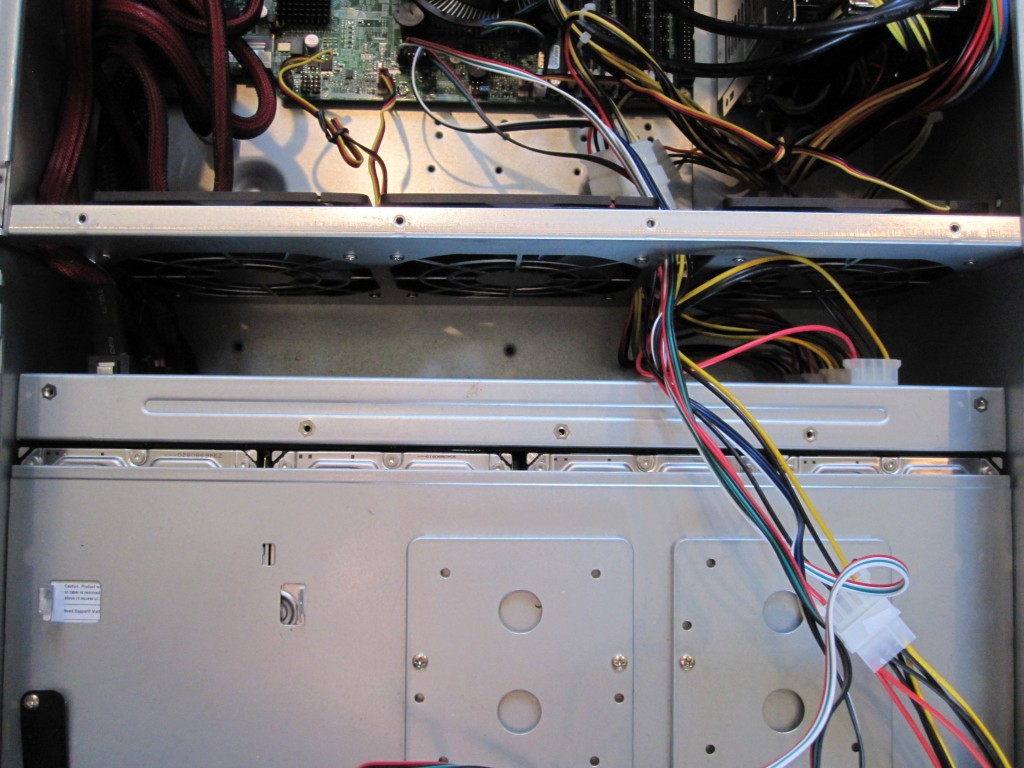
Everyone will probably install these differently as there is a bit of manual work to get the new bracket to fit. I was running late for a dinner so I used the “brute force I go to the gym every day and can bend steel” method to install the bracket. Do not do this as it can warp the case and the bracket as you can see below. Again, do not do this.

One other tip is to do this installation when initially purchasing a system so you are not faced with tight quarters when maneuvering the bracket into place or the other option of dis-assembly. For example, the SFF-8087 connectors need to bend a bit to fit. You want to think about the routing well before installation.

I should note that I had an issue with some of the shorter cables making the new routing between the Norco backplanes and the HP SAS Expander.
Once installed, one needs to wire the fans into the motherboard or the included power distribution point. Supermicro boards tend to have fan headers on the far side of the board specifically to control case fans, so I decided to use those.

Another key point is to carefully lay out your cabling prior to installing the bracket.

There is not much room to get cables through the partition (which is a good thing for airflow) so prep work and foresight here come in handy.

One could reverse the bracket and put the fans on the other side, but I prefer this installation so I can route the power wires directly to 3-pin headers. It is actually better to install the fans on the reverse side so that you can unscrew the non-hot swap fans without removing the partition.
Conclusion
If you Norco RPC-4220 or RPC-4020 is within earshot (i.e. not in a server room) do this mod. The total cost is quite a bit since you need four 120mm fans and the bracket. I think I spent $13 on the fans and $20ish shipped on the bracket so it costs about $60 per chassis. On the other hand, using a fan controller with the stock fans is louder, moves less air than the original fans, and still costs $15-20, but it is an easier mod. Another nice thing is that all of my fans can now be monitored via the motherboard.


I’m going to build soon…the 4220 is sitting in the box…Are the Scythe 12Low fans enough? I’ve seen 12Medium in other builds. Are you bays HDD bays full? Thanks
They work OK with “green” drives and SSDs which are in that chassis. I have another chassis with PWM controlled, slightly faster (at the high end) fans and that works out OK and will probably swap the fans shown above out when I swap drives. I basically just used those fans to mock up for pictures since I had them lying around and I knew cooling requirements would be very low for the drive mix.
I’ve just ordered a Norco RPC-4224. I’m not sure if it will come with the 120mm fans because of a comment a Norco rep made on the Newegg feedback page for the model. Where can I order one of these 120mm fan partitions? I hope I won’t need to but I like to be prepared.
Hello Patrick,
great post, great site indeed, my congrats.
So how much of an amazing noise reduction did you achieve?
How much more after installing the “Corsair Hydro Series H100 CPU Cooler” (posted on 29 March 2012)
Would be nice if you would also provide some metrics in dB about the actual noise reduction.
Thanks for your post, every form of noise reduction is important for a biest holding 24 HDD.
Greetings, Hans.
Hope to find these details soon.
Thanks, Hans.
Judging by the 4 screw holes in the top the bracket is installed
upside down. The issue is that these fit the RPC-4220 and newest
model 4020 without modification. I currently own a 4224, two 4220’s
and 2 4020’s which are different revisions. I finally broke down
and bought the fan wall for all. It installed without modification
in the 4220’s no problem. The 4020’s were another story. Only 1 pair of screw holes lined up whth the fan wall. I simply measured
and marked holes, drilled with the smallest bit that I had, put the
bracket in place to check alignment then drilled the full size holes with any minor adjustments. I also enlarged the two notches
on the top corners to avoid bending metal. These cases are cost effective and functionsl but not built to exacting specs.
A drive bay lever has broken on the old model and it did not seem
well designed. It is more of a decoration than a functional item.
when installing the drive carrier on the old model make sure that
the light pipes havn’t popped out or the LED’s will be dim or non-functional.
Finally if you have 4020 with the SATA connectors on the backplane
be very careful with them. The plastic shell is held to the circuit board with 2 filmsy pieces of metal melted into the plastic then soldered on the other side. I inadvertantly pulled 2 of those off. They want $50 for a new model backplane and don’t even list the old one. I got lucky and straightened the metal contacts, and carefully inserted them into the plastic shell. Then I hot glued all 4 SATA’a at their base and then made them into a solid plastic block. Now they don’t wiggle and work.
In my opinion get the fan mod (unless you like the sound of jet engines) and spend the extra bucks on the RPC-4220. The SFF-8087 connectors are the way to go. That will eliminate cable clutter and bypass those evil SATA connectors.
If you are patient it’s not too bad and well worth the effort.
Good luck…got to refinance the house so I can get more hard drives.